Posts in Railways
First foray into Gauge One

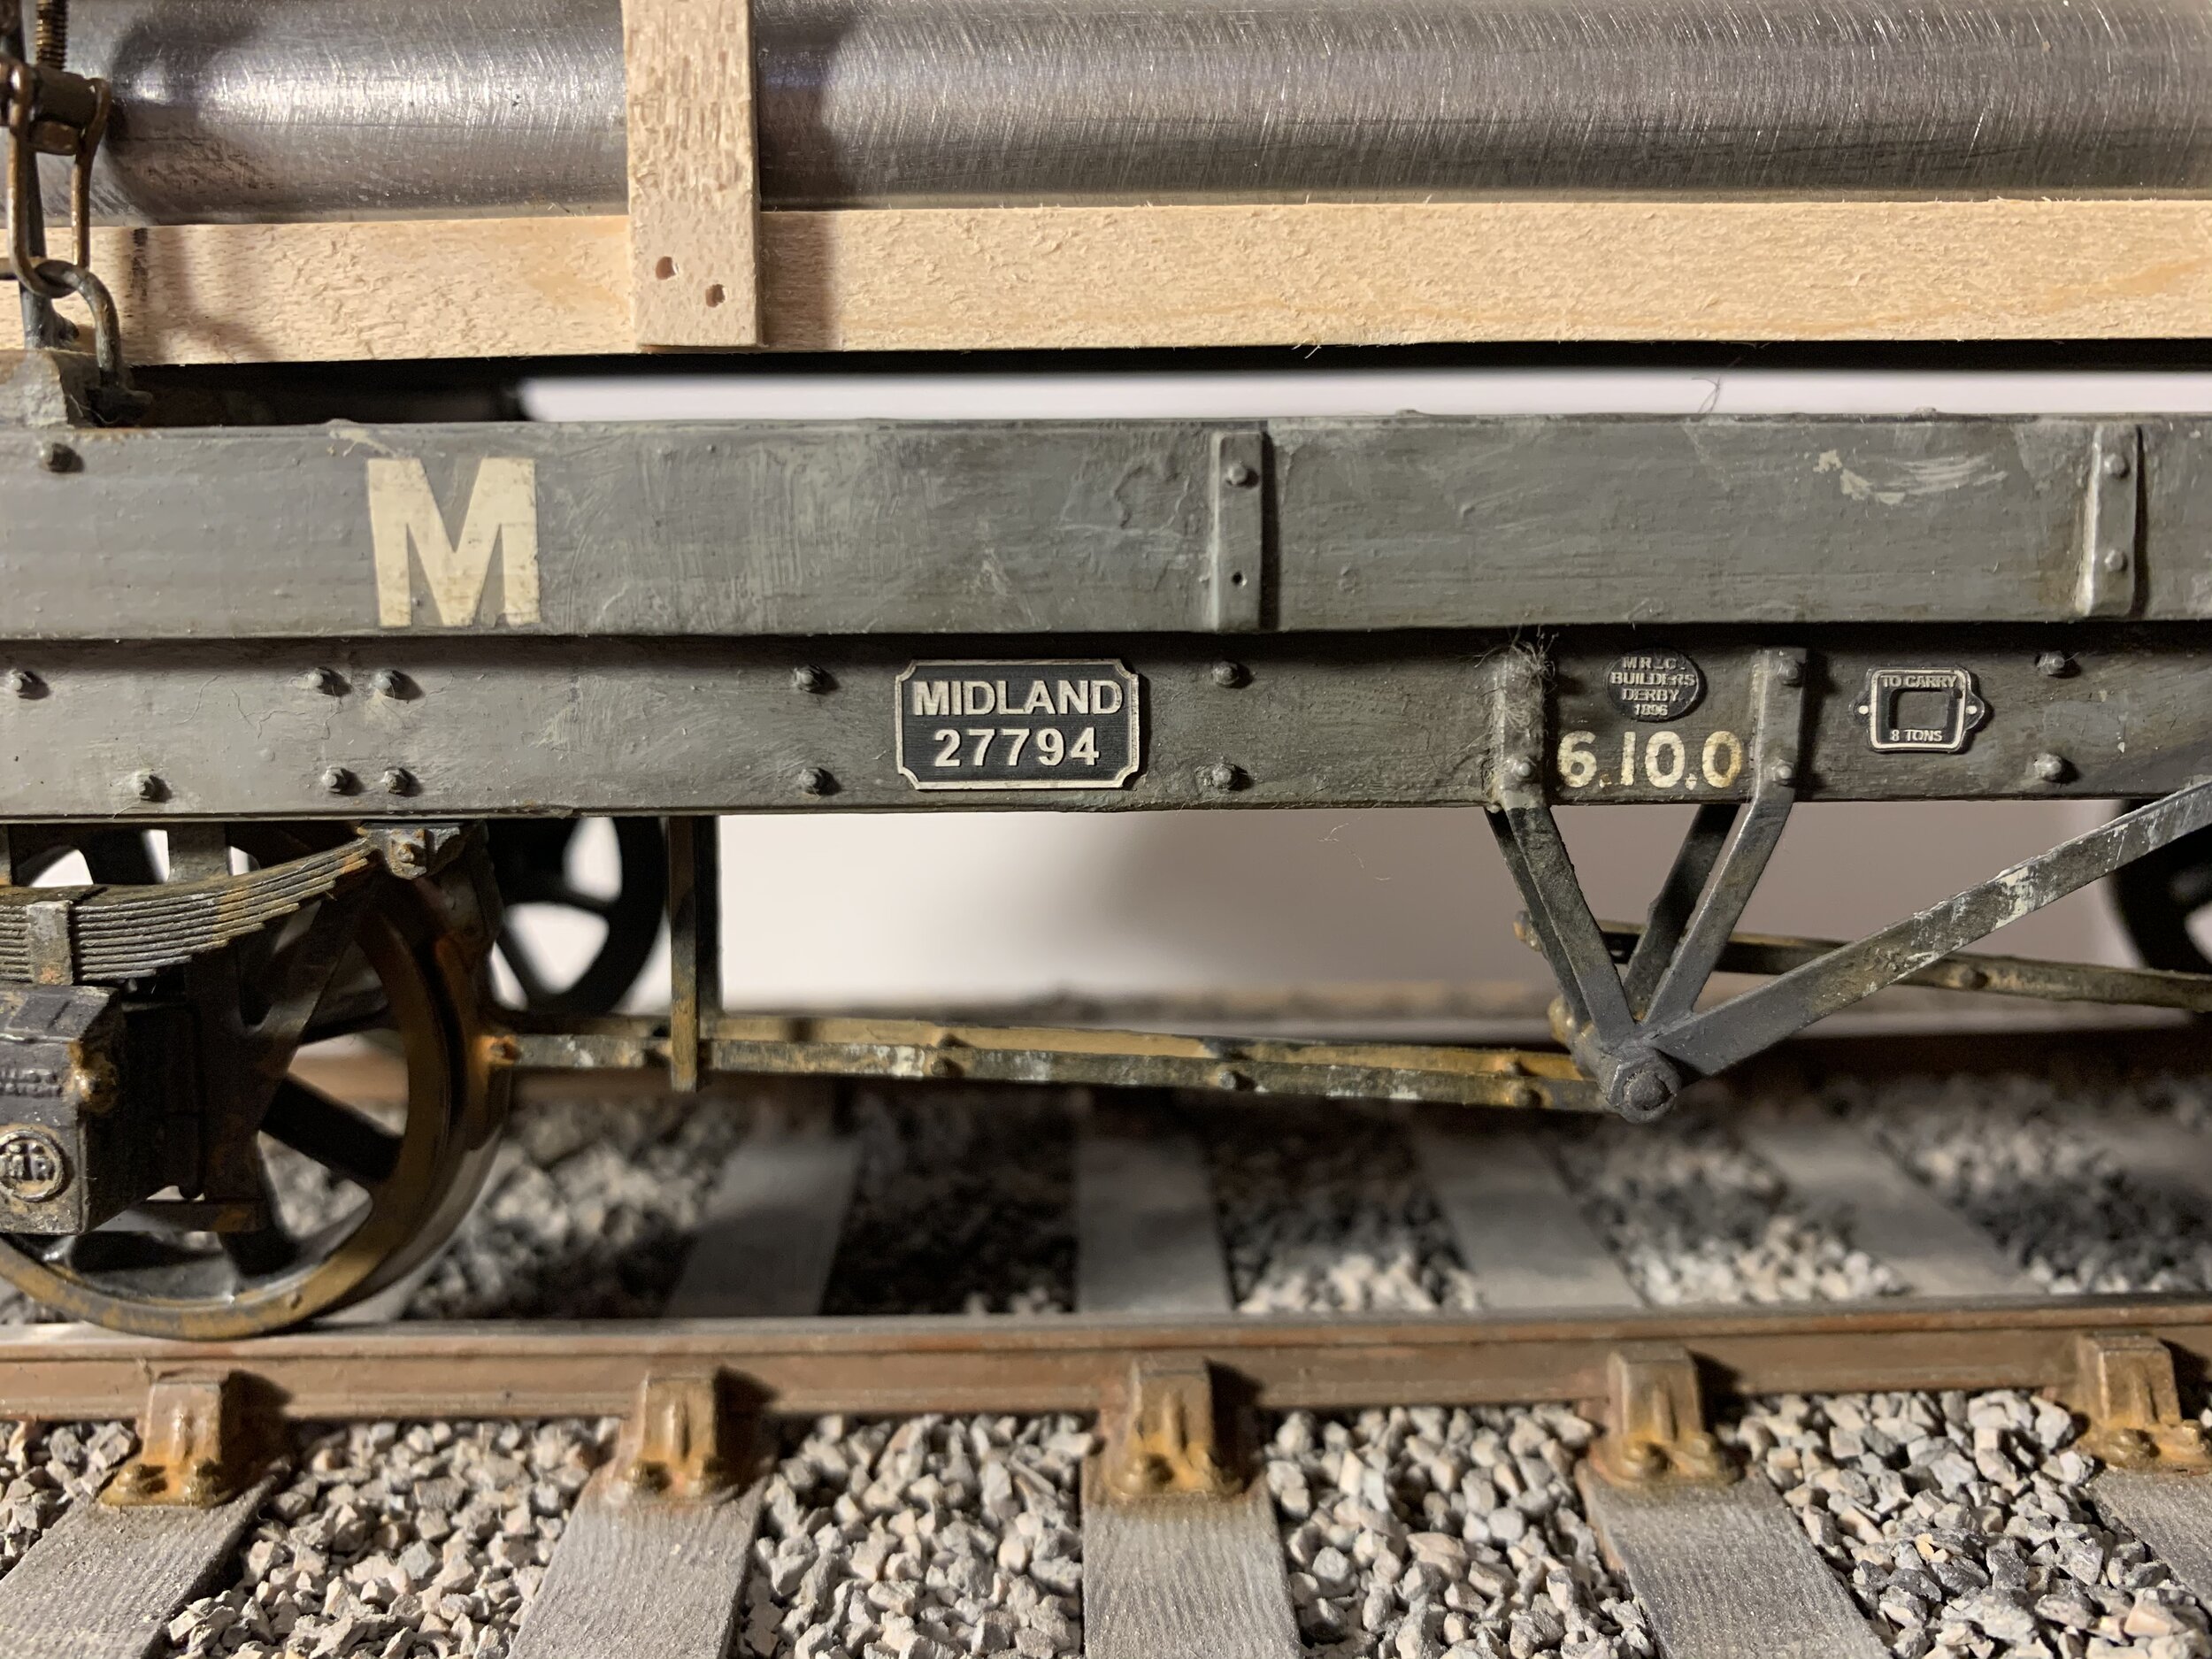
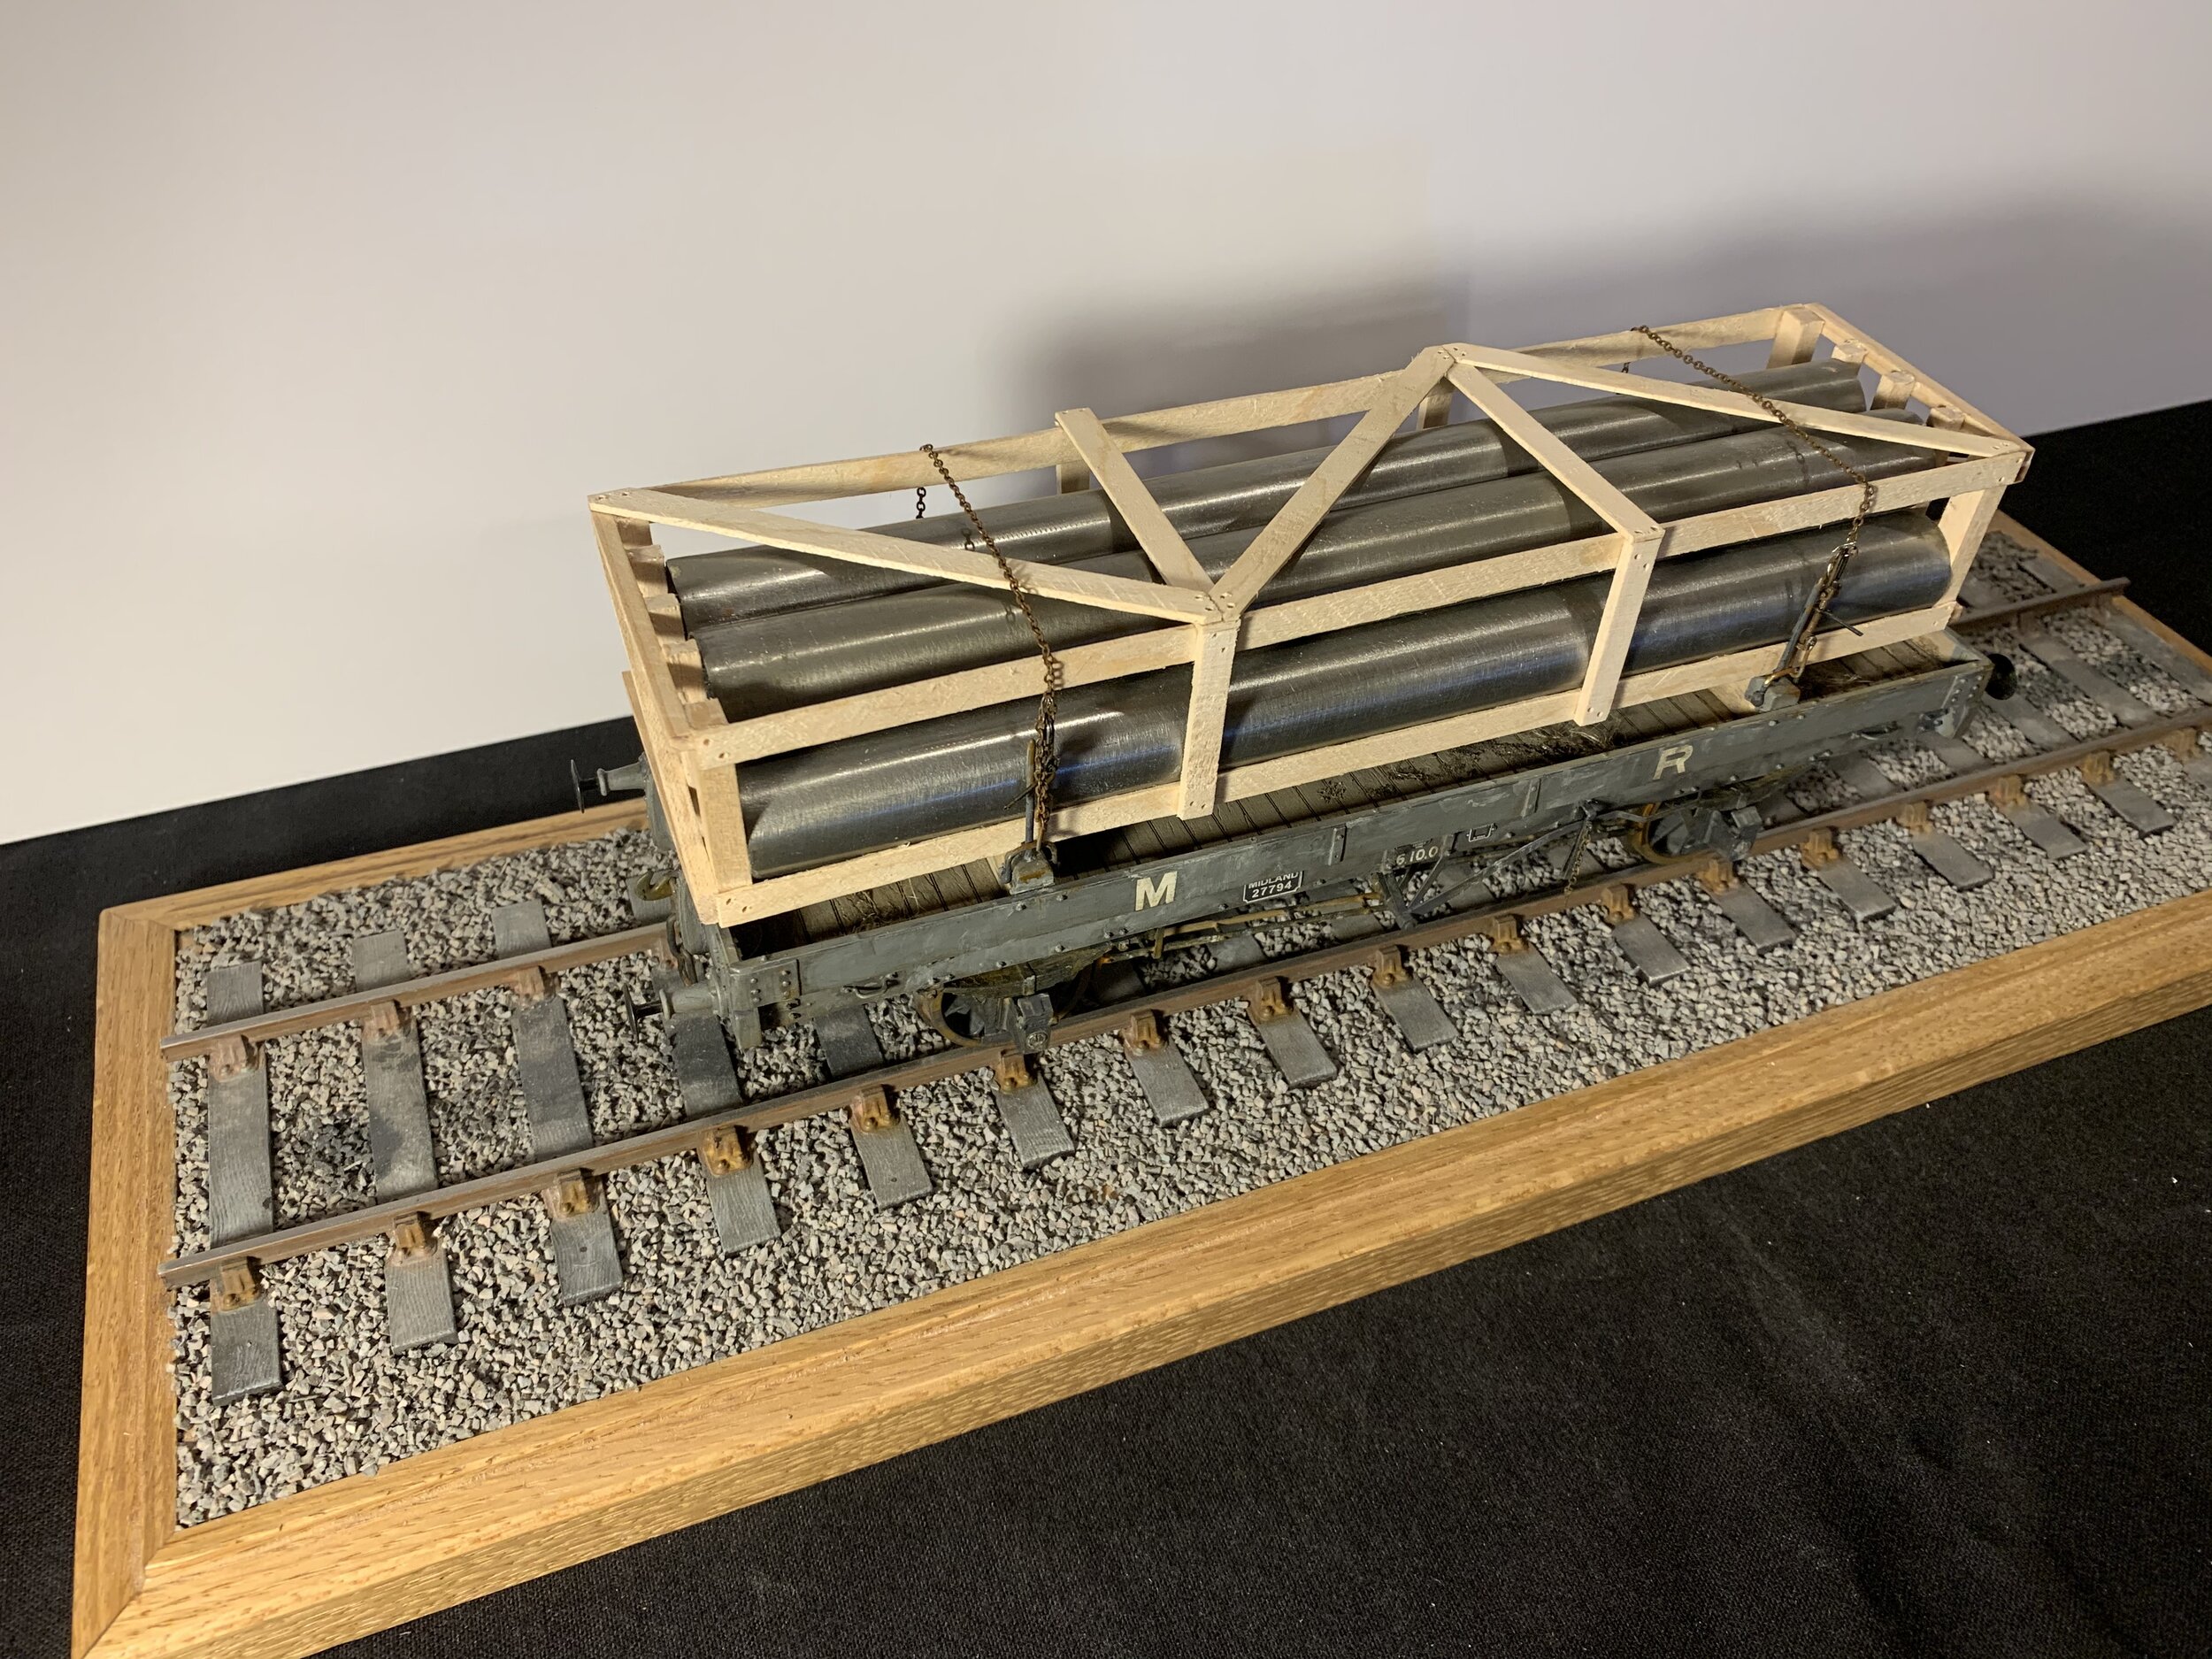
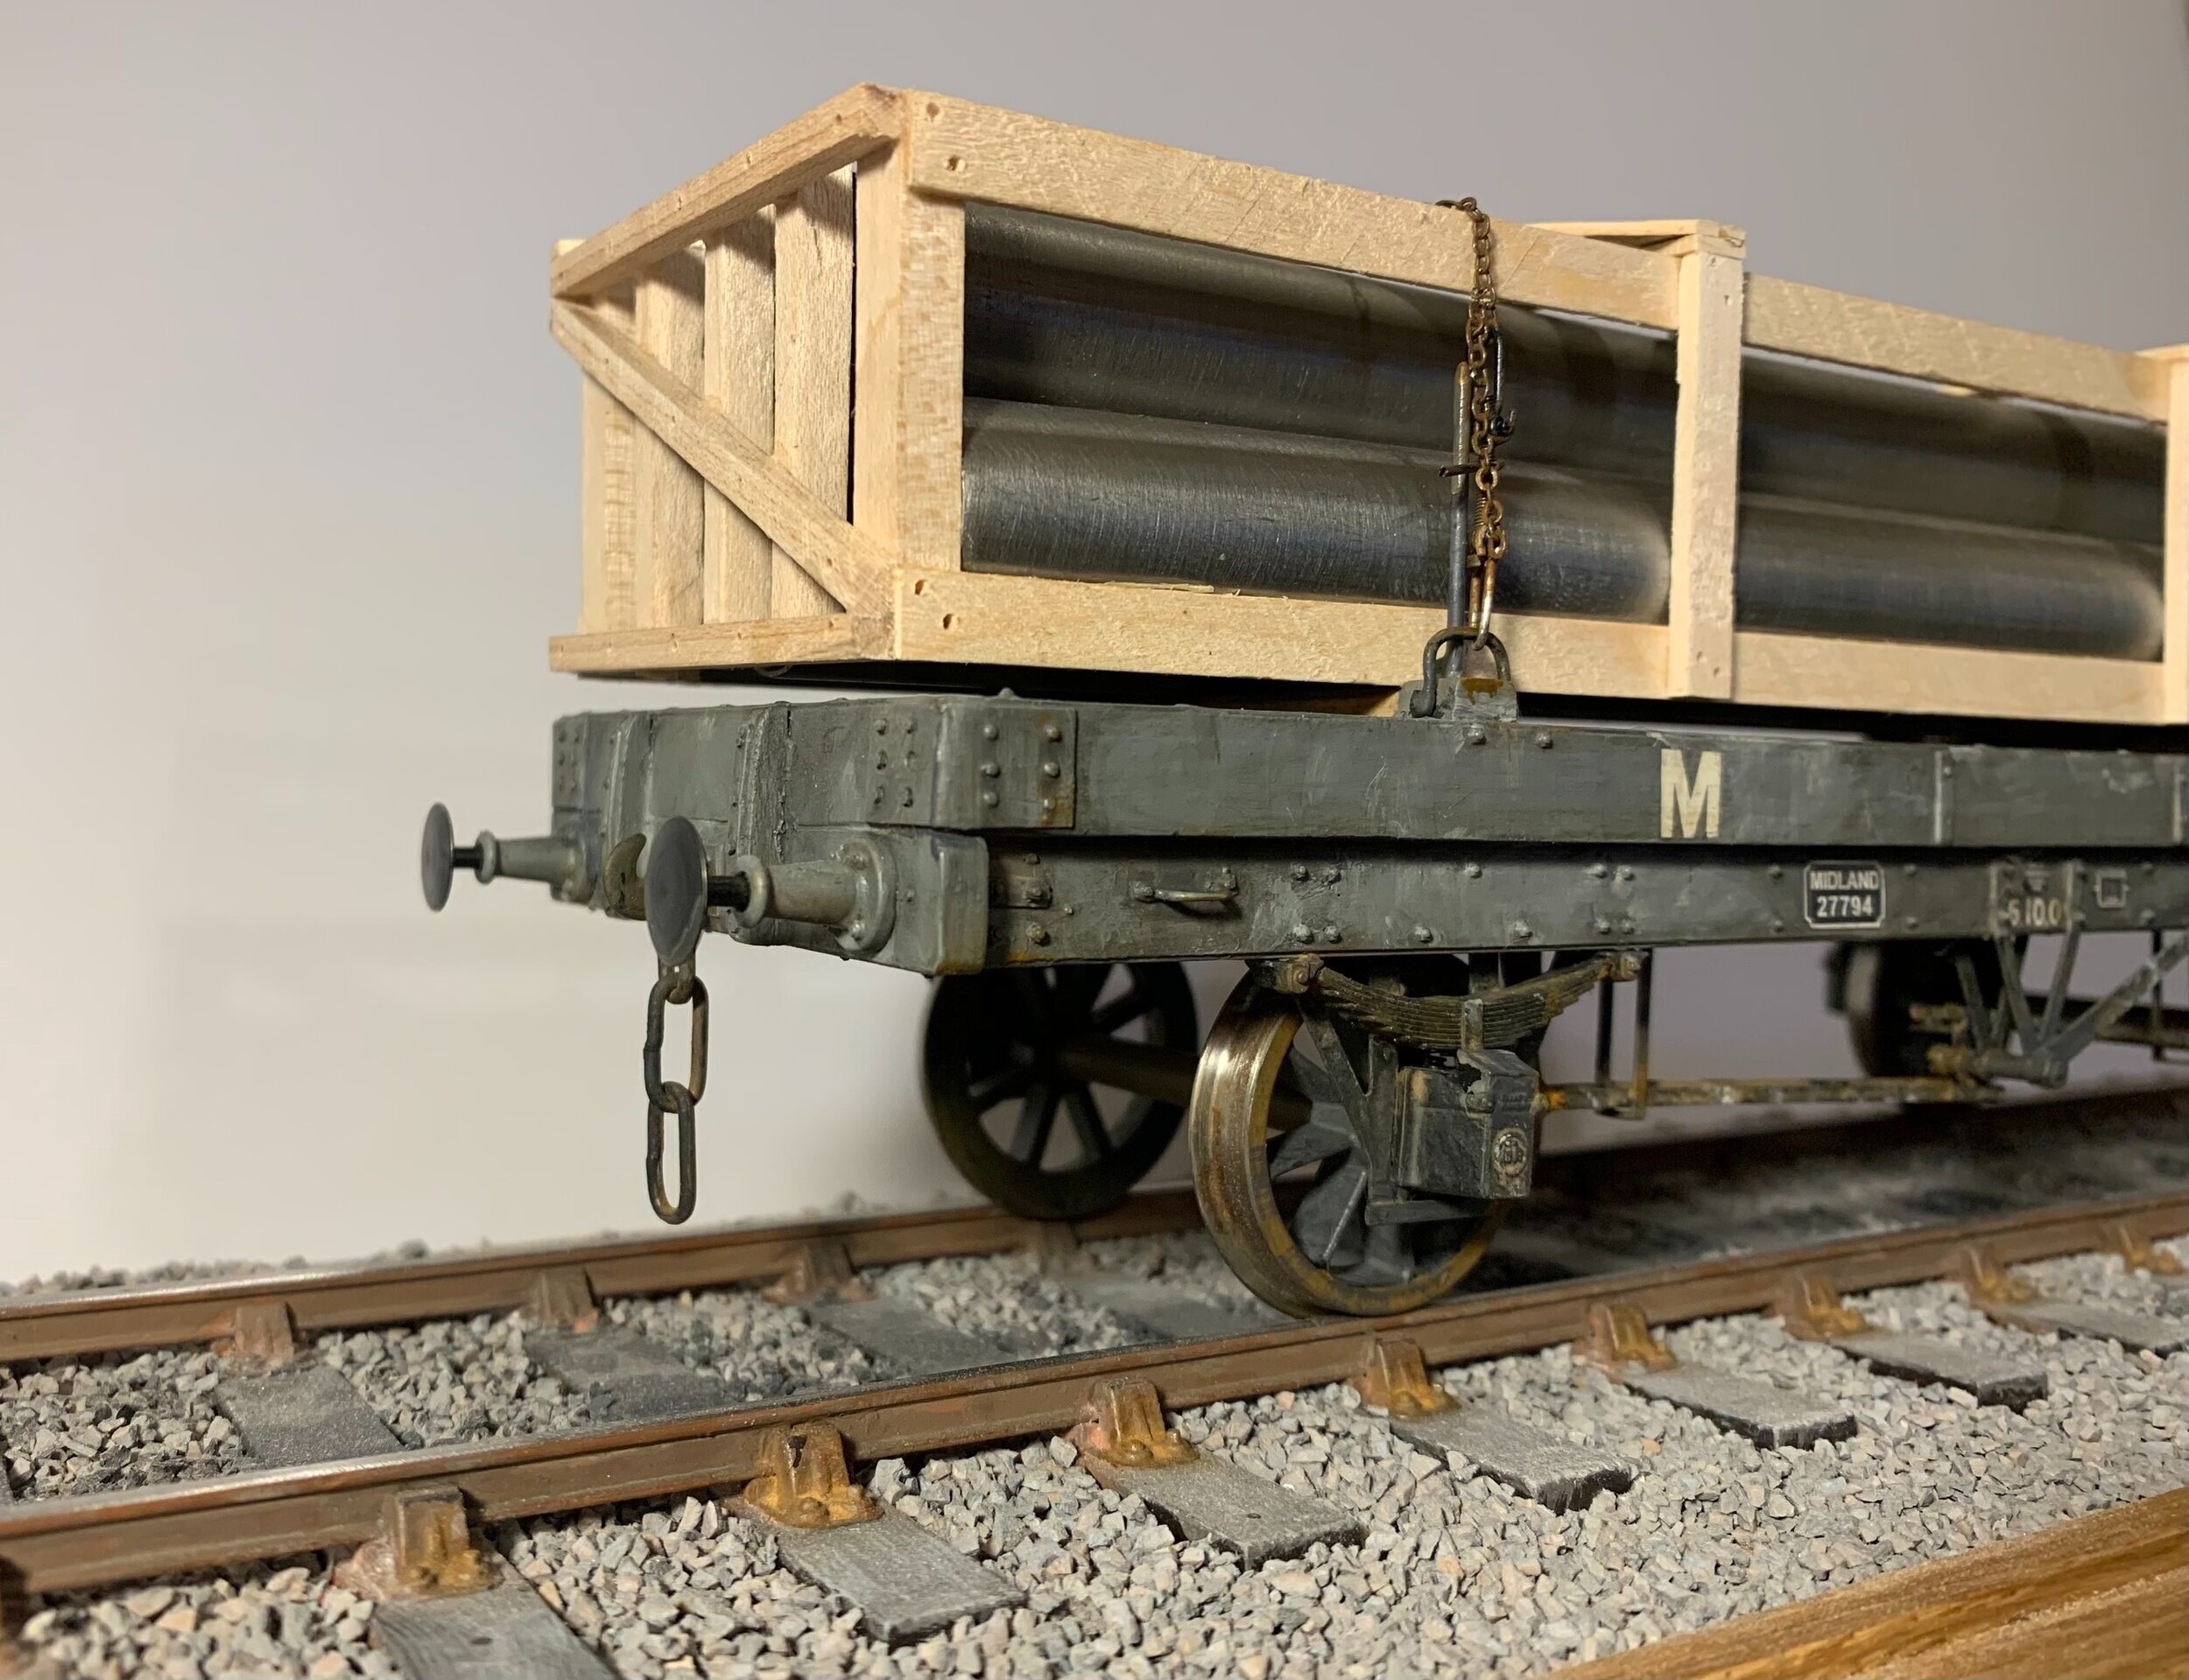
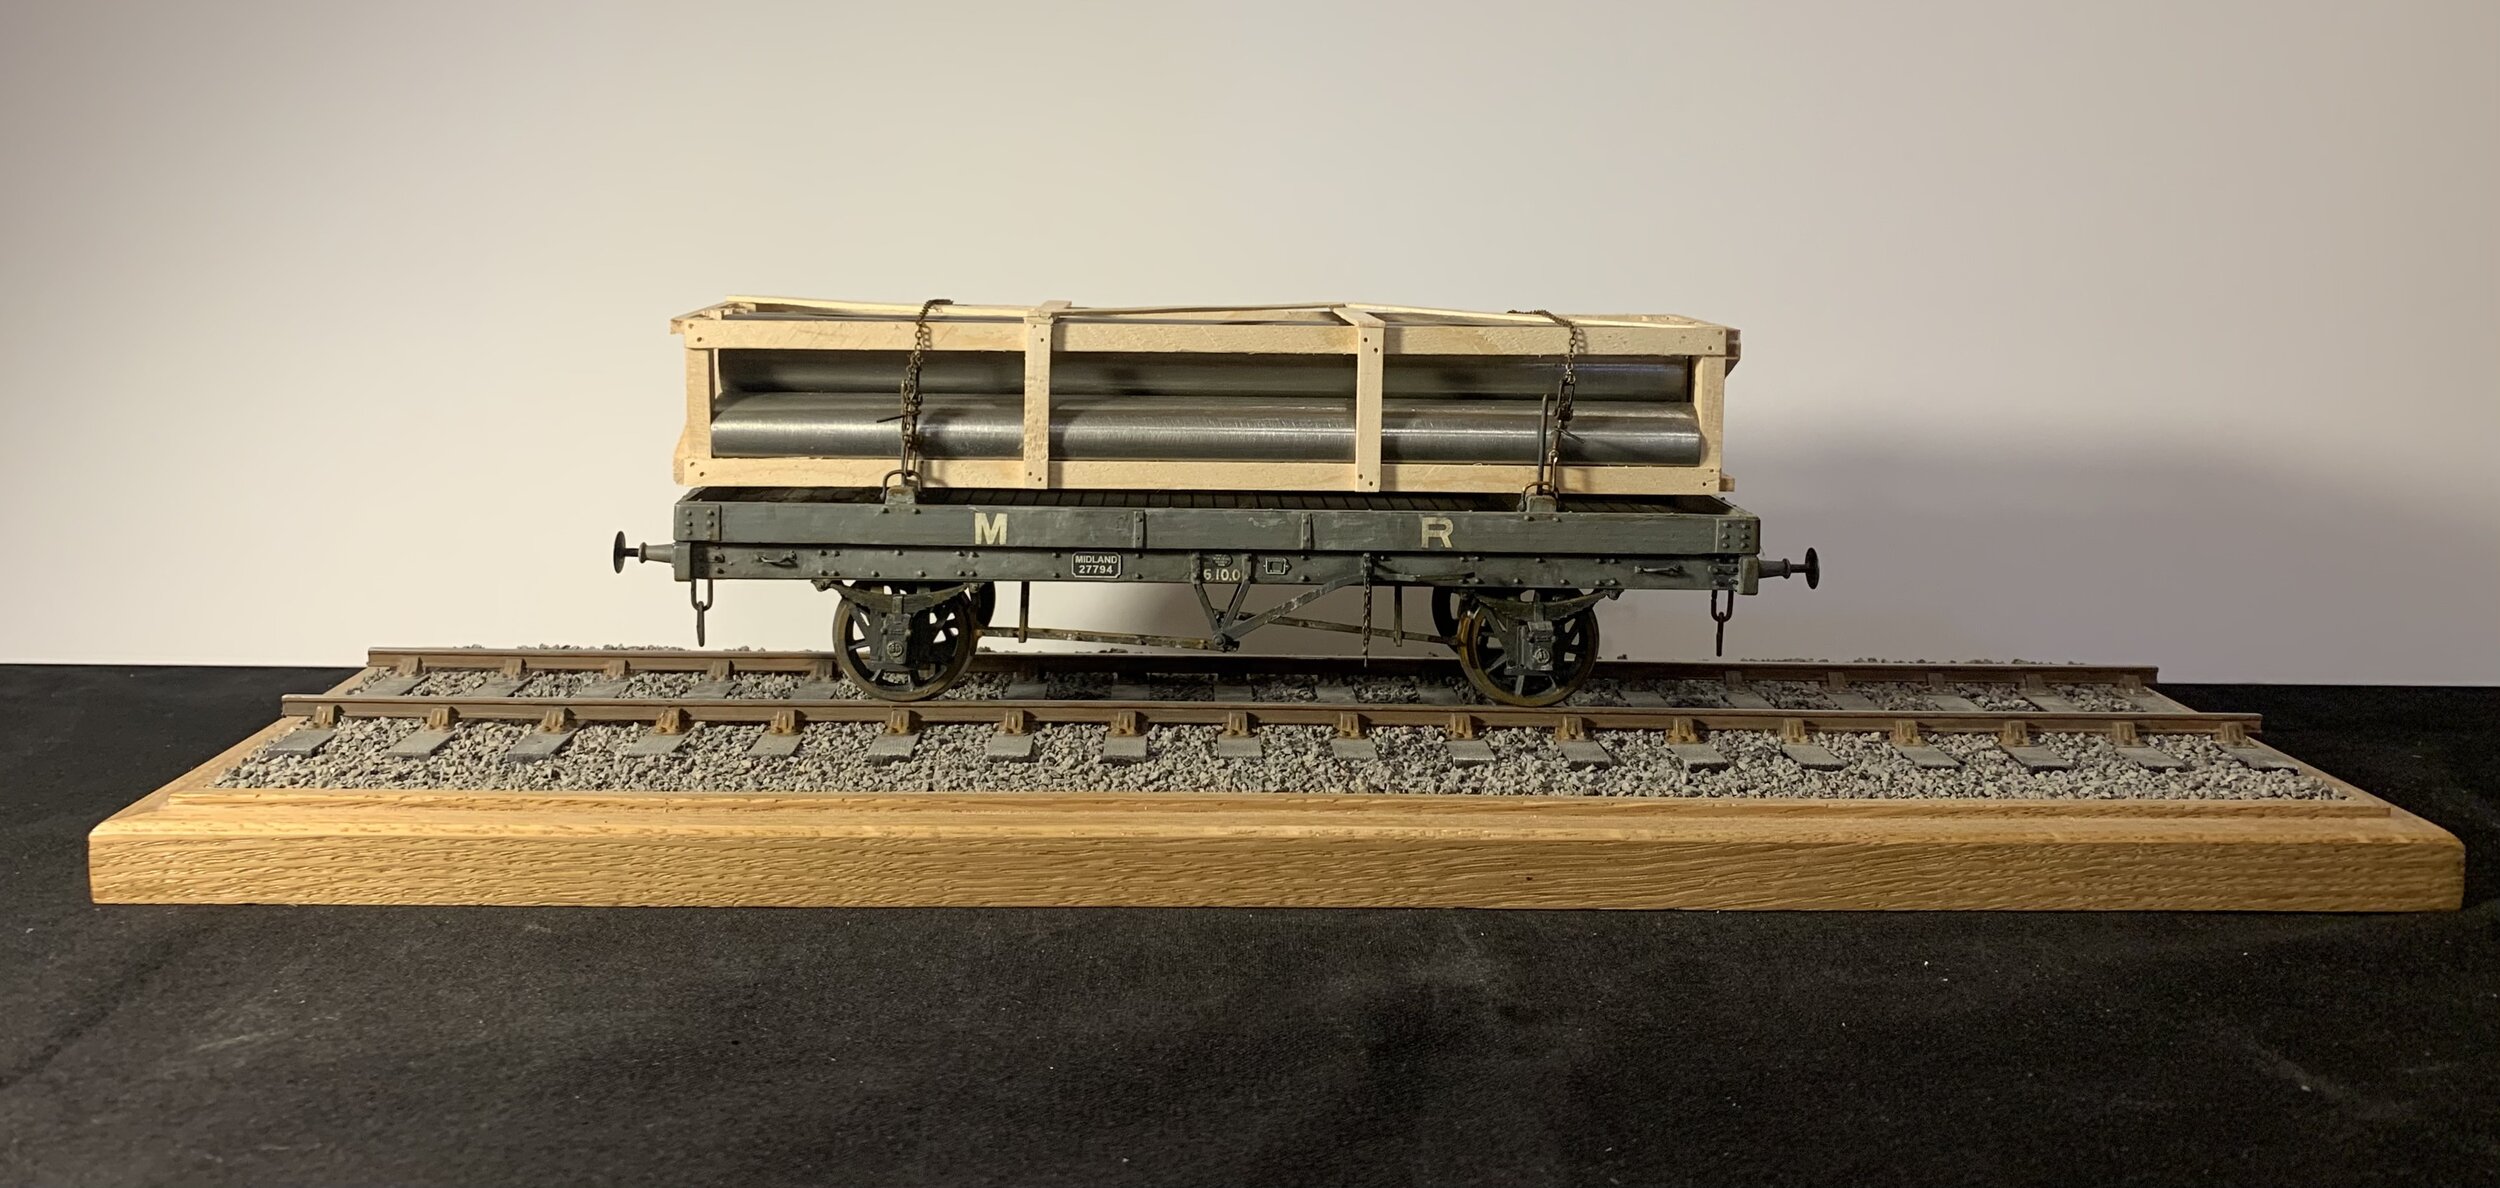
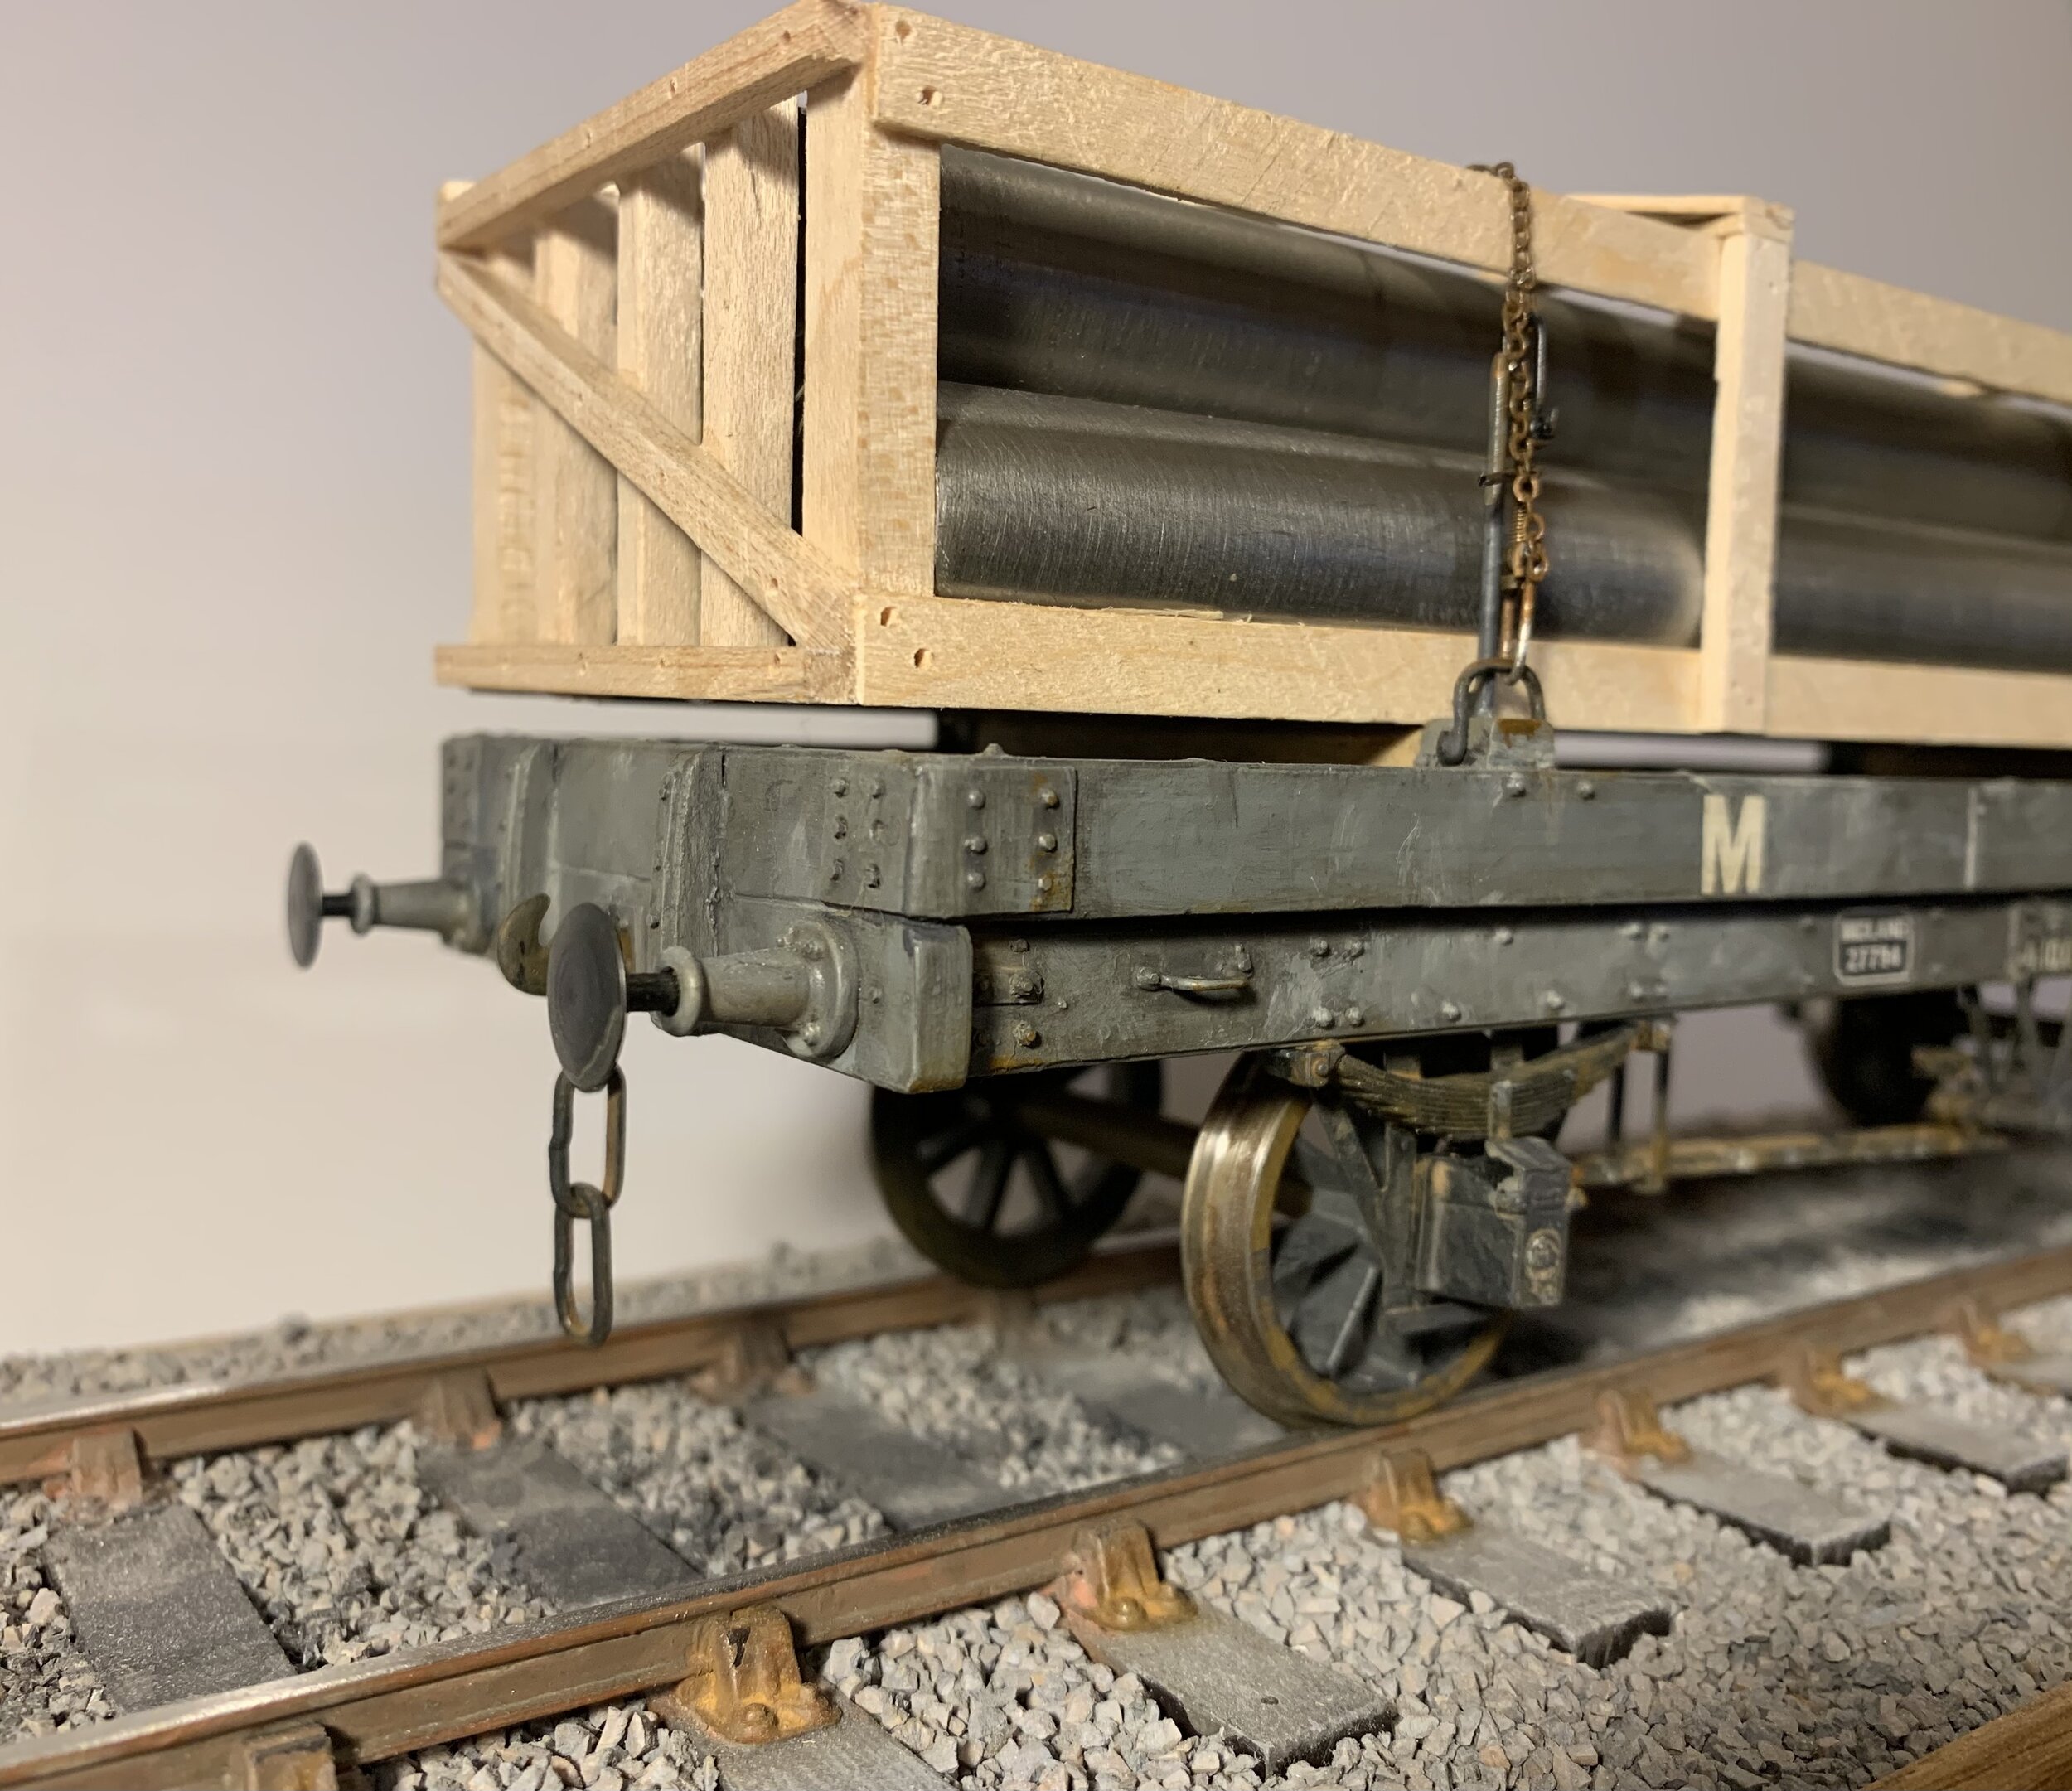
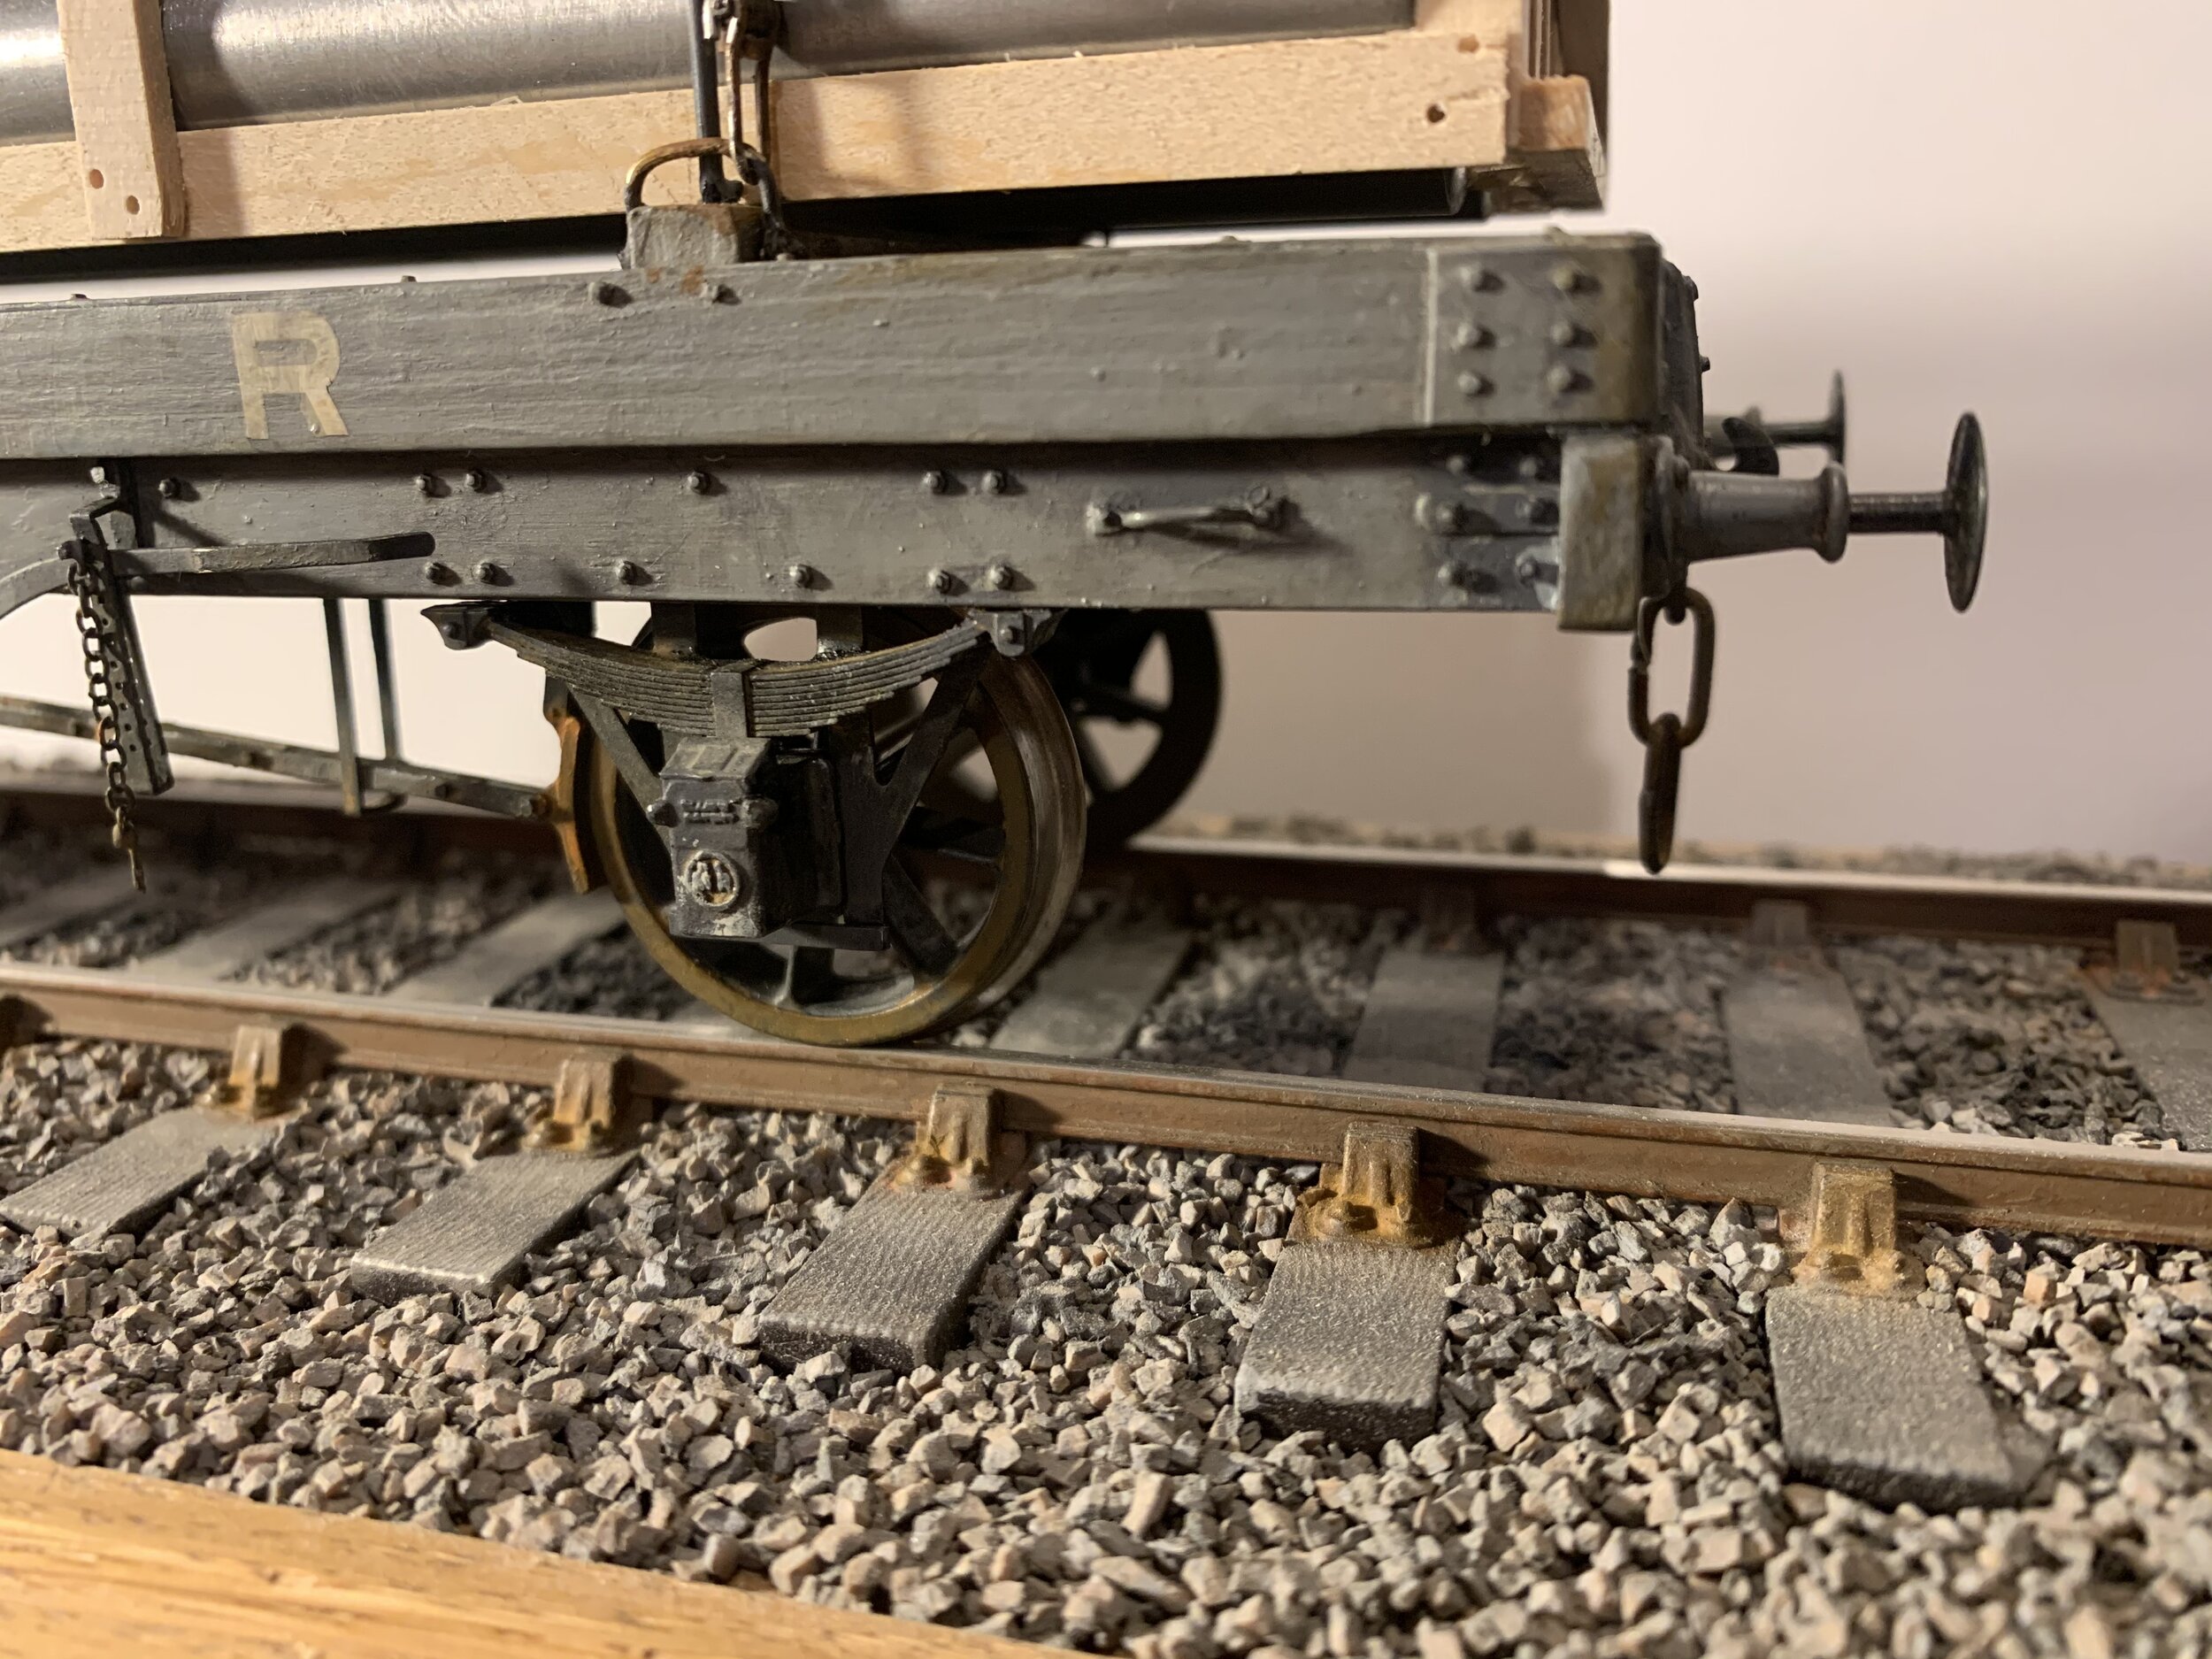
I have long held a desire to make large scale display railway models. I have been inspired on numerous occasions by such models displayed in museums, especially the Science Museum and the National Railway Museum. So I thought I’d take the plunge. I have started with something simple, a Midland Railway double bolster wagon, complete with a load of steel pipes. The basis of the model is sections of maple machined by me to the correct sizes to represent the buffer beams, solebars, plank sides and bolsters. The floor is a piece of ply with laser engraved planks. The wheels, axleboxed, w-irons, buffers and couplings came from Slater’s. The bolt details are from the excellent range by Historex. A bit of trial and error was needed to get the right sizes but they are extremely effective. I also have Phil Pearce of Intentio to thank for the laser engraved number plate, builder’s plate (with legible build date!) and ticket holder. My laser doesn’t quite have the definition to make these unfortunately. The load of steel pipes are curtain poles from Ikea that I happened to have lying around!

I have plans for a second wagon build so watch this space.

If you would like to commission me to build you your favourite wagin to this marvelous scale then contact me to discuss. This model is made to true 1:32, or 9.5mm/ft, as that is the scale the Slater’s parts are produced to.
Turnout Operation

The final and most important element to constructing pointwork is to get them moving. I tend to use the C&L components in conjunction with Tortoise point motors. I mount them using strips of wood to aid location, especially if struggling upside down under a layout!

Photo 23-11-2020, 10 10 31.jpg
Photo 23-11-2020, 10 11 12.jpg
Traversers

Usually as part of a larger project, traversers can be built to any size. I use quality ply-wood and super-smooth ball-bearing runners so the trackbed can be moved up and down with one finger from either end with no snatching or sticking – far superior to draw-runners. Discuss your requirements by making contact with me using the contact page.

Photo 23-11-2020, 10 20 19.jpg
Photo 23-11-2020, 10 20 04.jpg
IMG-3624.jpg
Electrics

As part of the overall package I am asked to provide, I can undertake electrics; either DC or DCC. Wiring is to usual two-rail with track-power bus-bars running the full length of the layout. In addition a second bus-bar is used to power point motors etc.

IMG-3620.jpg
IMG-3621.jpg
Layout Design

I can take your initial rough sketches and room dimensions and come up with a draft plan for your approval. Typically it can take 4 or 5 revisions before a final version is arrived at. Here I show a couple of real examples. They are drawn using Auotcad and therefore are extremely accurate. Individual turnouts or sub-assemblies of trackwork can be printed at full-size and can then be used as templates to manufacture the trackwork on or off-site. Full scenice details can be represented or just a simple track centre line- to suit your requirements.

Planning takes into account baseboard sizes if already made, or I can design the layout around site constraints such as having to man-handle boards up winding stairs.

My plans are produced for the intended recipient’s sole use as part of their hobby, and are not to be reproduced for any reason outside of this use.

Wagon lettering and weathering

I can hand letter your wagon to any style or period. I can also weather your wagons to suit your requirements and taste. Pricing is upon application. If you wish to discuss in more detail, the please get in touch using the contact page.

Here is a gallery of some of my work.

Midland in Bristol
A general overview shot of 'Midand in Bristol'

A general overview shot of 'Midand in Bristol'

A close up of 1761’s innards.

A close up of 1761’s innards.

‘Midland in Bristol’ is my entry into the Model Railway Journal Cameo Competition, finished in May 2019. It’s 6’ long and about 18” deep at its widest point. It is based on the Avon Wharf docks in Bristol around the turn of the last century. Inspiration for it has mostly come from Midland Record No 30.  I have so far built an 0-6-0 tender engine from a Mercian kit with much refining and added detail. It includes radio control from Red Arrow, with the battery in the tender, driving the Mashima motor through an ABC gearbox. I am, however, aware that this would have been far too large an engine for the docks; it struggles on some of the tight point-work and may well be confined to running in with a train only. I am also in the process of re-building an ancient 0-6-0 tank from a Slater’s kit; adding radio control and an ABC gearbox. This one will be built with plenty of side-play to negotiate the track-work. Although the minimum radius was intended to be 6’, I think some of it unintentionally dips below that!

I’m looking forward to getting to grips with the rolling stock - my existing stock of about half a dozen wagons, mostly 3-plank opens, is being re-built with sprung w-irons and lots of weight, new stock will be built which will be about half a dozen 5-plank opens - by far the most numerous Midland wagon seen on the docks.

The wooden buffer stops at the dock’s edge.

The wooden buffer stops at the dock’s edge.

Midland Railway 0-6-0 tender engine; a Mercian kit with a lot of extra detail. Resplendent in a simplified Johnson livery, as running in 1907 but just prior to re-numbering as 3153

Midland Railway 0-6-0 tender engine; a Mercian kit with a lot of extra detail. Resplendent in a simplified Johnson livery, as running in 1907 but just prior to re-numbering as 3153

Bespoke Trackwork

I can take your design, be it a sketch or Templot, and turn it into a reality. It can be just the pointwork, or the whole layout (including baseboards should you need them).

Or if you’re not sure, then I can help you design the layout. Really, whatever stage you’re at, I can assist.

I mostly use C&L components with the addition of my own ply sleepers if extra-long ones are needed, or 14” wide ones around crossings. If a turnout is being made for you to fit to your baseboard, then I make it on 6mm MDF, with tie bars and wiring droppers added for your convenience.

Part of a larger trackwork configuration, laid onto foam underlay (optional).

Part of a larger trackwork configuration, laid onto foam underlay (optional).

A double-slip with cosmetic and functional tie-bars fitted.

A double-slip with cosmetic and functional tie-bars fitted.

Beautiful flowing curves. Both roads on this double-slip are subtly curved.

Beautiful flowing curves. Both roads on this double-slip are subtly curved.

Bespoke Signwriting

This was an interesting task - and will be part of a much larger project. The original sign once stood on the Metropolitan Railway’s goods depot in Vine Street, East London. The sizes and lettering where firstly guessed from a photo of the original, counting bricks as an indicator of overall sizes. Then it was sketched out onto a piece of card. For the G, D O’s and the S, I cheated slightly in that I drew these out using AutoCAD and then laser-cut a stencil in thin card which I used to draw around. Final tweaking of the white lettering and black shading took a while but it was worth it in the end. The overall sign was weatherd quite heavily to dull down the severity of the red, white and black, and also to represent the effect of the smog-laden Edwardina atmosphere of the time.

IMG_7098.JPG
IMG-1374.jpg
Ned and his dray
20180726_163444302_iOS.jpg
 

Over the years, Ned has built up something of a cult following. His first public appearance was on Monk’s Gate, where he could be seen waiting patiently for his handler to finish chatting idly with Mr Knight, the yard manager. This was when Monk’s Gate was located in London. He was subsequently relocated along with the entire railway when it was magically shifted to Birmingham. Lastly, he was then sent on down the Worcester and Birmingham Canal, eventually coming to rest in Bristol where now once again, he stands still waiting patiently for his handler and where Mr Knight’s close cousin is still stood waiting for who-knows-what to happen but looking cross about it whatever it is…

The truth is a little more straightforward though. He is straight out of a Slater’s box! I think his charm, however, is in his coat markings - copied from a photo of a real horse. I don’t think you can make it up very well and it’s always best to copy. Incidentally, Rusty the Jack Russel is also copied from real life. He can be seen at the gates to Bristol goods yard intent on causing mischief.

IMG_7809.JPG
GWR station signage
IMG_7801.jpg
 

I produced these signs as part of a larger commission. They both were eventually fitted to the W H Smith bookstall (see Latest News). They were an interesting change from actual modeling as they were created from scratch by me using AutoCAD. Early on in the W H Smiths project I researched a suitable font to base these signs on but found nothing that was close enough. In the end, I spent some time drawing the font from scratch and have ended up with the whole alphabet and numbers. Thus it is a simple operation to reduce or enlarge depending on the prototype size and print off, creating any sign that was used on the Great Western system. As you can see from the photo above, I have also drawn the distinctive ‘pointing hand’. Drawing them myself has meant that the subtleties of the original have been faithfully reproduced, as no modern font could really do it justice.

 
Horse poo...!
IMG_7808.JPG
IMG_7809.JPG
 

As most of my personal railway modeling is around the pre-Grouping era, when horse-power was used extensively, the natural result of having all those horses around was horse manure….and so no scene where horses were present would therefore be complete without some!

It has to be said that my representation of this commodity has drawn quite some comment and indeed I am proud to say I know of at least one well-respected fellow modeler who has used my method to great effect on his own railway!

So I thought it might be useful to mention below how I go about making my own (in model form that is…)

  1. Gather the raw materials: sieved sharp sand, sieved fine and dry garden soil, PVA, washing-up liquid, water.

  2. Mix them all together to form a stiff paste.

  3. Form into manure-like deposits on your scene. Real droppings were spread out in clumps but don’t over-do it. In real life, deposits were quite quickly cleared up in goods yards. maybe less frequently on roads. Also be mindful of keeping it all in scale.

  4. Wait until thoroughly dry.

  5. Chip or abrade any large lumps. This should have the effect of exposing yellowy-ginger sharp sand. Smear some superglue around and sprinkle with more dry seived soil.

  6. Allow to dry and vacuum any remaining dust or soil. Repeat the superglue/soil if necessary or desired.

  7. Straw can be added around the manure if you wish to add further texture and realism. I use chopped-up cheap paint brushes and chopped-up coarse string.

And there you have it…!

 
MR abandoned coach body
 

The original inspiration for this came from a photo of a very similar coach body lurking in the background of a photo in Midland Record No 30 of St Philip’s Goods Station in Bristol. This model now resides lurking in the background of ‘Midland in Bristol’.

The main body of the coach was an experiment. The construction of which started with a solid lump of timber which was sanded to the profile of the coach body. I then laminated a thin layer of plasticard to the side and end, onto which was added a further layer which was cut away to represent the paneling of the prototype. By the time all the panels are cut out of it, just a fragile web of plasticard remains. This was then carefully glued down to the base layer. Roof details were then added and the whole lot primed with red primer.

The paintwork finish - representing a very dilapidated crimson lake - came about by pure fluke. Once the primer had dried, I went over the body with the top coat, in this case Halford’s Rover Damask Red. However, in my impatience to build up sufficient depth of colour, I dwelt a little too long and ended up with terrible paint runs! In my annoyance I grabbed the nearest towelling rag and wiped it off. Hey-presto, a delightful rendition of old, faded, peeling paint appeared before my eyes! Just a thin wash of dirty paint and dry-brushing once the spray was dry and there it was!

The boarded-up window and old wagon sheet draped over the body complete the scene. There is no under-frame at all represented and instead it has been left chocked-up on wooden bearers.

 
Photo 04-02-2019, 20 21 42.jpg
Model Railway Journal
 

December 2017

Having spent many years buying and avidly digesting the Model Railway Journal - to many the spiritual ‘home’ of the finer end of finescale modelling - I was approached by Barry Norman to write an article for the magazine about how I made the Goods Office on Monk’s Gate with particular emphasis on the brickwork. It was an honour and real pleasure to write for the magazine, and also re-awakened a love of descriptive writing that I had convinced myself I wasn’t any good at since school days back in the 70s/80s! The icing on the cake, however, was Ned and his dray appearing proudly on the front cover. Bless.

i286541539329596257._szw1280h1280_.jpg
 

July 2018

My second article to be written for MRJ appeared in issue No264. This article describes in some detail how I developed and made the tea chests, packing cases, wicker baskets, crates and other items once so common goods on the railways. The description and photos will be of great use if you fancy having a go yourself, using the products available here in my shop.

 
Crates 1.jpg
Crates 2.jpg
 

October 2018

My third MRJ acticle appeared in Issue No 266, describing the construction of the Midland barge (or Lighter to give them their proper term). Very pleased with Jerry Clifford’s editing and arrangement of photos. Further constructional notes can be found here.

 
Barge.jpg
 

February 2019

My fourth article in the Model Railway Journal is in issue No 269. It's another 'how to' article describing in some detail how I went about representing the hard landscaping elements of 'Midland in Bristol'. Again, very pleased with Barry Norman's editing and page layouts.

 
Yards 1.jpg

October 2019

Issue No 274 contains a fairly in-depth look at Midland in Bristol, with some great photography by Jerry Clifford (also the editor of this edition) and Adrian Colenutt. I’ve approached the write-up a bit differently to the usual ‘nuts and bolts’ style. Instead I’ve majored on the motivations and inspirations behind how and why Bristol came about. If you get the chance to obtain a copy and read my article I hope it strikes a chord and inspires you to achieve something you maybe didn’t think possible. Without giving too much of the game away, it all started with my break down in the spring of 2017; indeed Jerry’s editorial and at least one other article talk of the many health benefits to engaging in a creative hobby. I hope in future articles to dwell more on the methods and techniques employed - which I have to say are still being developed and honed as I go along my modeling journey. It has been - and always will be - a great source of ongoing inspiration and satisfaction to me to know I can in some way encourage you in your own modeling journey.

IMG_7826.jpg
LNWR Signal Cabin
i286541539332266240._szw1280h1280_.jpg

Just finished (as of November 2018) this model of an LNWR Signal Cabin, to a scale of 1:24 or half inch to the foot. The overall base measures about 500mm x 250mm and is about 320mm high. As you can see it's a cut-away model showing the fully-detailed interior. It's my entry for the LNWR Society Modelling Competition and inspired by the isometric drawing of a similar cabin in Jack Nelson's iconic 'LNWR Portrayed' book.

It's constructed mainly from wood and mount-board, with details from styrene sheet, brass, perspex, real glass, brass and nickel-silver.

i286541539332266211._szw1280h1280_.jpg
Photo 11-12-2018, 15 45 00.jpg
i286541539332266199._szw1280h1280_.jpg

I gained a 'Highly Commended' which I'm quite pleased with - the certificate is now hanging proudly in the workshop! Well done to the Society for a great competition - will I be back next year I wonder...?!

Meanwhile, I am proud to report that the model was donated to the LNWR Society for educational and exhibition use. I am very pleased that it ahs gone to a good home and maybe I will get to see it again at a future exhibition!

Photo 11-12-2018, 15 44 53.jpg
i286541539332266182._szw1280h1280_.jpg
i286541539332266251._szw1280h1280_.jpg