7mm Scale O Gauge Diorama 'Watery Bottom' for sale.

I recently completed building this delightful diorama. It’s based on the viaduct of the same name on the old Somerset & Dorset Joint Railway in Lyncombe Vale near Bath. Whilst it has a real location as its inspiration, it could be anywhere. Rather cleverly, the signal - of Midland origin, and painted in LMS colours - is in fact removable, being fixed on a 3mm brass spigot. So it can be easily removed and swapped for a different signal more in keeping with your rolling stock or period. The whole diorama measures about 1500mm long by about 300mm deep; the track is O Gauge finescale. The scenic back panel has been expertly painted by Paul Bambrick and features in the ‘Latest News’ section on his website. The back panel itself is removable for ease of transportation or storage. This truly is a stunning, highly detailed and realistic diorama and offers great scope for photographing and displaying rolling stock of any period or railway company. Please don’t hesitate to contact me if you are interested. It is priced at £1800 but I honestly don’t expect it to be available for sale for very long.

7mm Scale O Gauge Paving

Recently added to the on-line shop and eBay is this range of paving. There are a few variants; namely straight lengths of random stone paving with integral kerb stone, straight lengths with a left or right hand curved end, and just the kerb stone in straight and curved. More options and styles will be added in due course. They are all highly detailed professional standard laser engraved in 3mm MDF. All parts are supplied unpainted. The compliment the sheets of manhole and drain covers nicely! Soon to be added will be 3D printed bollards of the old ‘cannon’ variety.

GWR Coal Stage Kit release Feb 2023

Following recent posts on my Facebook page, I have been building a 4mm GWR coal stage as a complete build but alongside this have developed this as a kit. The kit is aimed at the modeller with a modicum of modelling experience and includes all laser-cut parts to build the main structure including all brick detailing parts, tank sides, chute canopy, doors, windows and staircase. It is now available to buy from my shop.

Focus on Dioramas

Dioramas have to be one of the most versatile aspects of railway modelling. In my view the pros far outweigh the cons; they don’t take up much space. they don’t cost as much as a whole layout, a finished diorama can be achieved in a relatively short space of time, they are ideal for photographing rolling stock, they can be easily movable so photos can be taken in natural light, the diorama can be designed so that your ideal photo angle can be achieved without any unwanted background and lastly (in this paragraph at least!) they give the builder a chance to indulge a design flight-of-fancy that otherwise might not be appropriate or prototypical to incorporate in a layout scenario. One could even be designed to take a bolt-on simple fiddle yard and run it at exhibitions!

I have built quite a few and I absolutely love them, for all the above reasons and probably more besides. My customers usually have a rough idea of what they’re after but not always. The making process begins with a sketch of how the finished diorama will look, which will set out the overall dimensions and main architectural and scenic features. Careful reference is made to prototype photos if appropriate, to provide accurate material for portraying colouring of stonework and brickwork etc. Using my skills not only as a model-maker but as a cabinet-maker, the spec of the diorama can include (if desired) polished hardwood plinths and edging, frontage scenic ‘wings’ and lighting and hand-painted scenic backscenes, using only the best raw materials throughout.

Get in touch today and I will help you turn your idea into a top-quality, finescale portrait.

Here follows a description of some of the dioramas I have undertaken:

THE CUTTING

For this diorama I was presented with a sketch showing the customer’s requirements. The construction features a birch ply baseboard with timber bracing framework, with the architecture and civil engineering being constructed using laser-cut MDF, and solid hardwood machined corbel and capping stones. Further detailing was carried out using contrasting brick string courses, key stones and inset brick panels to the retaining wall and tunnels at either end. The repetitive brick arches to the wall give a sense of greater length than would otherwise have been achieved with just a plain flat wall. There is a low wall along the front edge which serves very well to frame photographs of the rolling stock.

Initial sketch, ballasting, foliage and greenery courtesy of Neil Podbery.

Finished diorama photos and rolling stock courtesy of Ian Statham.

THE YARD

This diorama commission was designed with a similar purpose in mind to The Cutting; to provide a realistic setting for photos of the customer’s rolling stock and locomotives. It too has a low wall along the frontage and very high retaining wall at one end and along the back. The hut in the foreground provides interest and also fixes the location as somewhere Great Western.

Additional grubbiness and the odd tuft of grass courtesy of Neil Podbery.

MIDLAND STYLE

Initially started as an exercise in distinctive Midland style, this diorama has since been purchased by a Great Western modeller…I am particularly pleased with the polished hardwood detailing to the edges , reminiscent of an Edwardian display case worthy of a museum collection. The blades of a turnout give the impression of the scene carrying on in one’s imagination. The 3D scenery just beyond the fence blends beautifully into the 2D backscene.

Handpainted backscene courtesy of Paul Bambrick

Ballasting, foliage, greenery, trees etc courtesy of Neil Podbery

WORK IN PROGRESS

I am always on the look-out for inspiration for future dioramas and I started this one having caught sight of a photo of Diggle Station on the old LNWR, although this diorama could be set anywhere. It is making good progress and measures about 1100mm long, x 300mm deep x 350mm high. It will have a front fascia and lighting pelmet, and already features a superb Paul Bambrick hand-painted backscene. The right-hand end of the line disappears into a tunnel, the left-hand end has a super-thin mirror. Further images of the work in progress can be found on my RMWeb thread here: https://www.rmweb.co.uk/topic/136999-monks-gate-models/page/9/#comment-5046714 The brickwork is currently being painted and weathered.

This diorama will be available for sale - if you wish to register your interest and/or discuss your particular requirements then contact me through the ‘get in touch’ page below.

FUTURE PROJECTS

Future dioramas that are floating around my head at the moment would be:

Something with a decided S&DJR flavour - think Combe Down, double-headed West Country and ex-Midland motive power.

A similar diorama to ‘The Cutting’ but with a decidedly suburban feel with the backs of houses to the rear rather than fields and greenery.

A large-ish diorama based on the JC Bourne etches of Brunelian tunnel mouths with a watery foreground.

If any of the above sparks your interest of if you have your own ideas you would like to discuss then contact me through the contact page. I look forward to hearing from you.

Garages rear view

I made this simple rear view of a row of garages as part of a much bigger model railway project. They are very reminiscent of the sort of structure built all over the UK during the last century, and frequently seen in exactly this situation - backing onto the railway. The entire railway is a collaboration between Norman Soloman, Paul Bambrick, Neil Podbery, Nigel Smith and myself.

Tunnel Kit

As I have now built a few dioramas incorporating retaining walls and tunnel mouths etc, I am working through the laser artwork for these and converting them into kit form. I have already made some styles of retaining walls available (see the ‘Shop’ section of this website). I am now able to make this tunnel mouth available and has also been added to the Shop. All the parts required have been laser cut in a mixture of 3mm MDF, 0.8mm Ply and solid hardwood coping and capping stones. The 3mm MDF brick walls and piers are pre-chamfered to produce very neat corners.

Ranelagh Bridge

This is something I’ve been working on for a little while and forms part of a larger on-going project. The main brickwork civil engineering is laser-cut brickwork added around an 18mm MDF core to make the main structure. The bridge girders themselves are Plastruct moulded lattice girders, individually cut and fitted together, using a template I drew in AutoCAD. The rivetted reinforcing plates were etched for me by the 4D Modelshop from my own artwork. Apart from the Plastruct girders, everything has been scratch-built by me.

More track building...

On the bench at the moment is a commission to build a set of 7mm pointwork comprising six B7 turnouts, a 1:7 single slip and a 1:8 curved cross-over. All using C&L components. The curved cross-over was a challenge to get the curves right. As the customer is some distance away, I produced a paper template that I posted to him for him to check the layout of the cross-over before I made it.

Methodical step-by-step construction ensures everything lines up and runs smoothly. I also added functional tie-bars using my own laser-cut 1.5mm ply tie-bars and dress-maker’s pins soldered to the blades.

Use the contact page to drop me a line to discuss your project.

My Workshop

I am very fortunate in that I have my own workshop in the comfort and convenience of my own garden. It is divided into two areas, a ‘dusty’ area which contains all the woodworking equipment and ‘non-dusty’ area which has my main workbench, laser and storage for projects on the go. The original black shed was a ‘cut-and-shut’ build from two old sheds. The oak-clad extension was designed by my son who is an architect and draws many admiring comments!

IMG-5774.jpg
Richard EllisComment
GWR War Memorial

I made this little but effective war memorial for a diorama. It’s loosely based on the one at Paddington Station but a lot smaller! It uses lase cut components in ply and mdf. The centerpiece sculpture is from the excellent Modelu range.

Taking the plunge with DCC
 

After multiple false starts with conventional two-rail and latterly radio control, I decided to take the plunge with DCC - and no wonder what took me so long! I like the addition of sound, and active braking means you ‘drive’ it rather than just on or off; fast or slow. This loco has a stay-alive capacitor as well so continuity of power between track and motor isn’t a problem.

 
Photo 18-07-2018, 14 53 32.jpg
Berkeley Station Building

Back in August 2018, I was surfing the internet researching something connected to the Midland Railway when I accidentally came across a website detailing work being undertaken on a newly formed preservation enterprise called the Vale of Berkeley Railway. I was intrigued to discover a stretch of the Midland that was unknown to me and one which had an interesting history to it. Here was a project at its very beginning and I was very drawn to the clear enthusiasm of the team involved in realising the dream of steam once again running on the railway. I made contact with Howard Parker, its Chairman, to introduce my services as a professional model-maker and see if there was any way I could help. As it happened, my wife and I were on holiday in Malvern and it only took a bit of arm-twisting with her to arrange a visit to meet Howard on site.

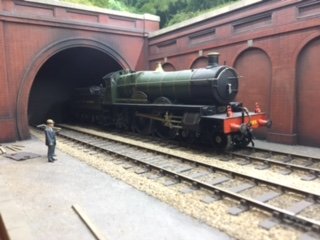
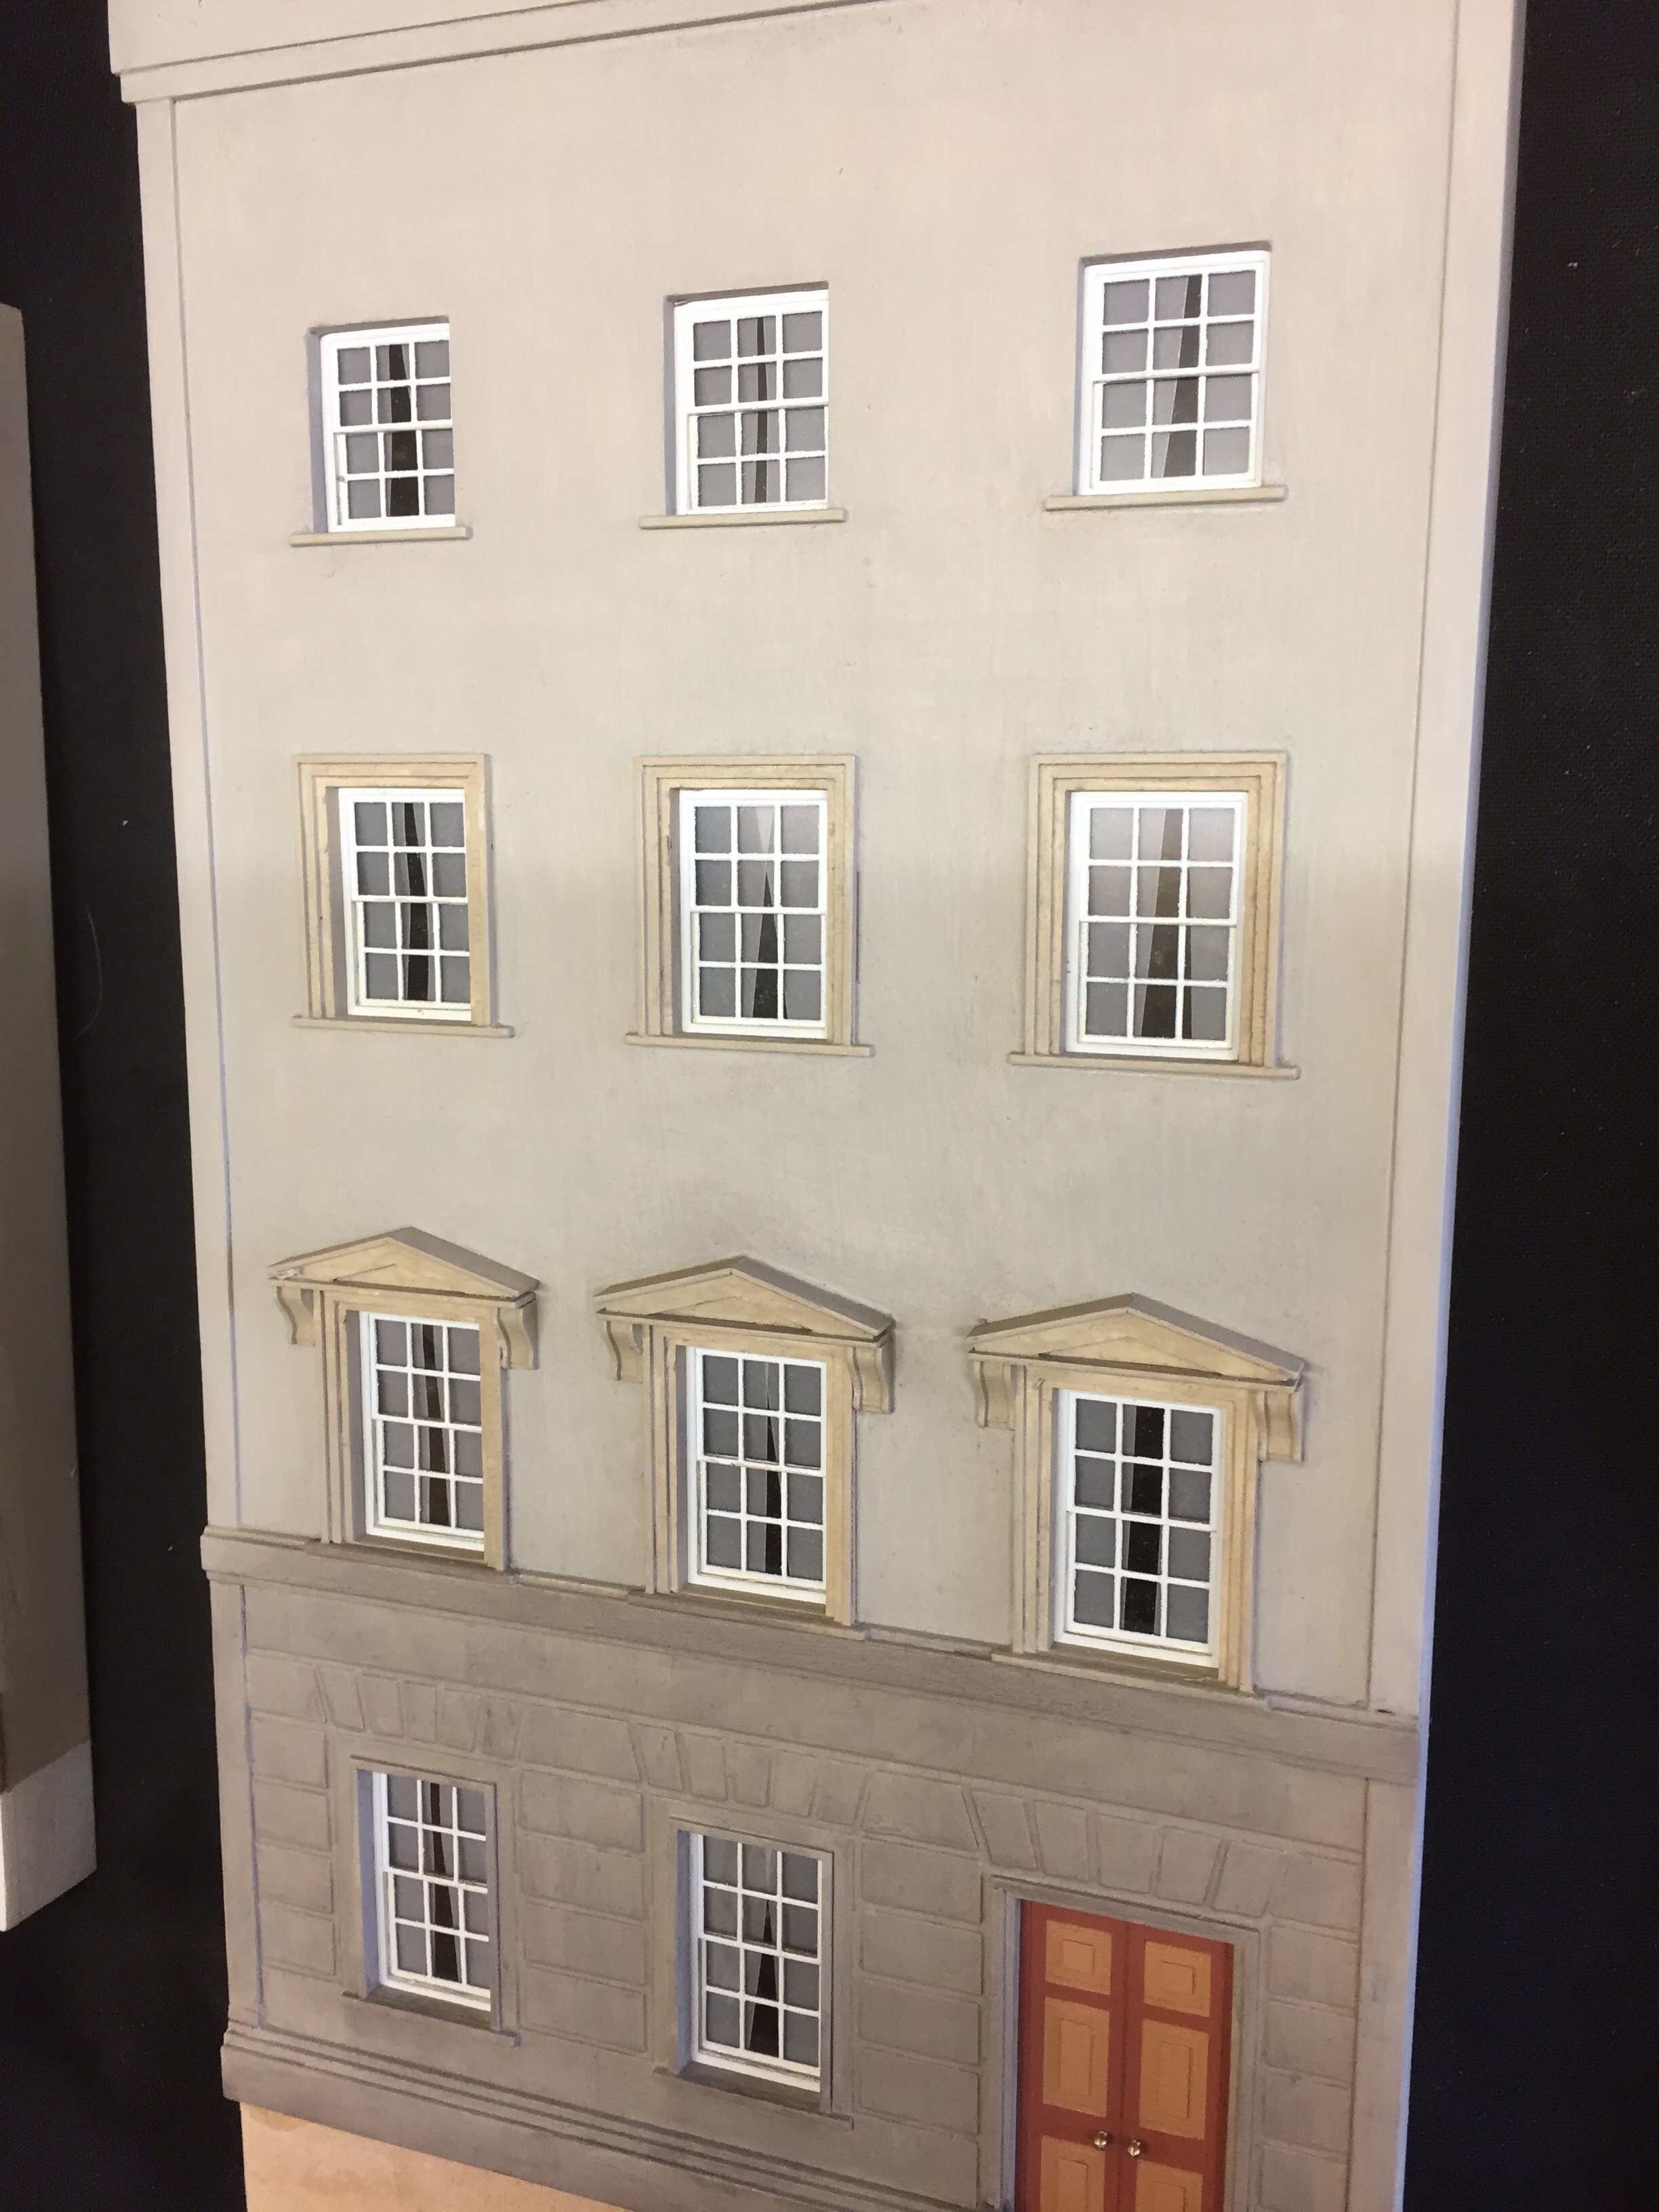
We met at the loco works at Sharpness, walked along the sidings at Oldminster and then took a short drive to Berkeley Station. As Howard talked with obvious enthusiasm, I could feel myself coming under the spell of his vision. All that remains now of Berkeley Station building are the footings, scatterings of red bricks and some tantalising yellow window arch bricks, engineering blue bricks and sections of stone mullions hiding in the long grass. Howard’s plan is to re-build this important and once beautiful structure as one of the main stations on the railway and thus forms a vital link in overall restoration plans. I therefore agreed to build a 7mm model of the station building as it would have looked in its heyday. The purpose of the model first and foremost being to provide a strong visual representation of how the station looked; and to inspire donors to contribute to its re-building.

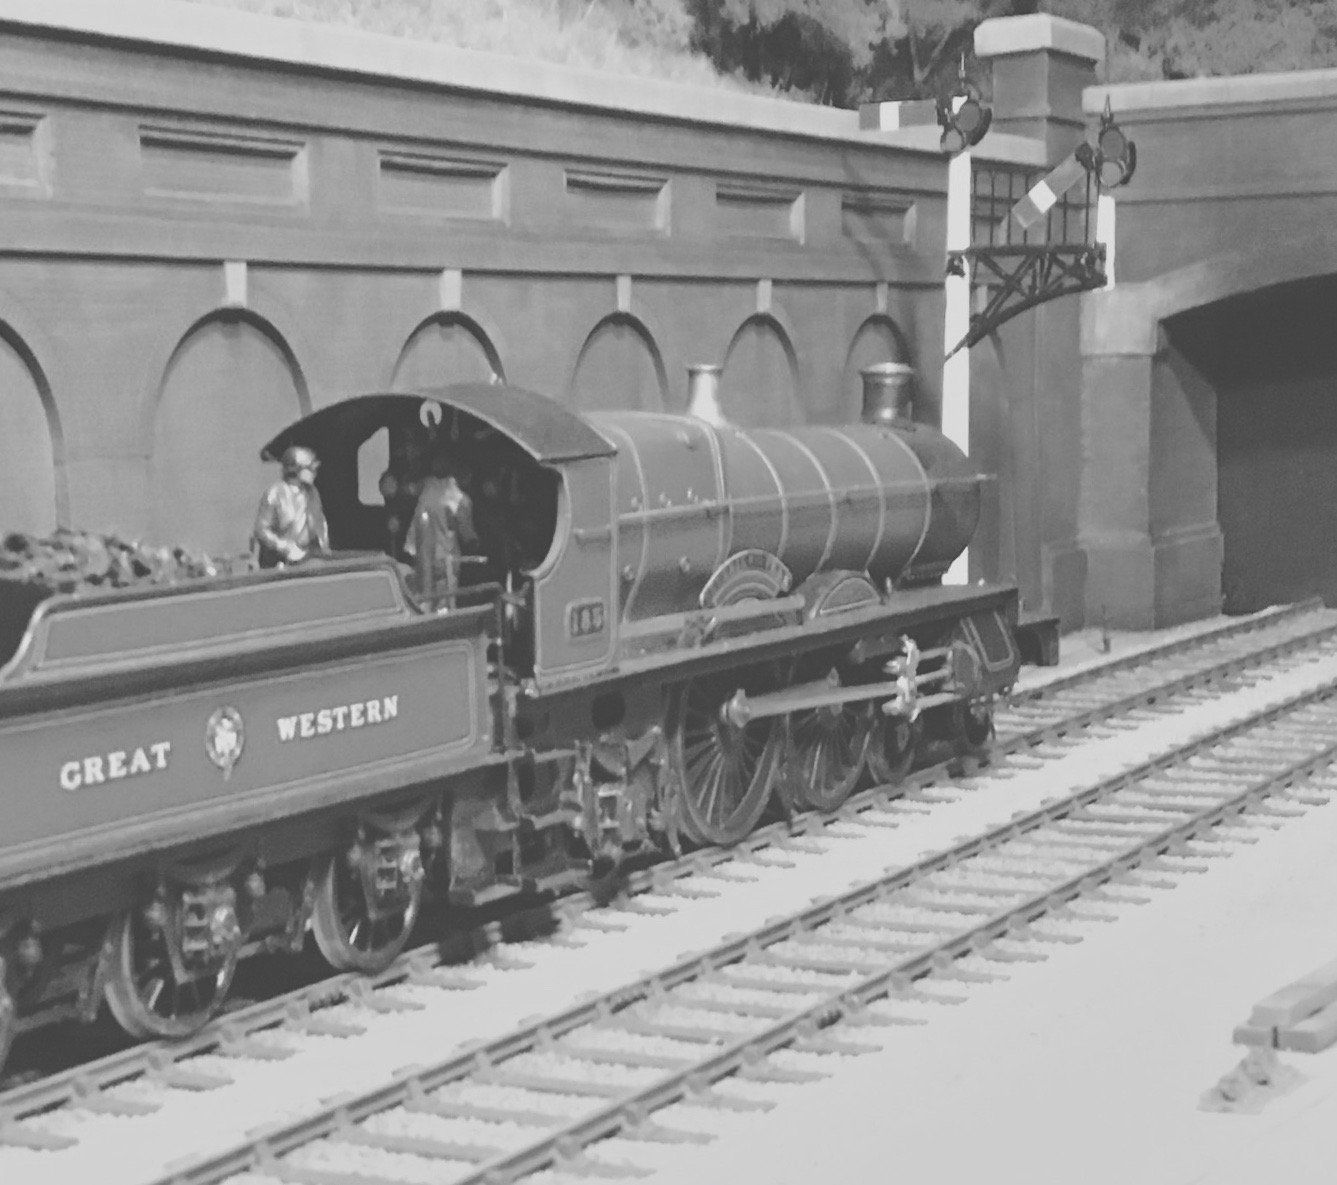
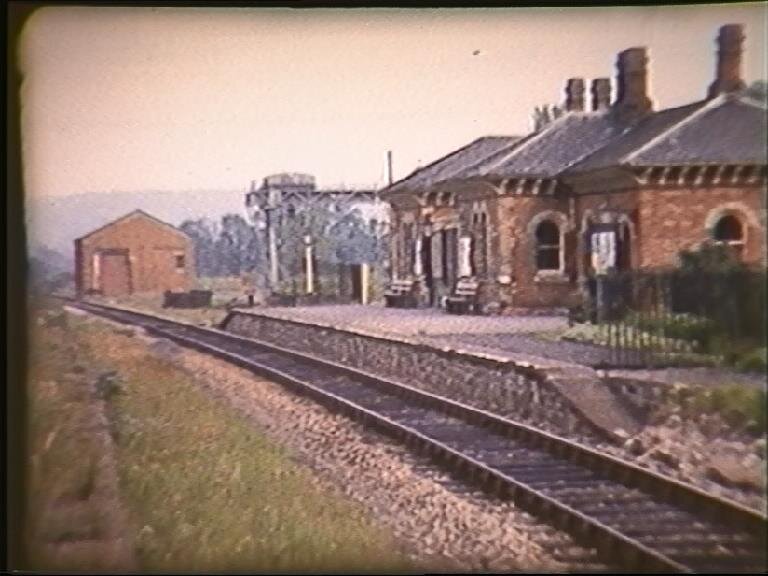
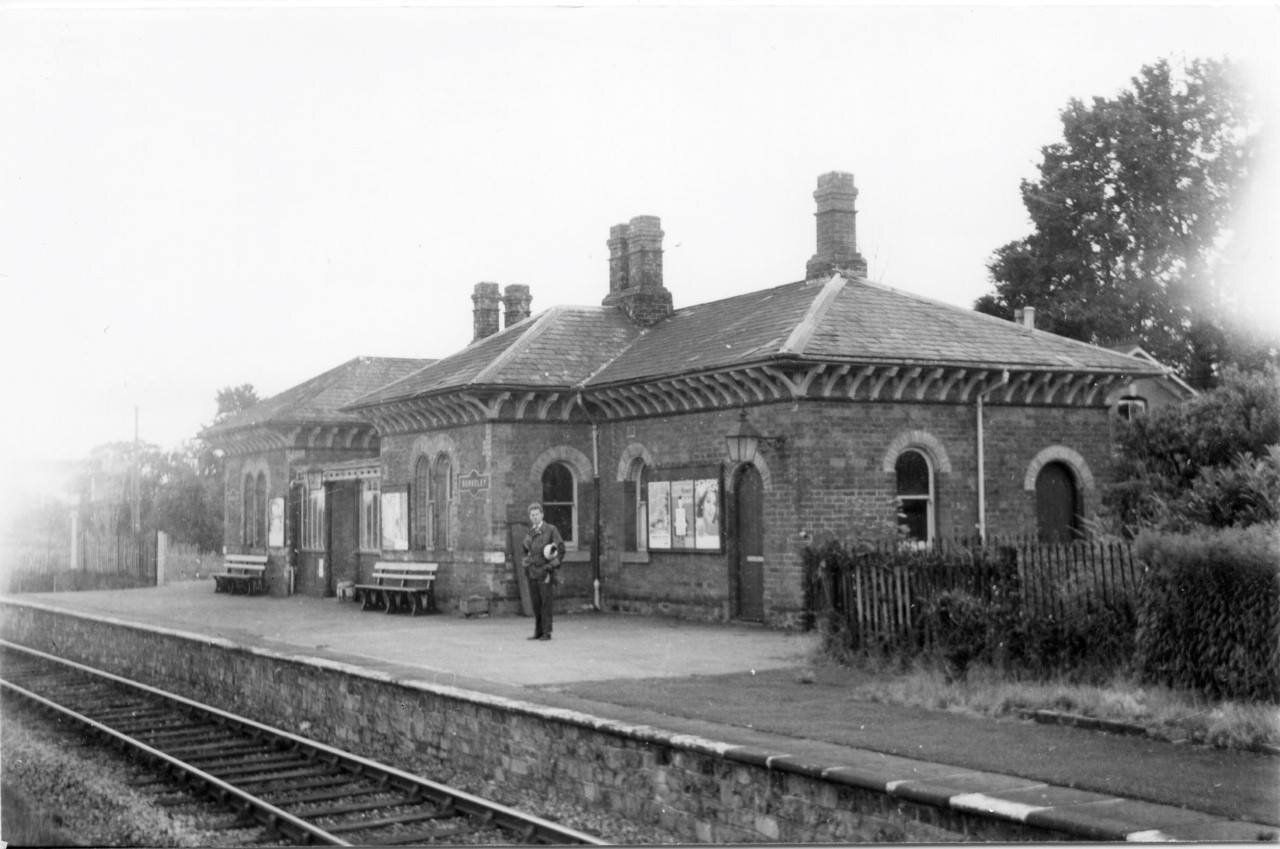
Berkeley Station lay on a stretch of line that ran from a junction off the Gloucester to Bristol Midland main line at Berkeley Road Station, through to Sharpness Docks. From there, the line ran onward over the Severn Bridge to the Forest of Dean. The branch was originally built by the Midland Railway in 1875 as the Severn & Wye & Severn Bridge Railway, which subsequently ran into financial difficulties and in 1894 became jointly owned with the Great Western Railway to form the Severn &  Wye Joint Railway. It was originally laid as double track but later reduced to single. It closed to passenger services in 1964 and the station building gradually fell into disrepair being finally demolished sometime in the late 70s or early 80s. The line itself is still there today, along with some sidings in the old goods yard that now only see very occasional freight traffic.

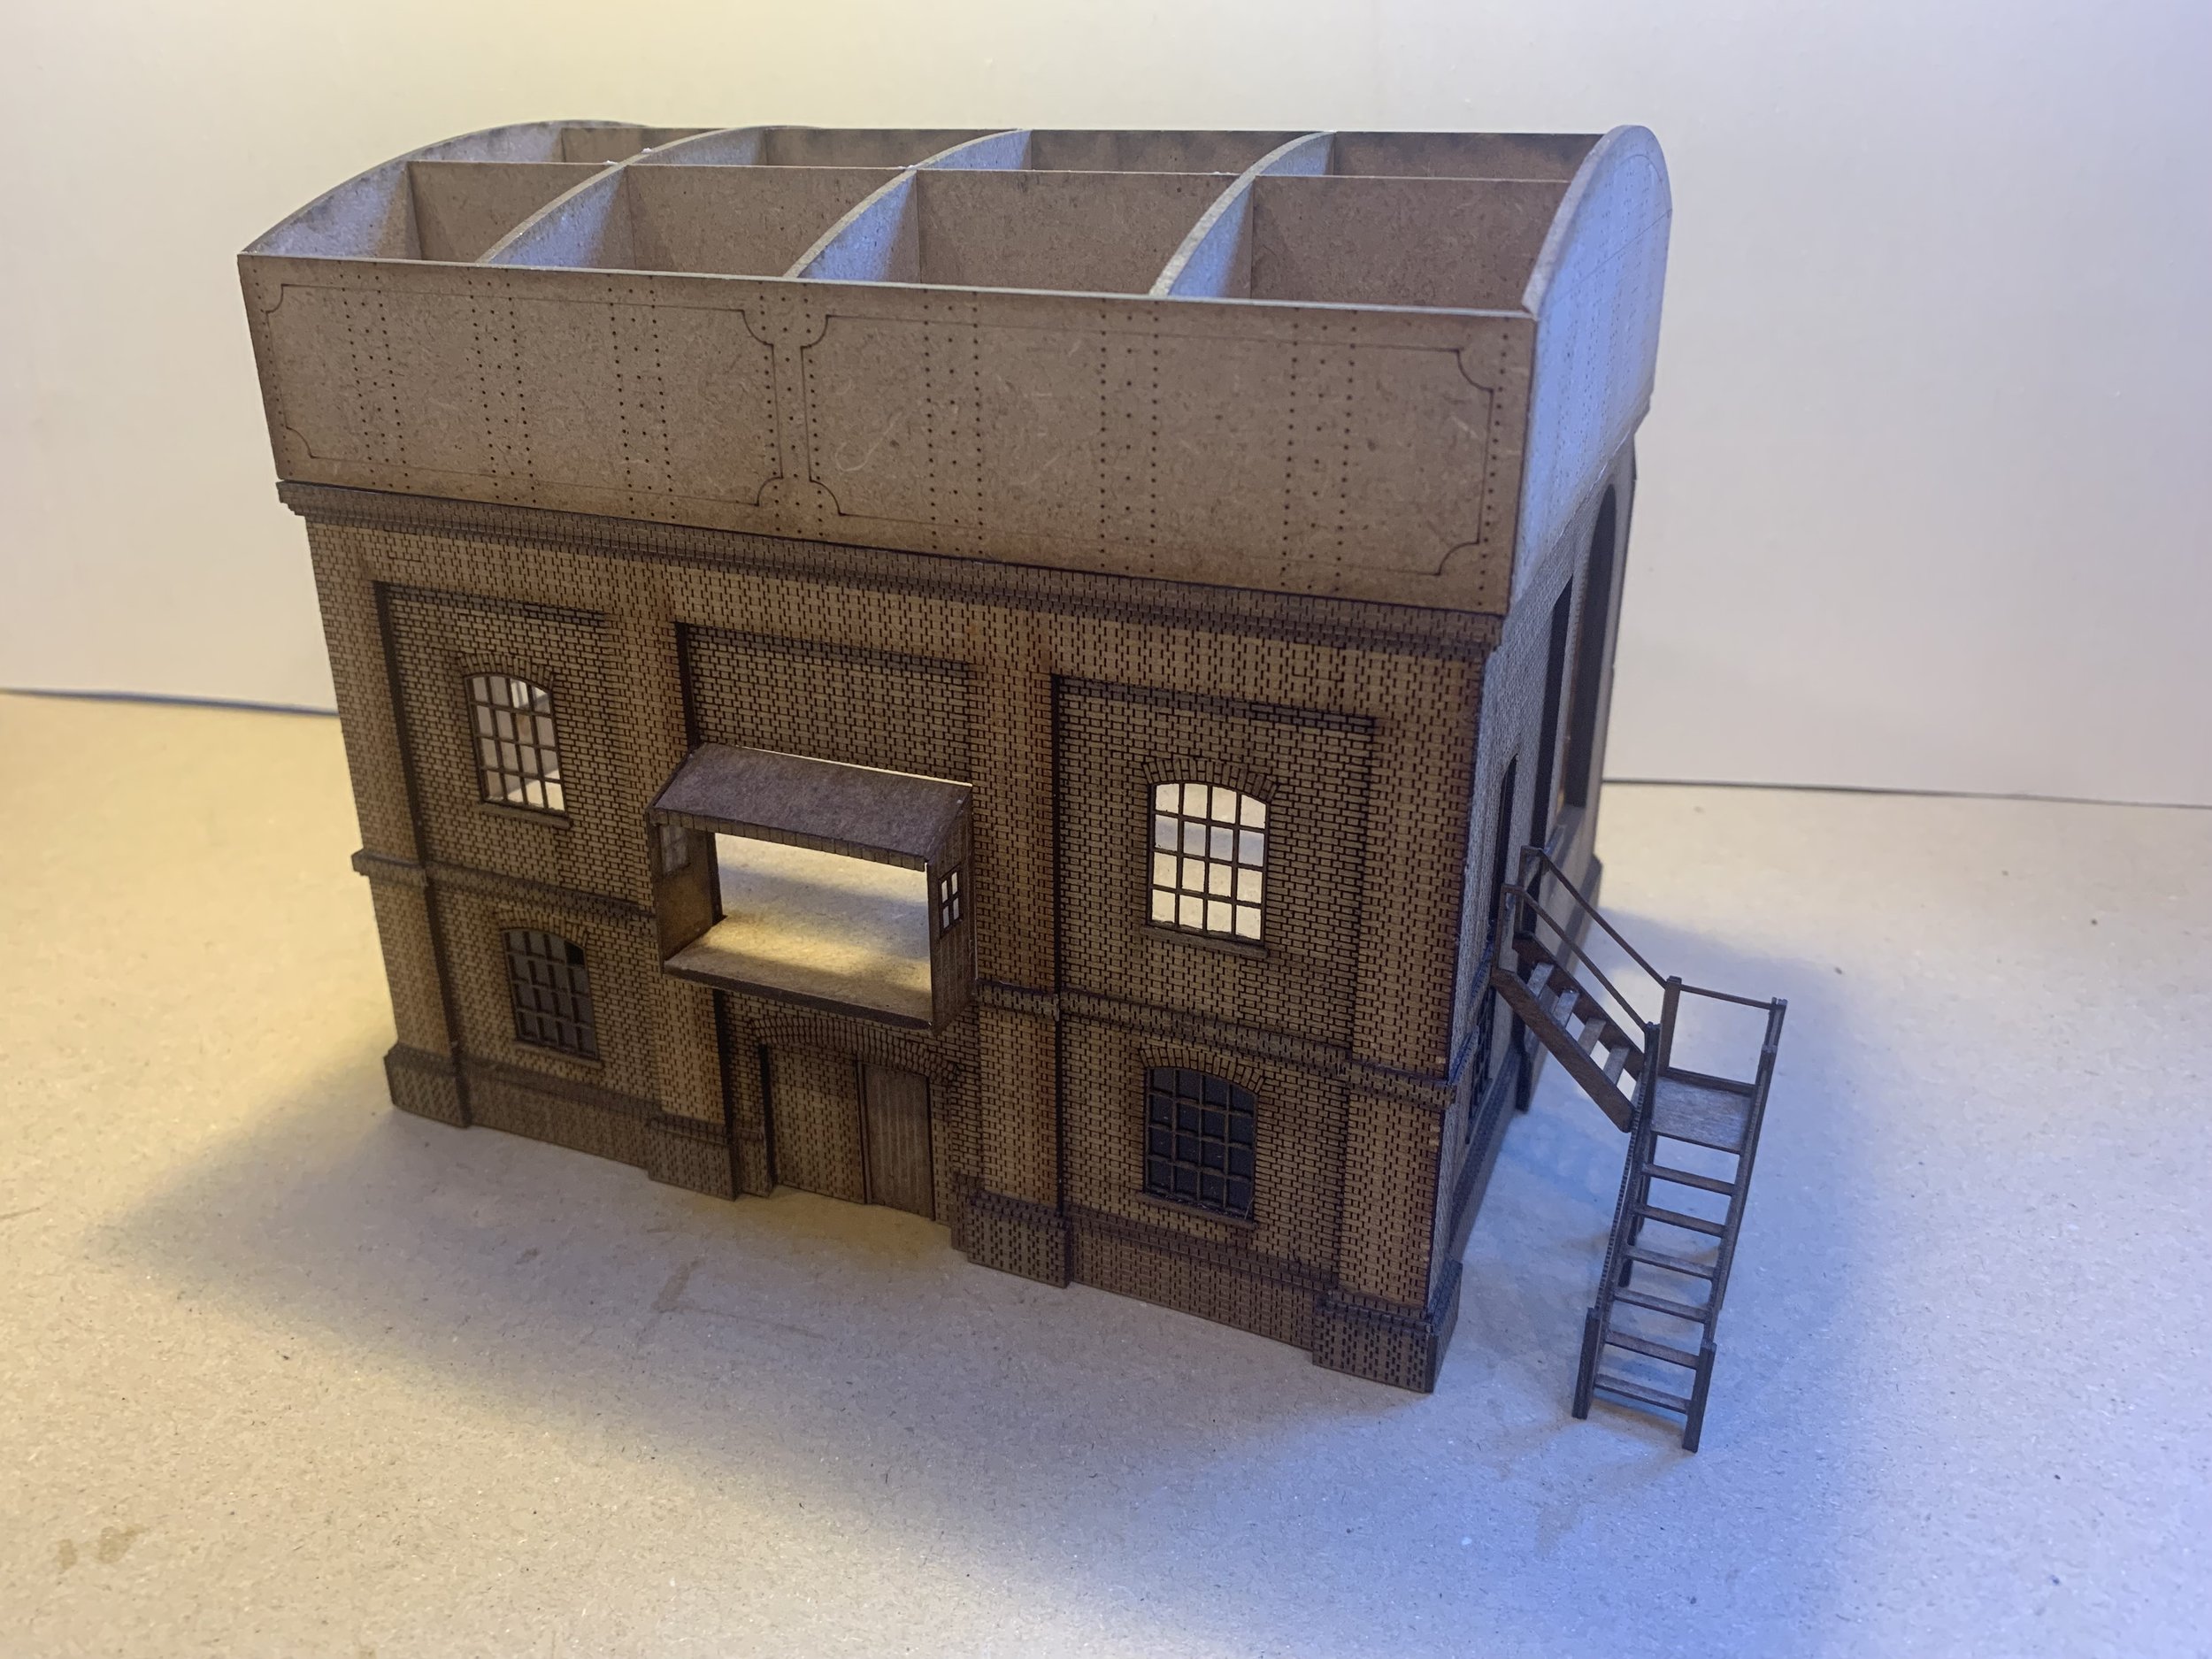
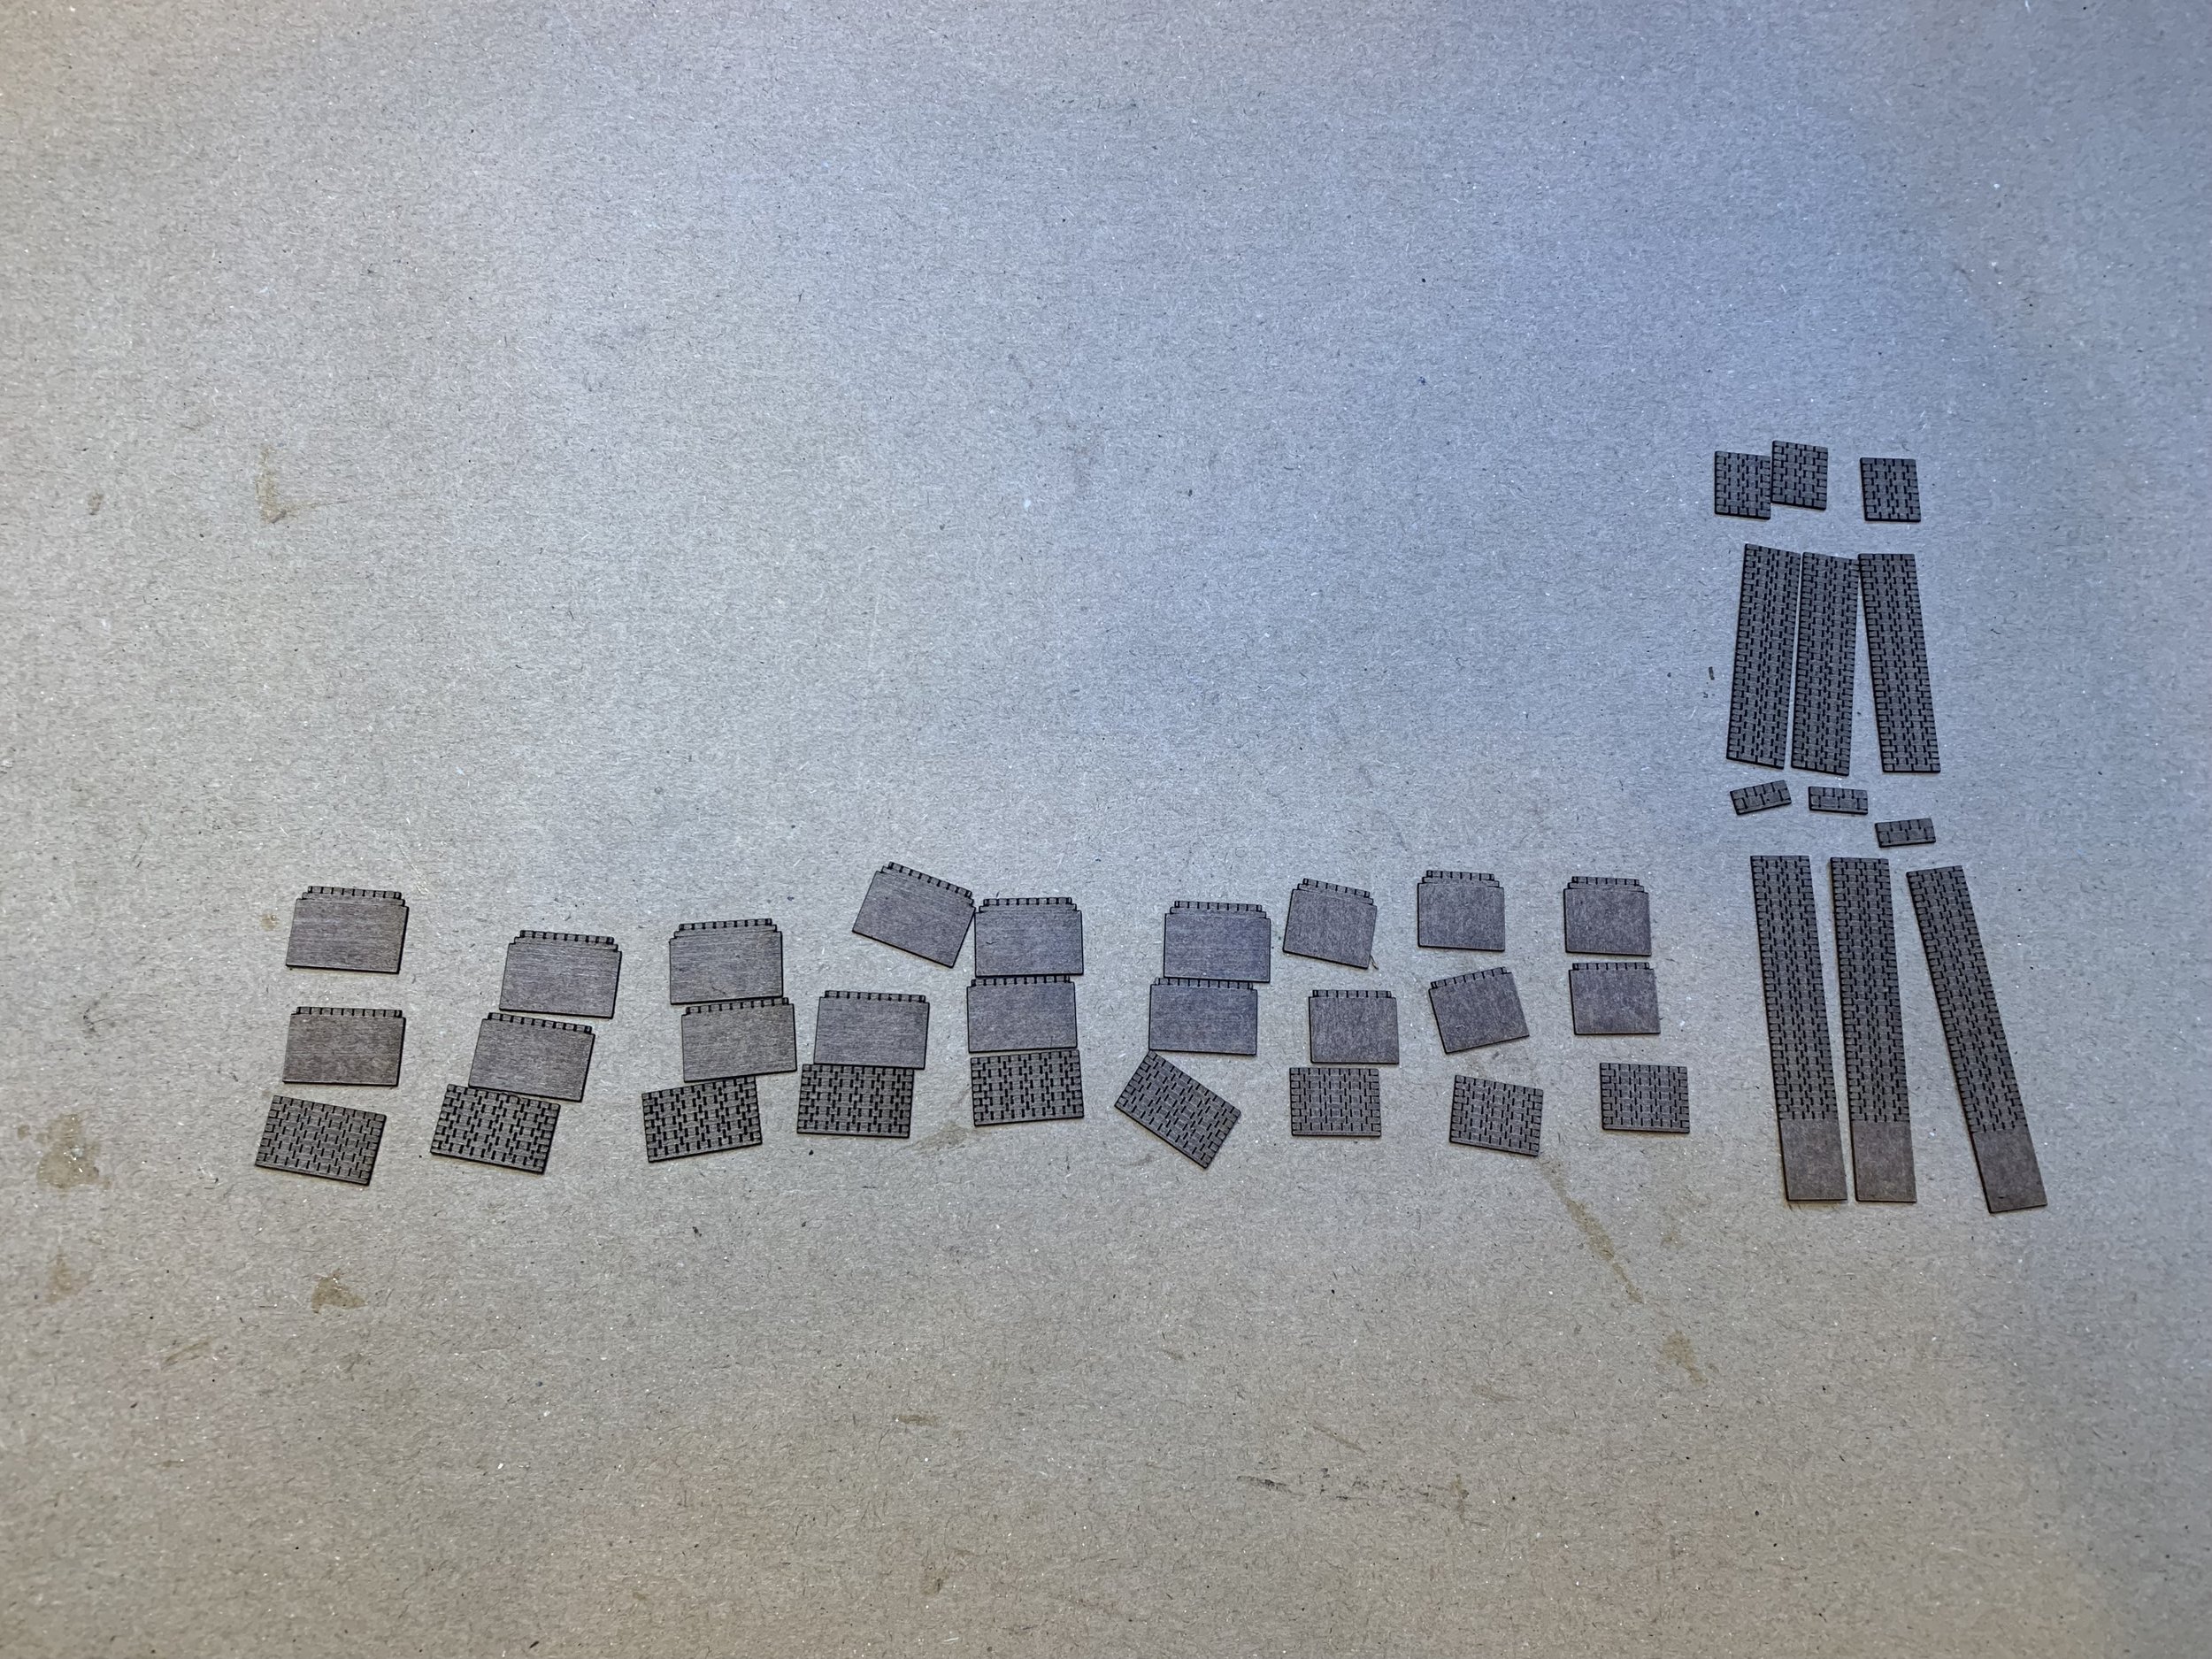
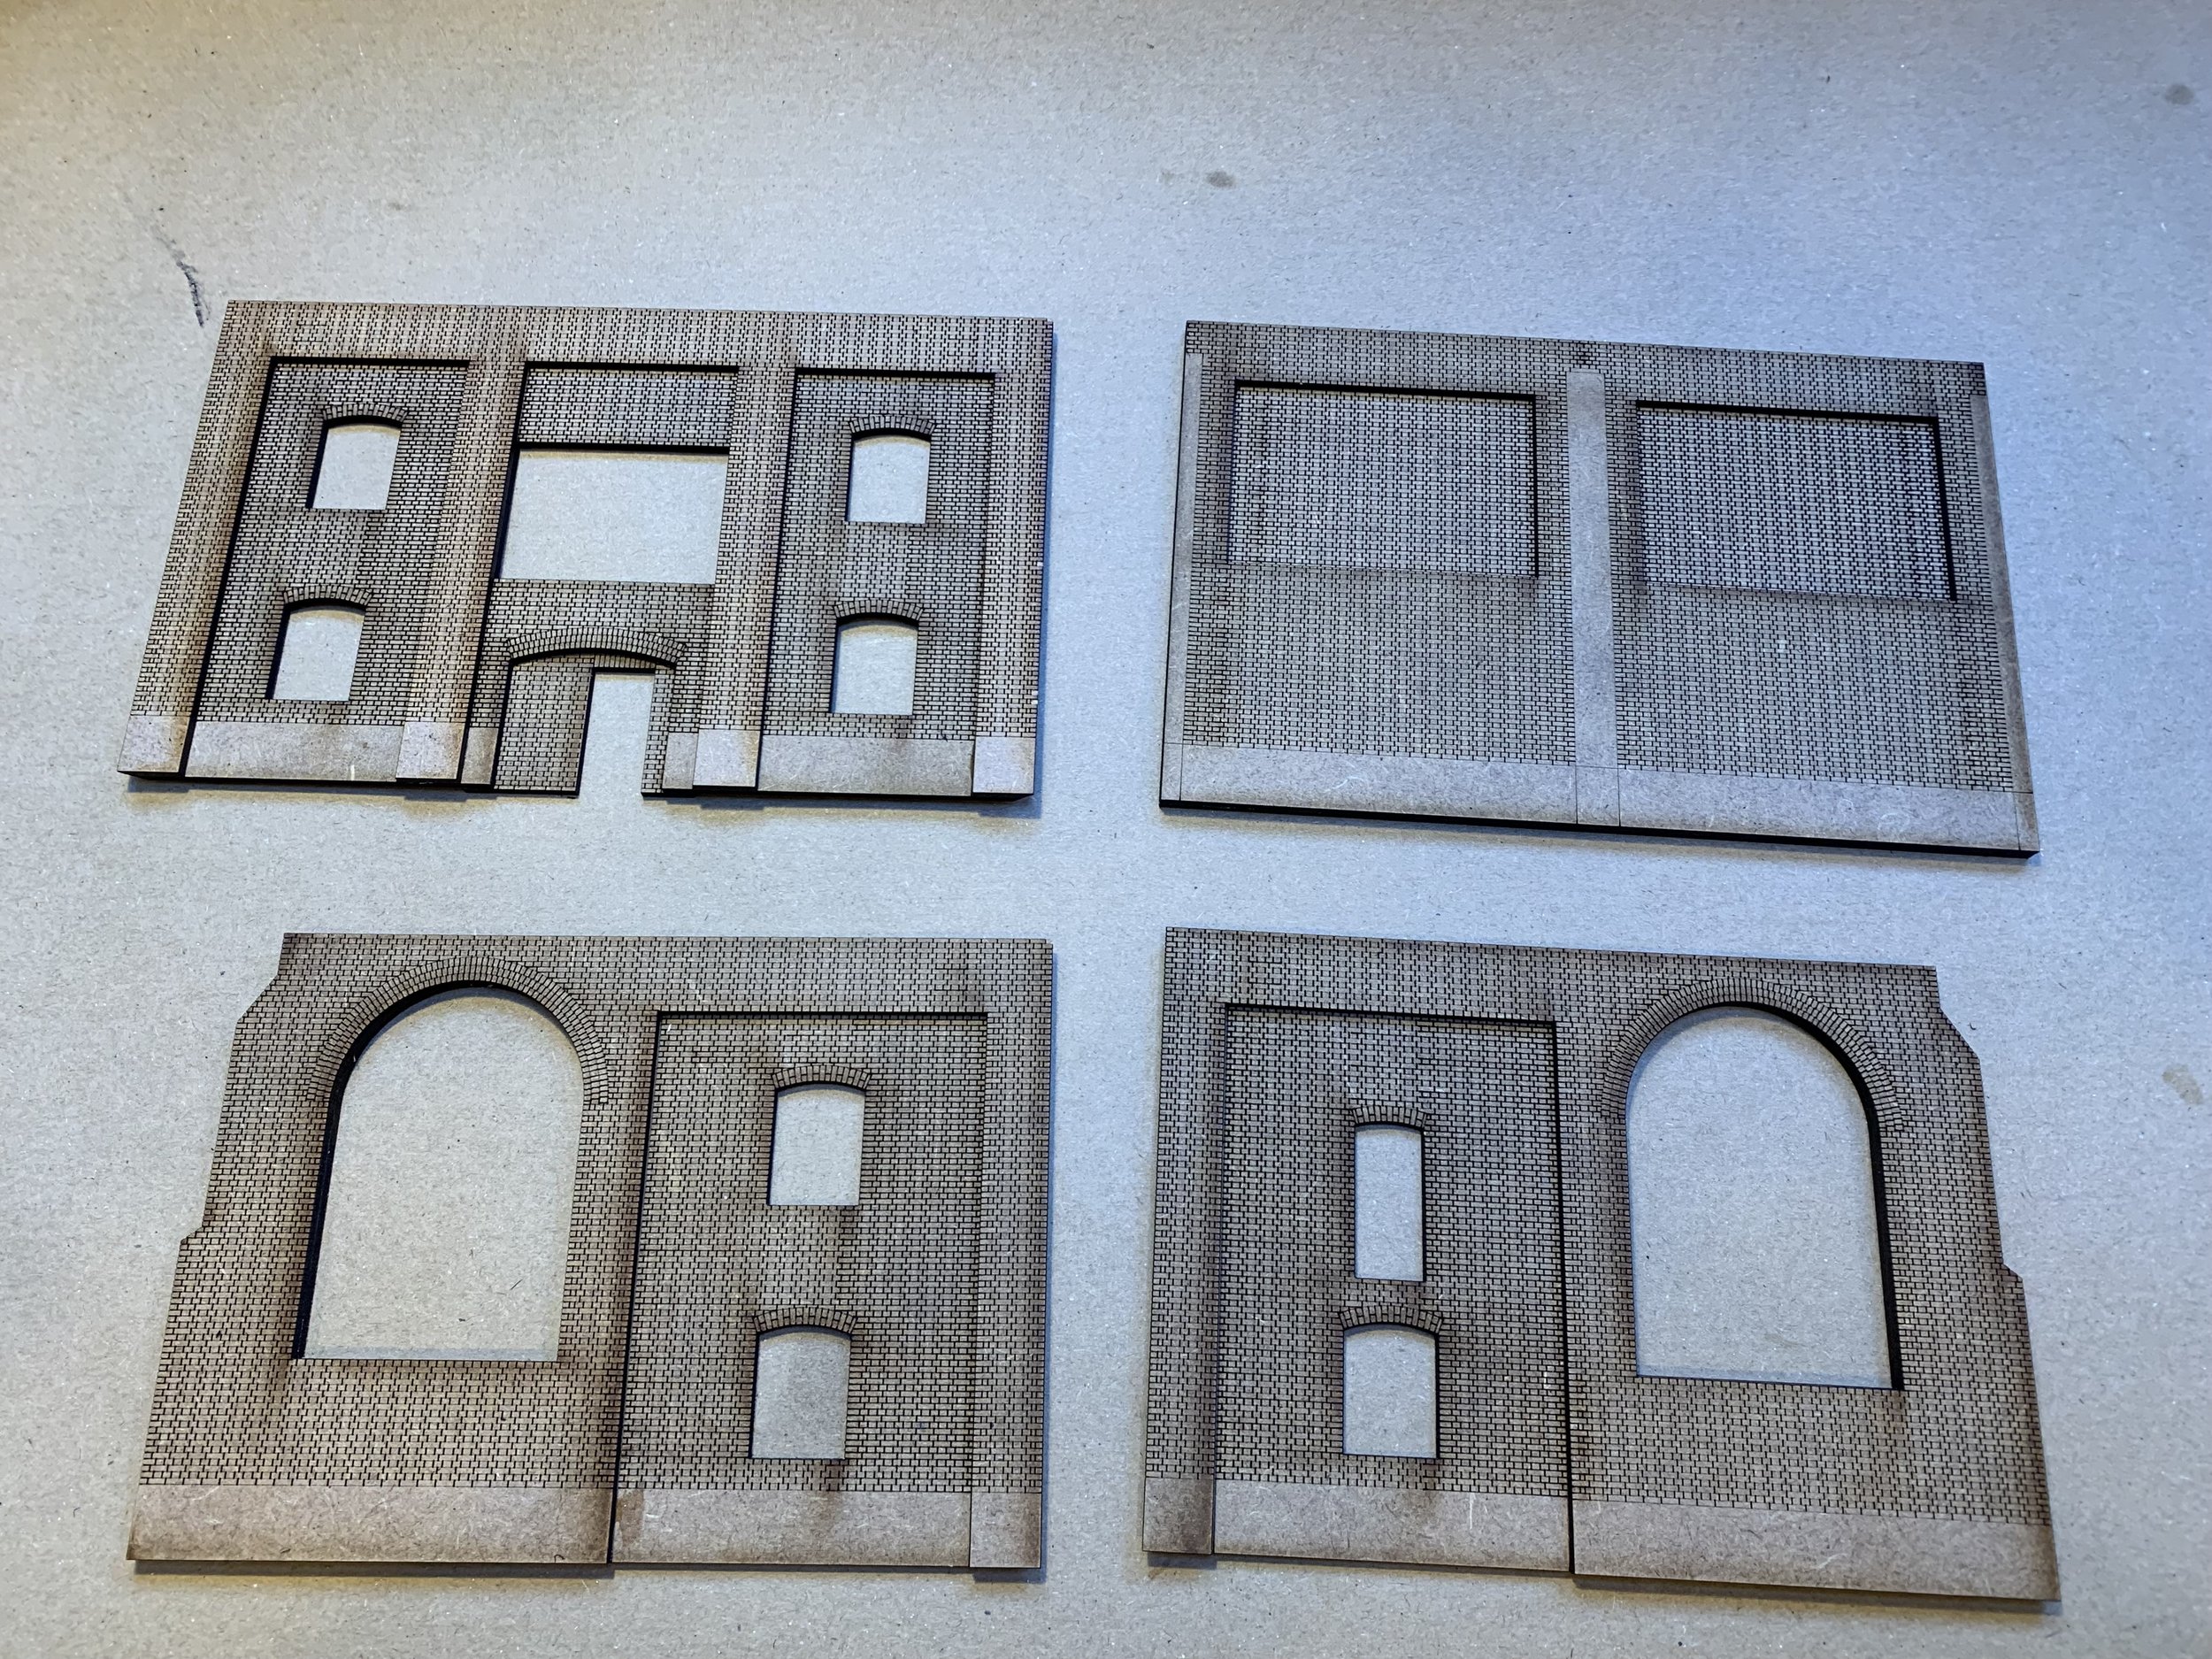
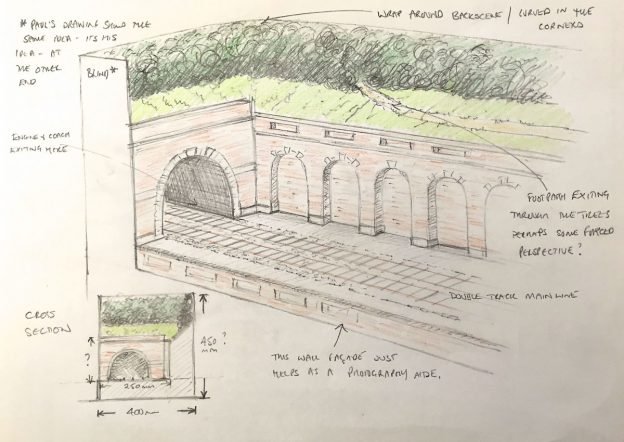
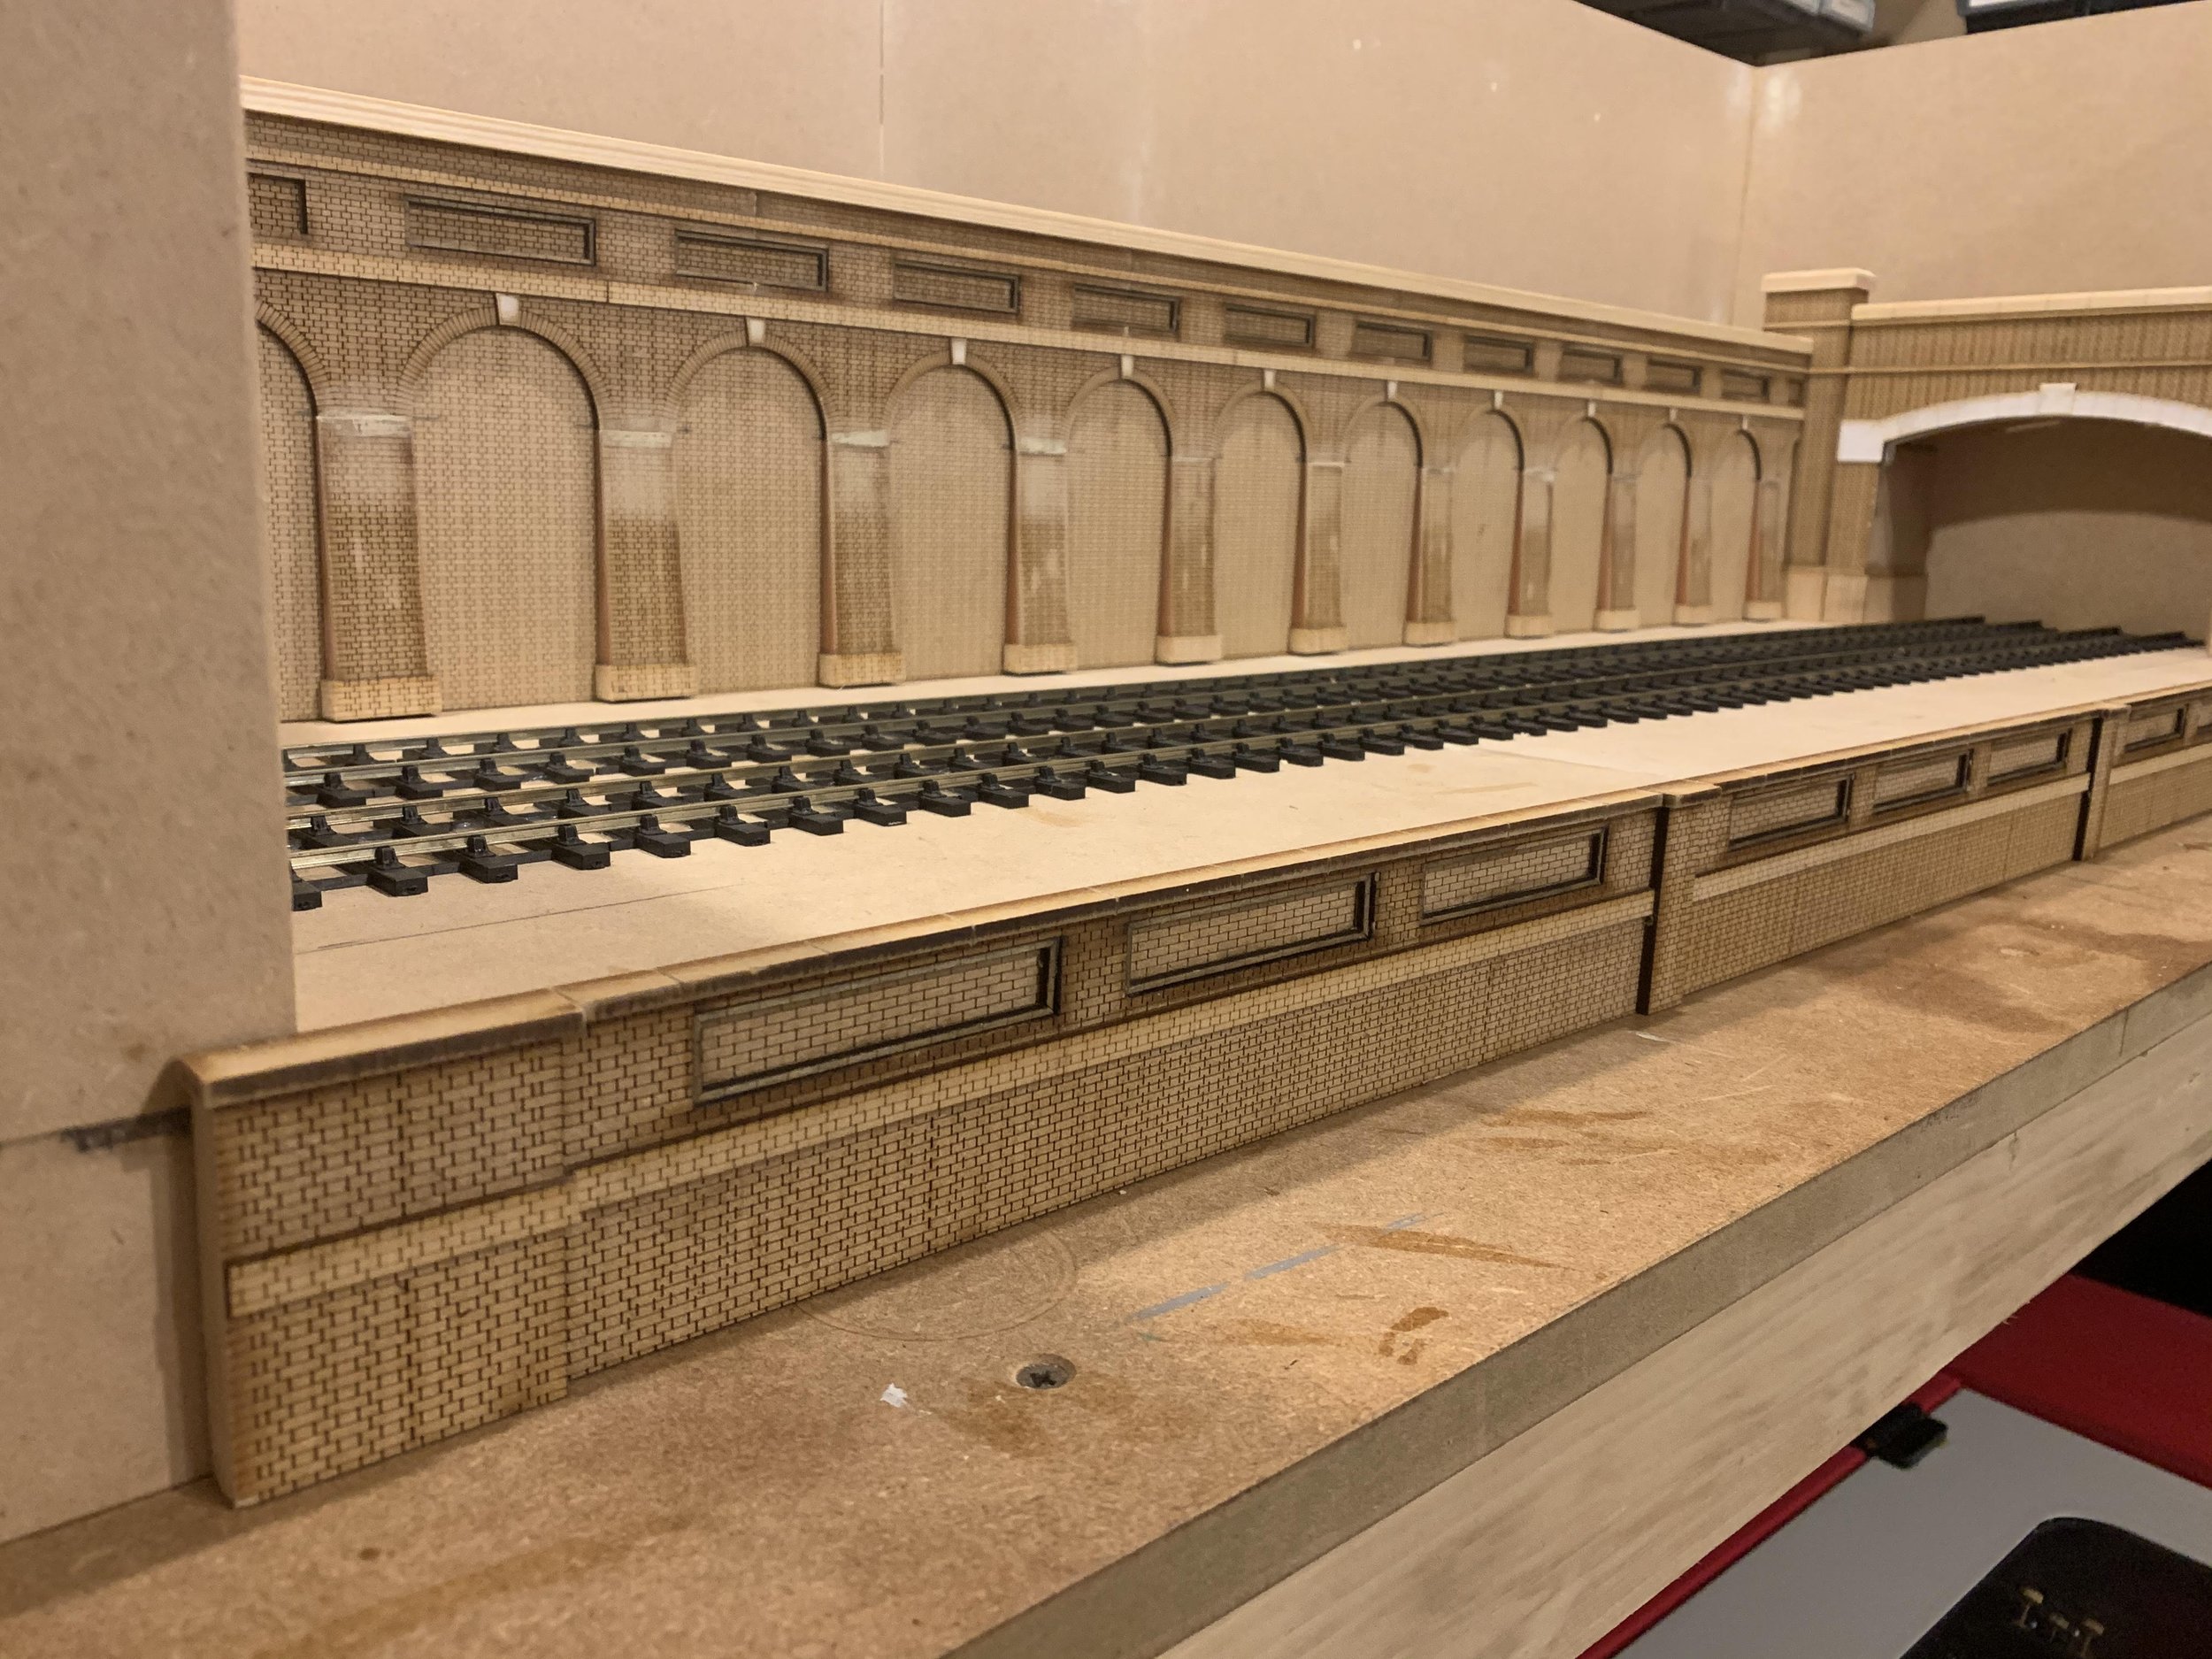
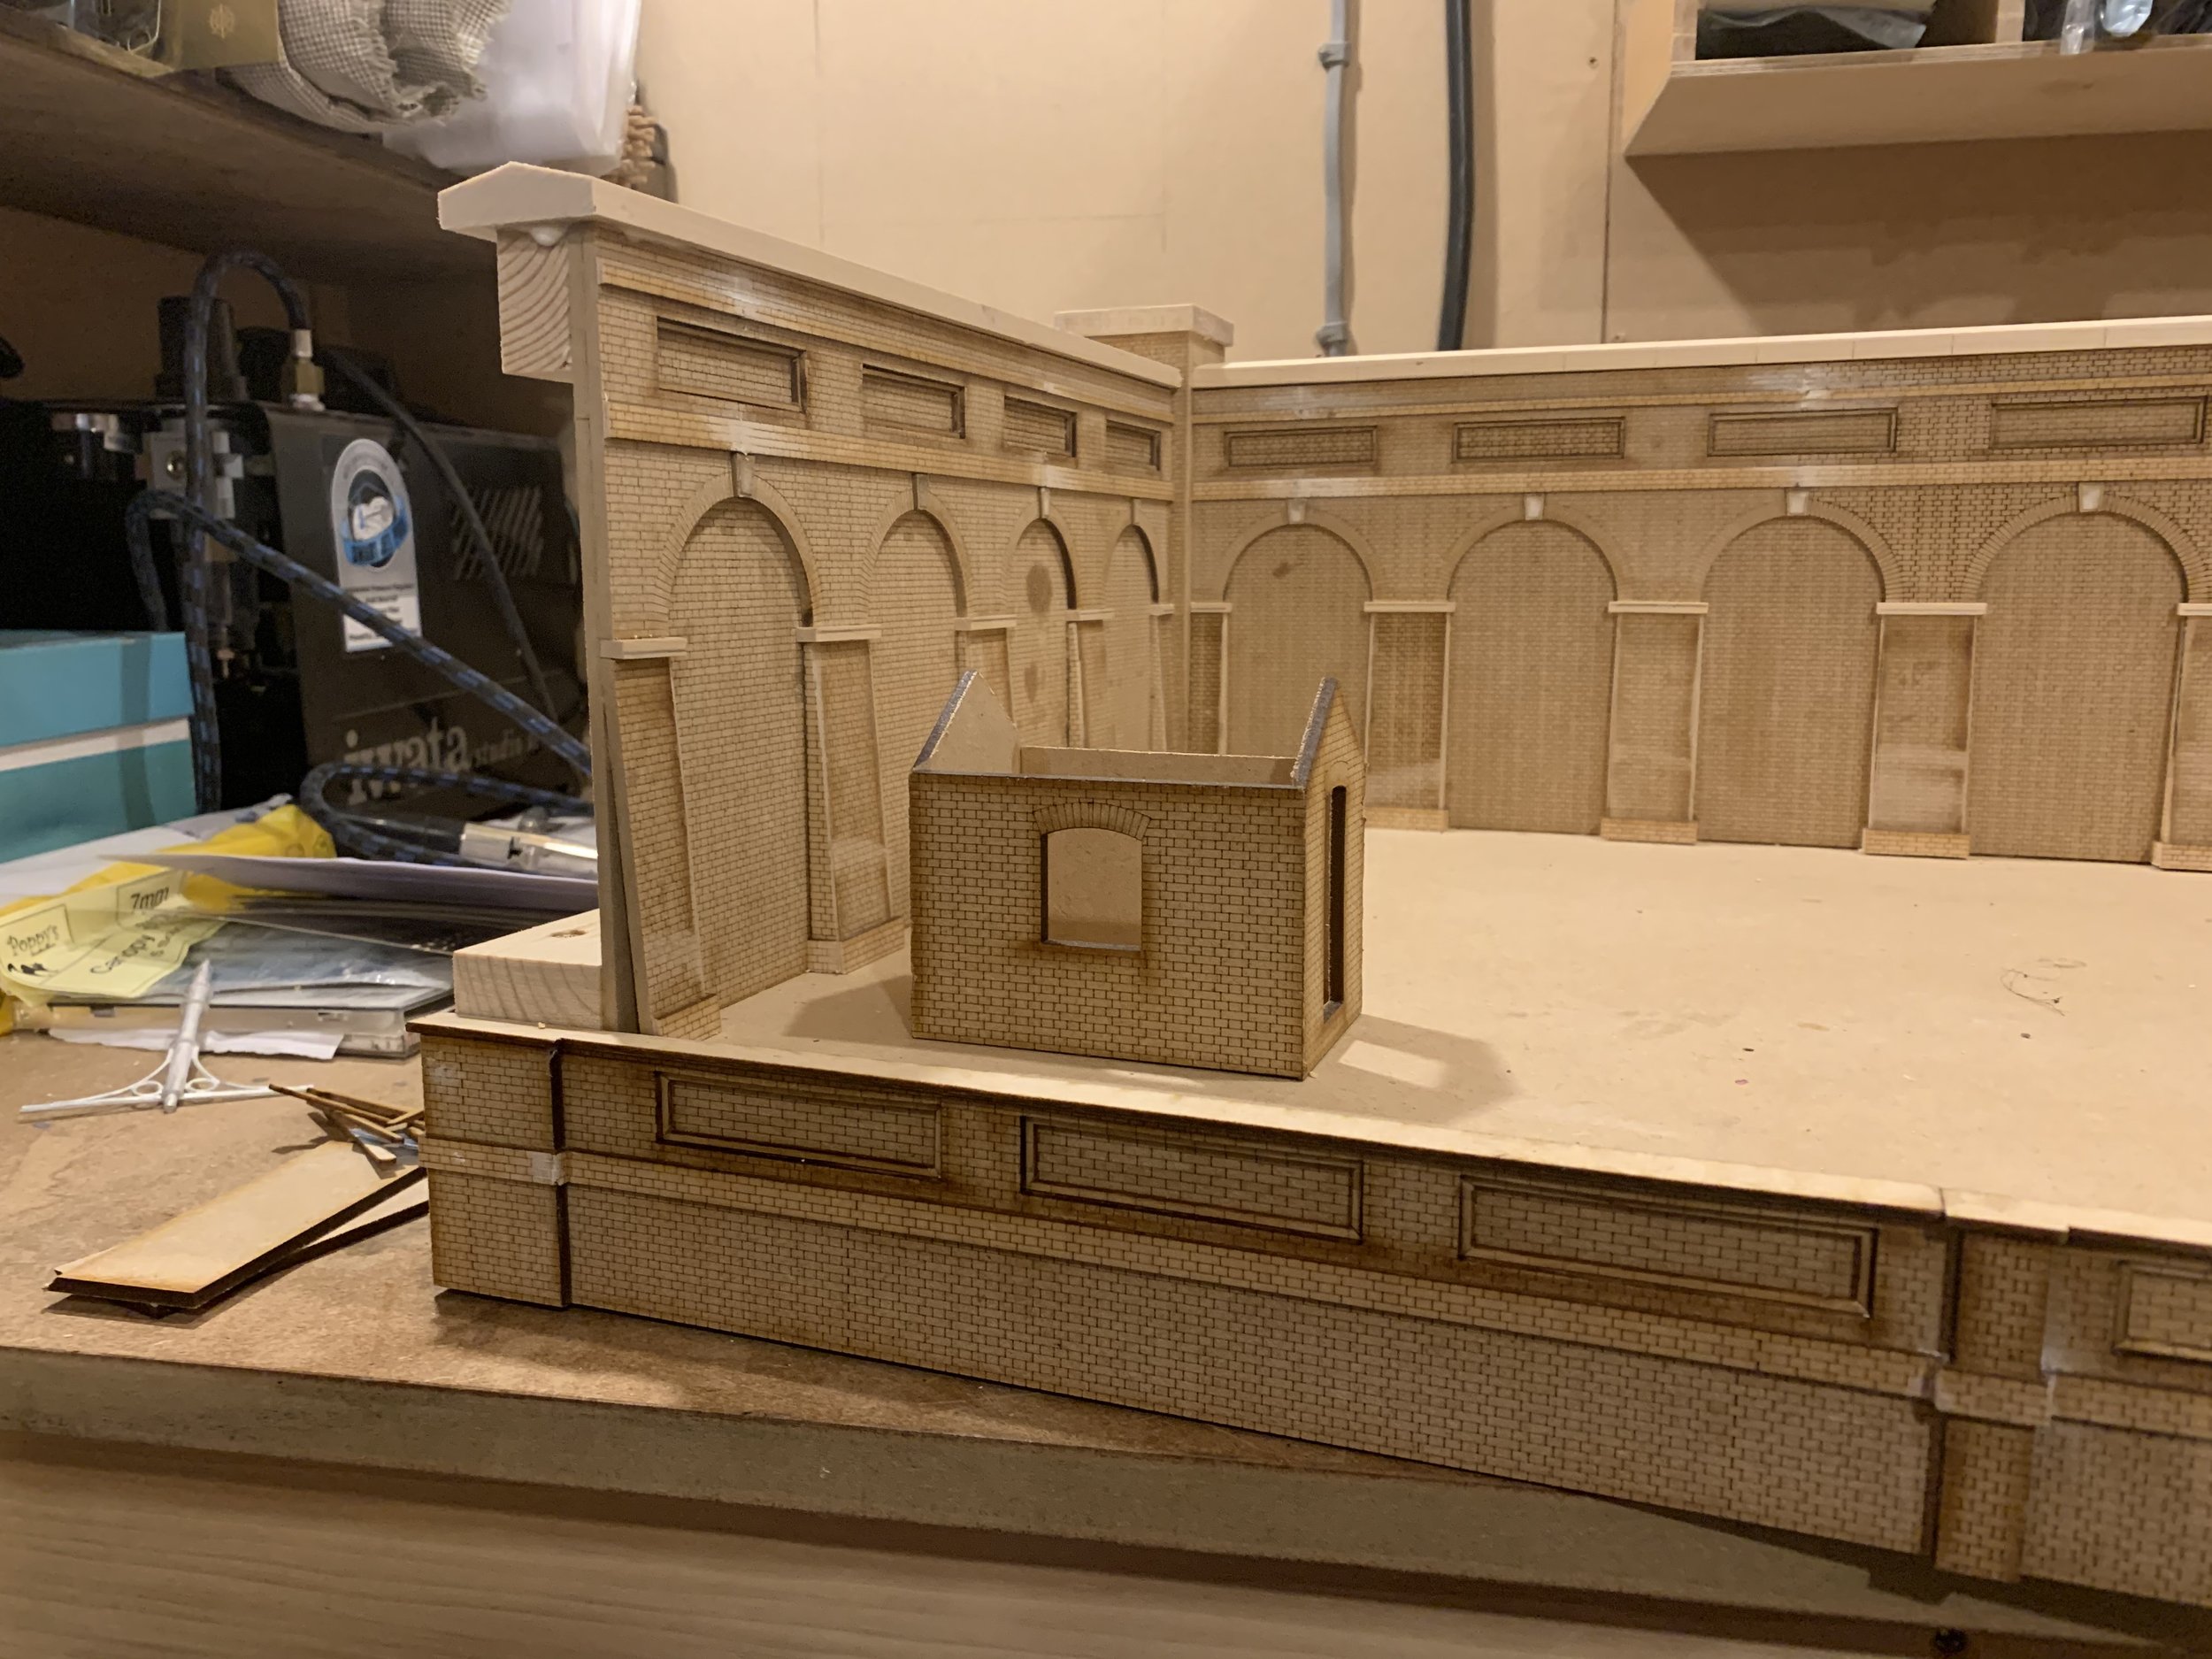
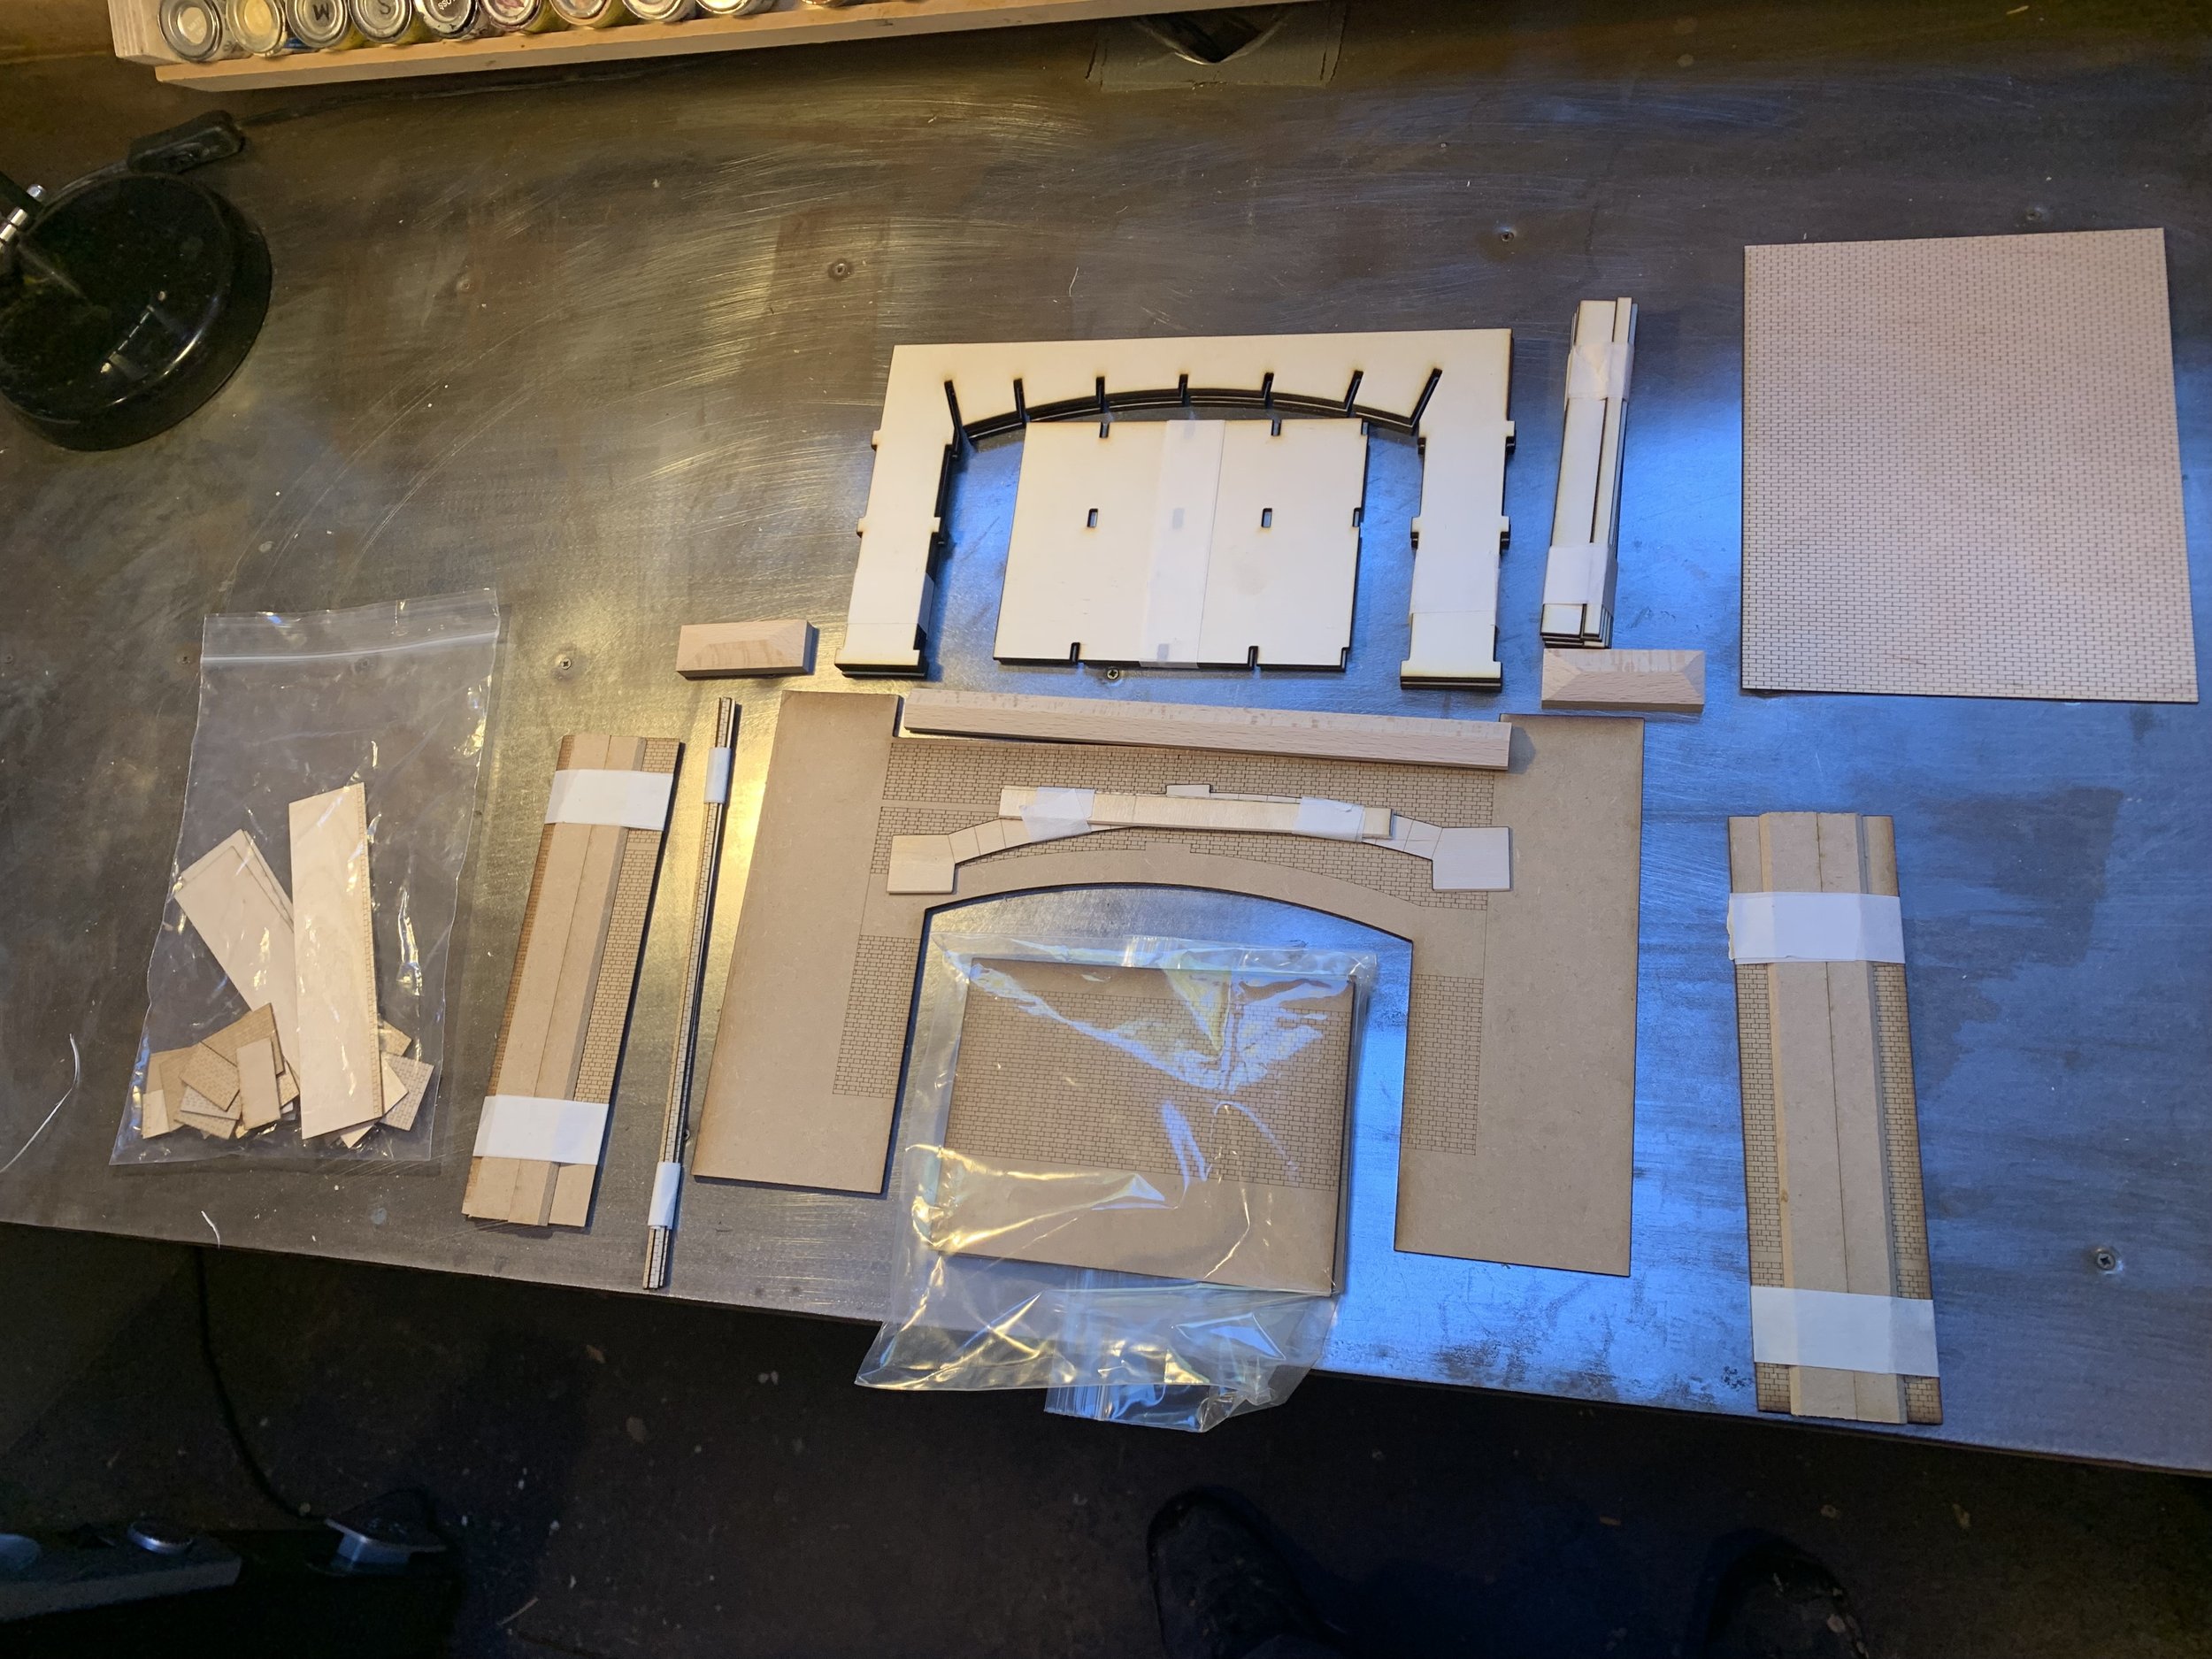
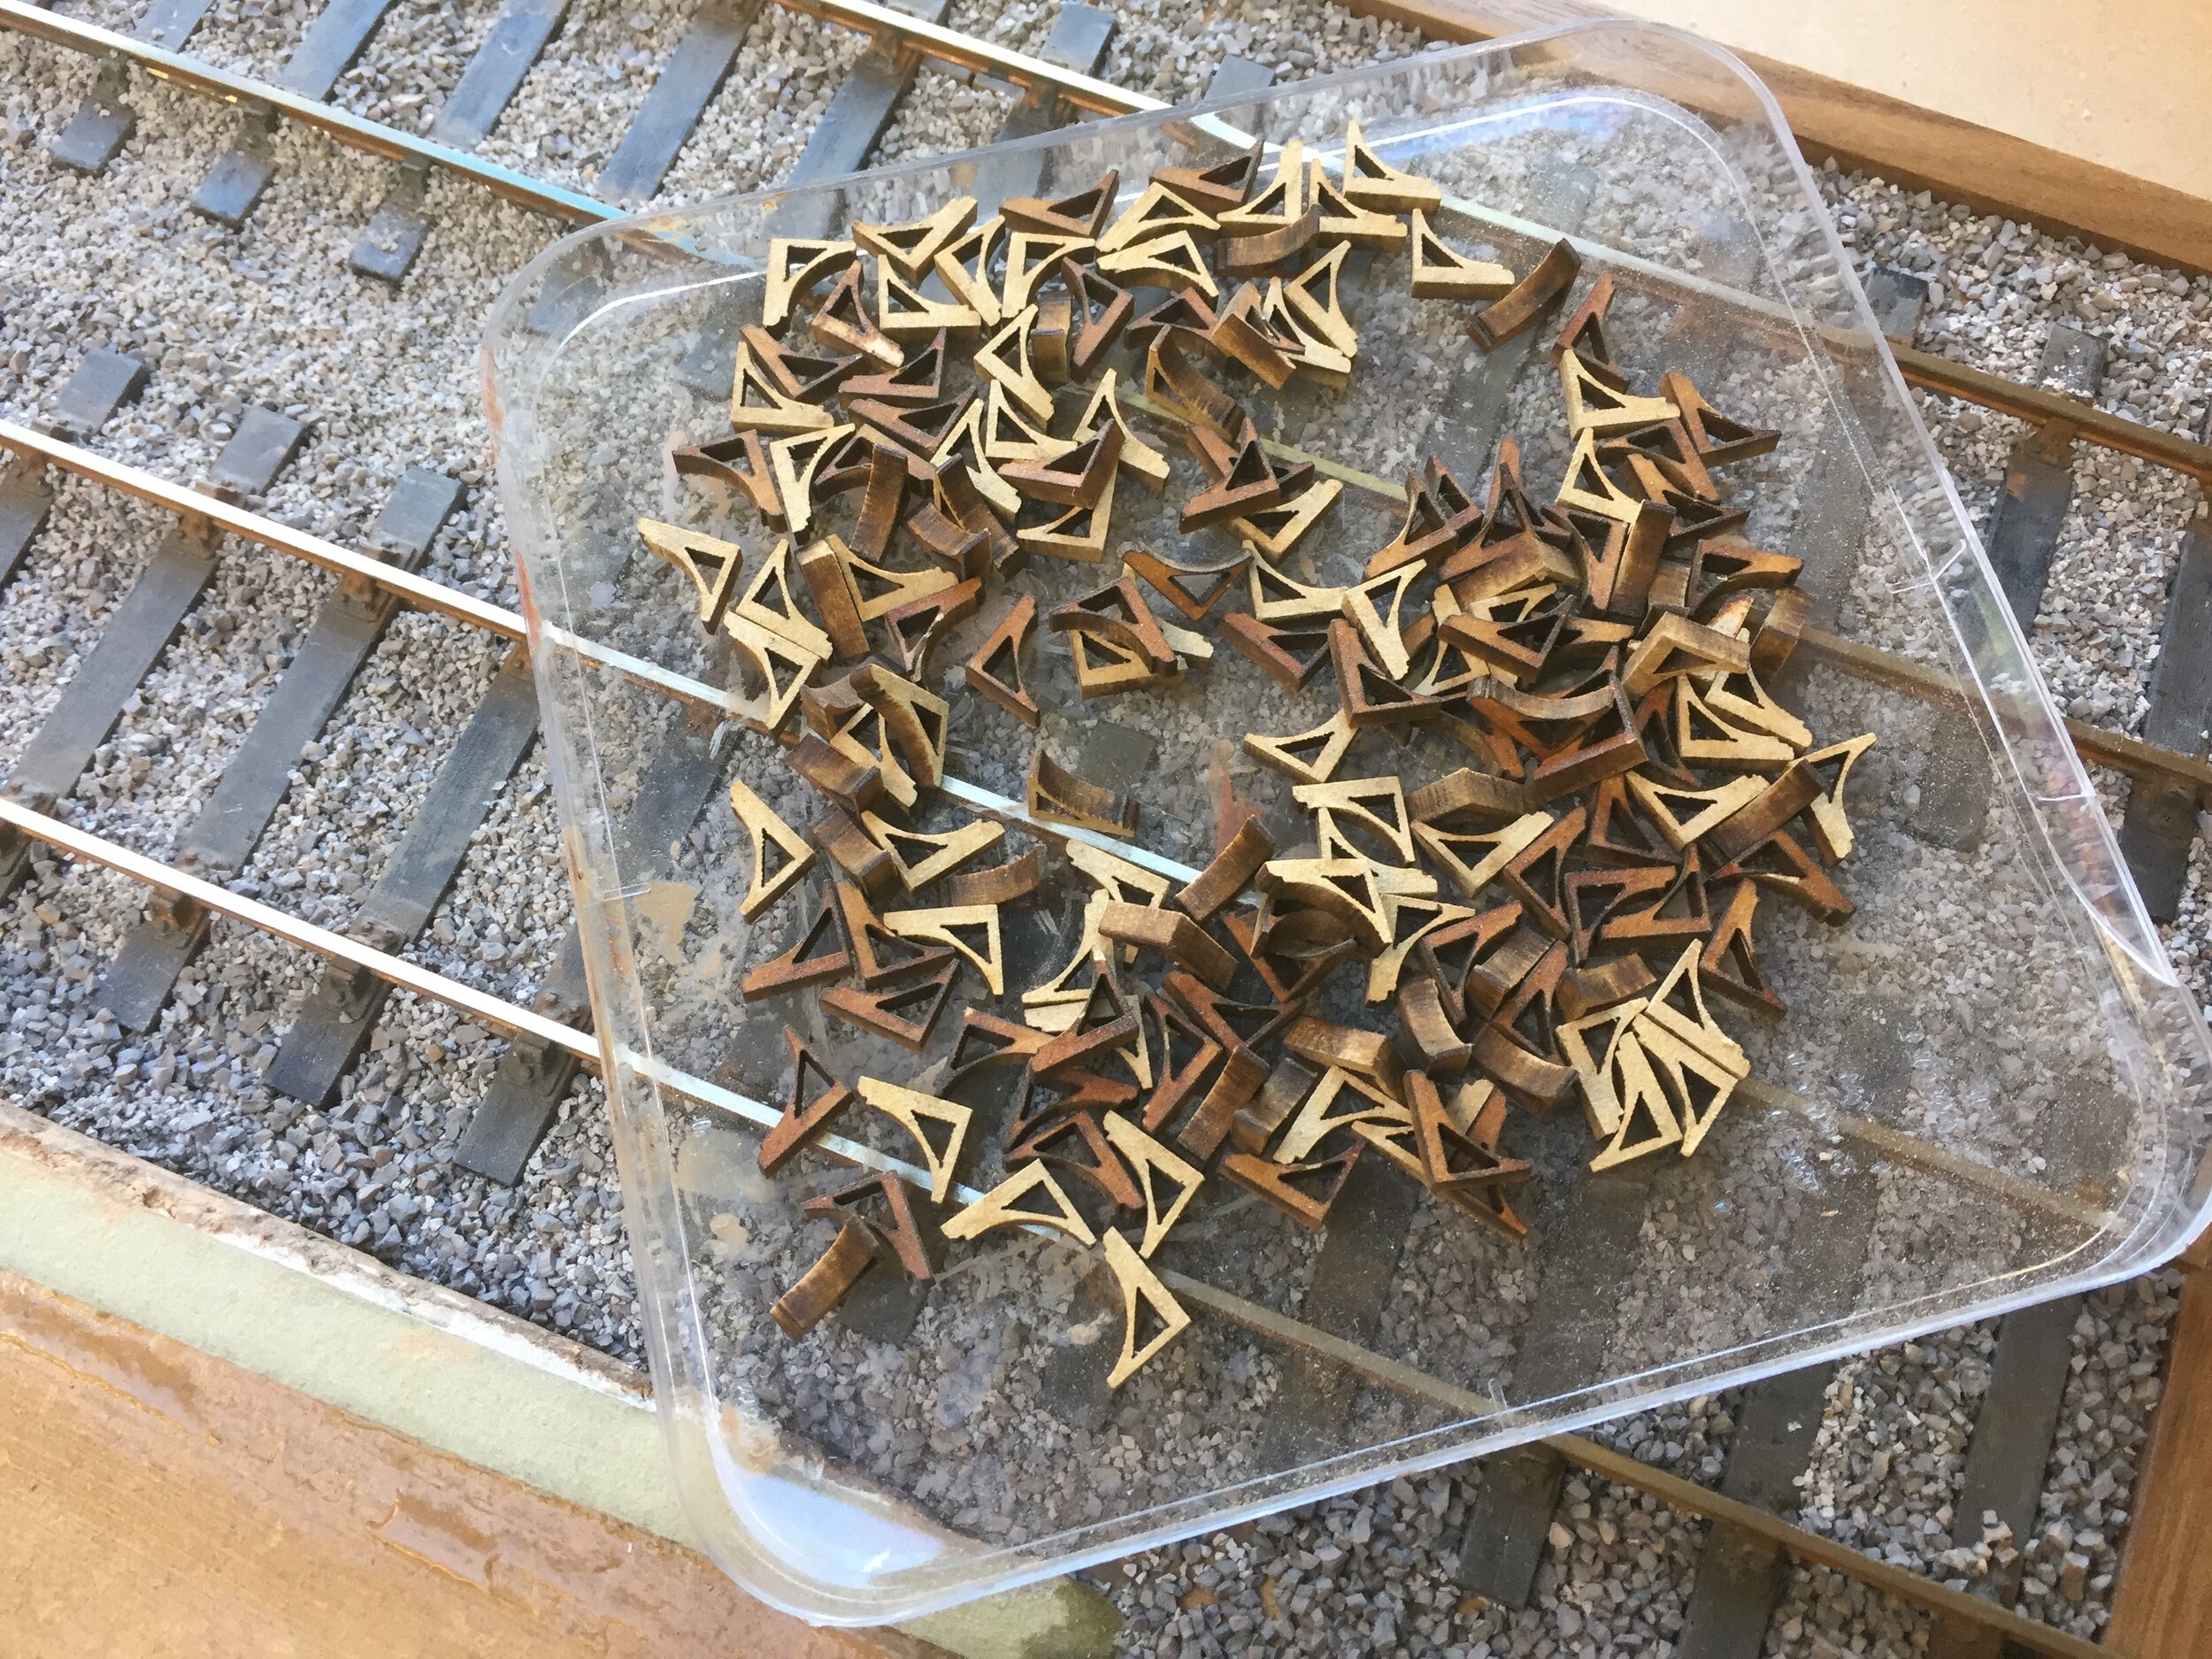
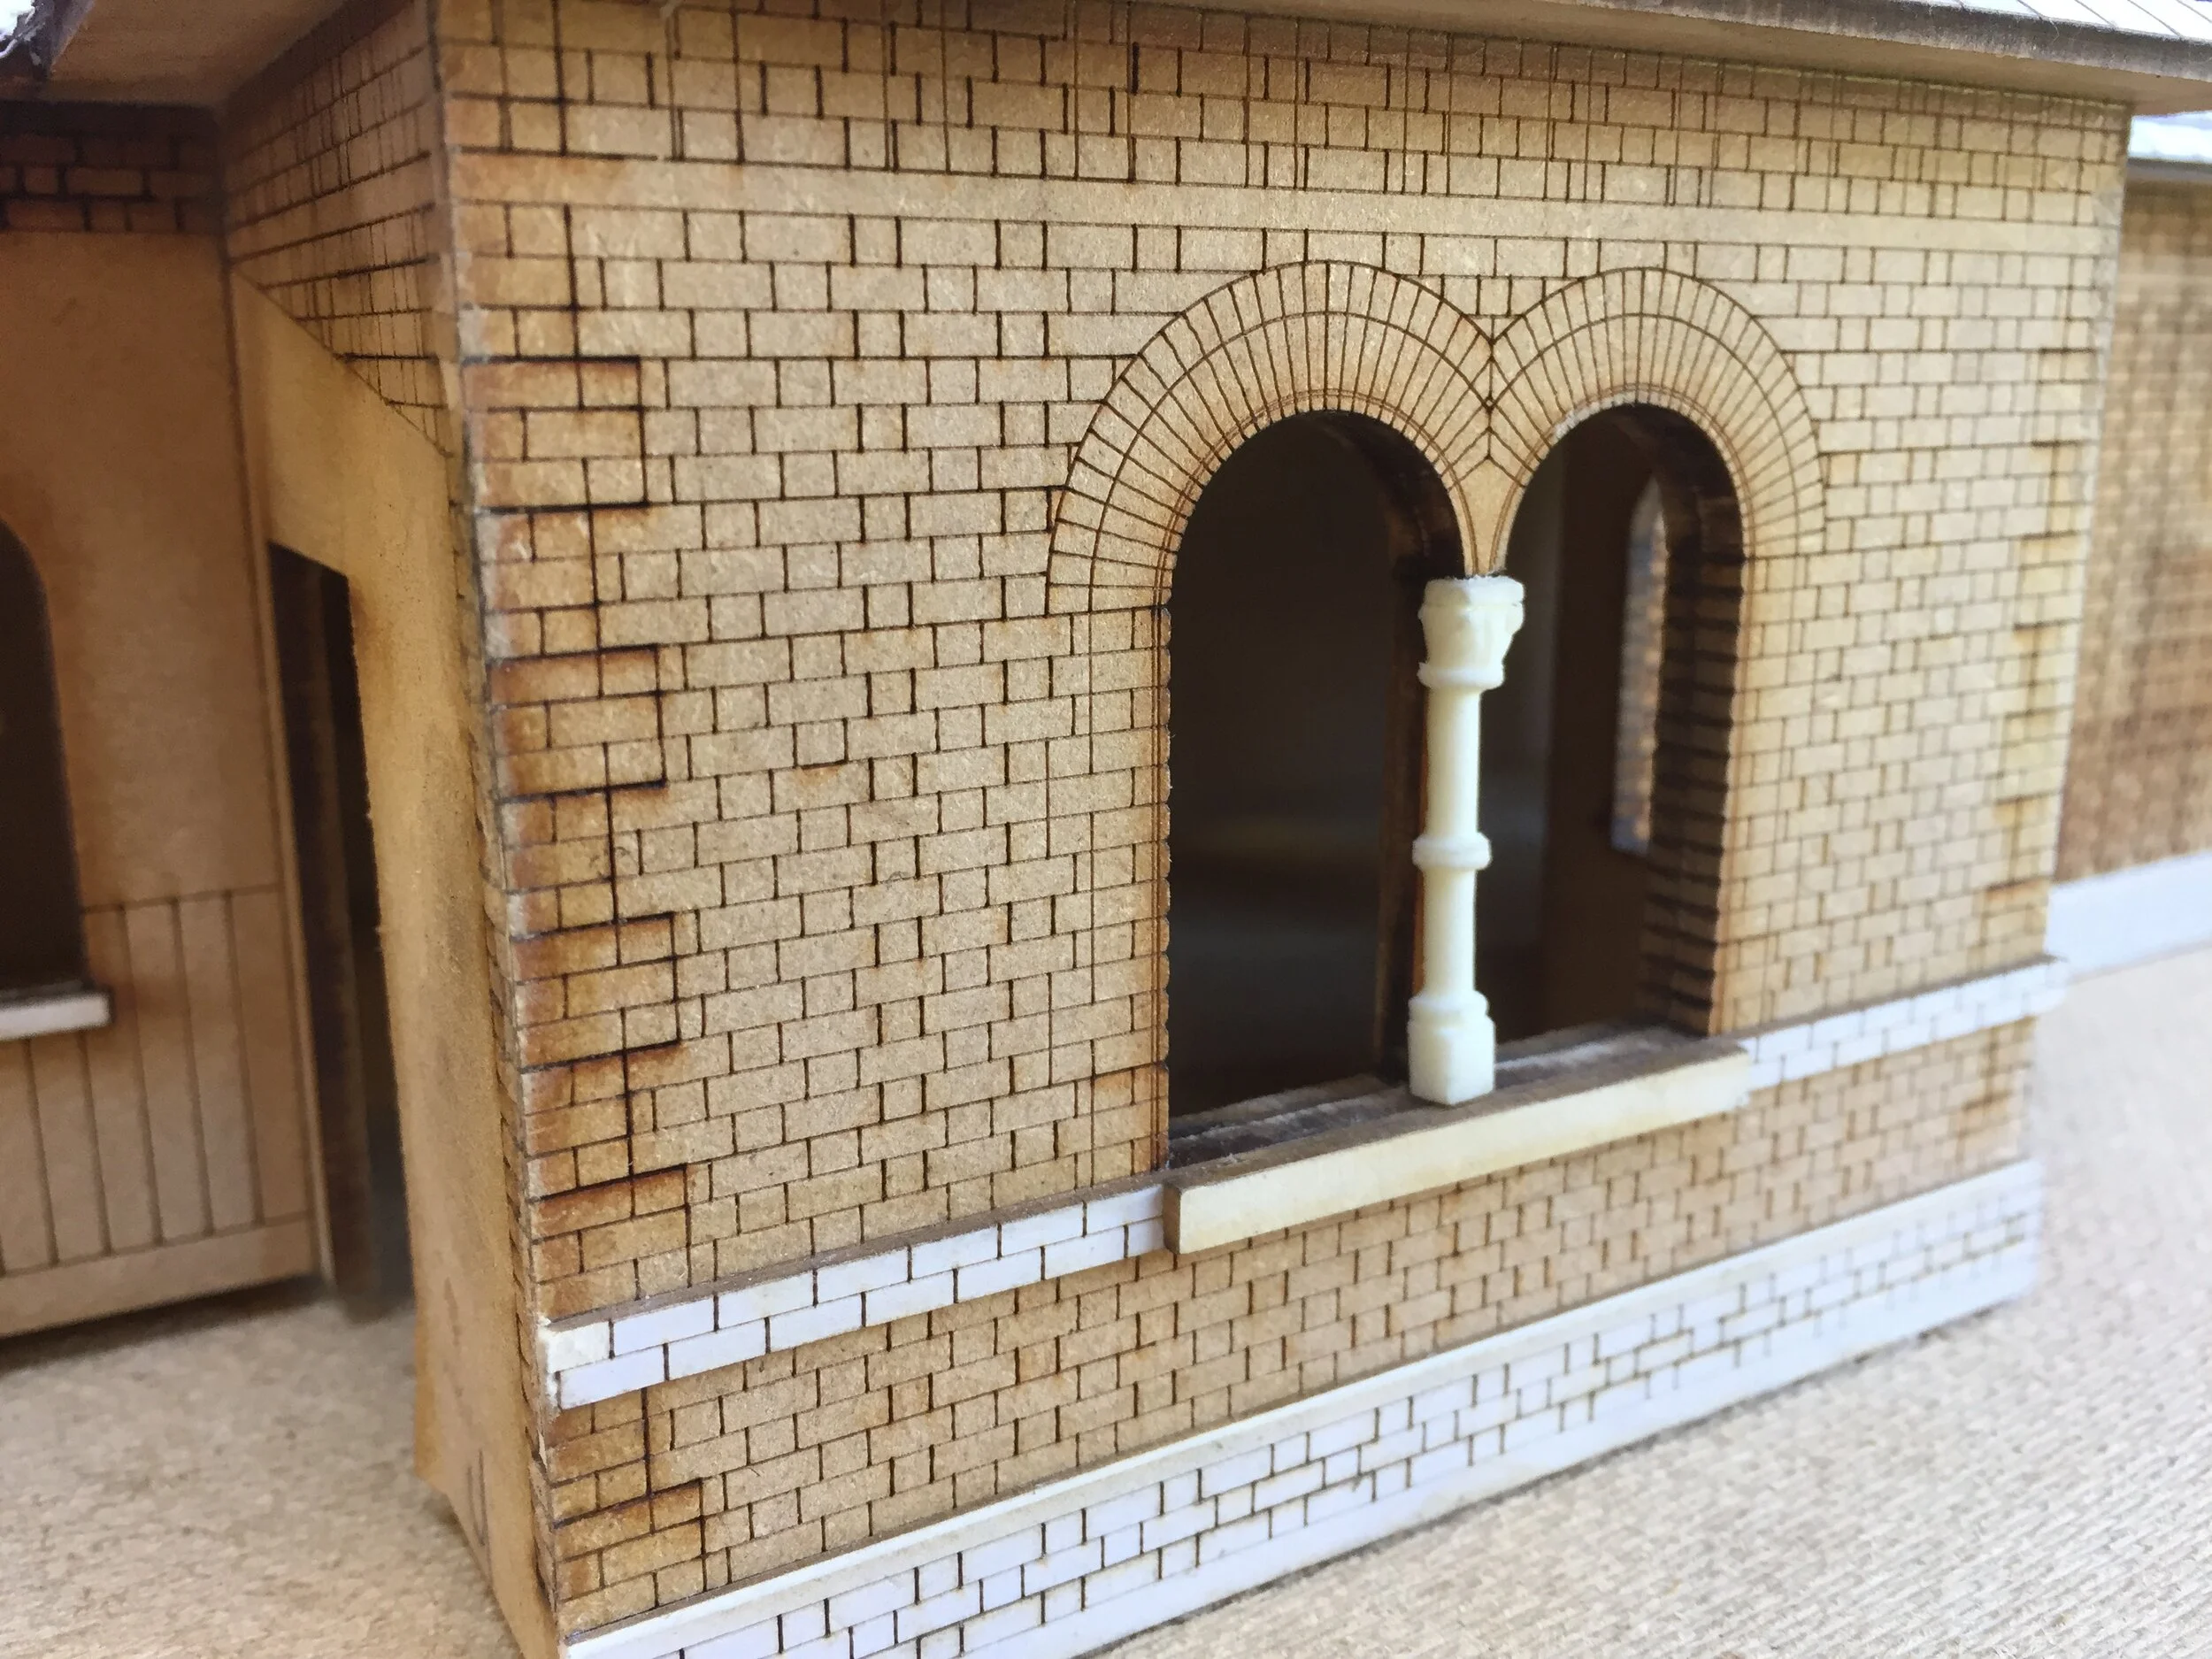
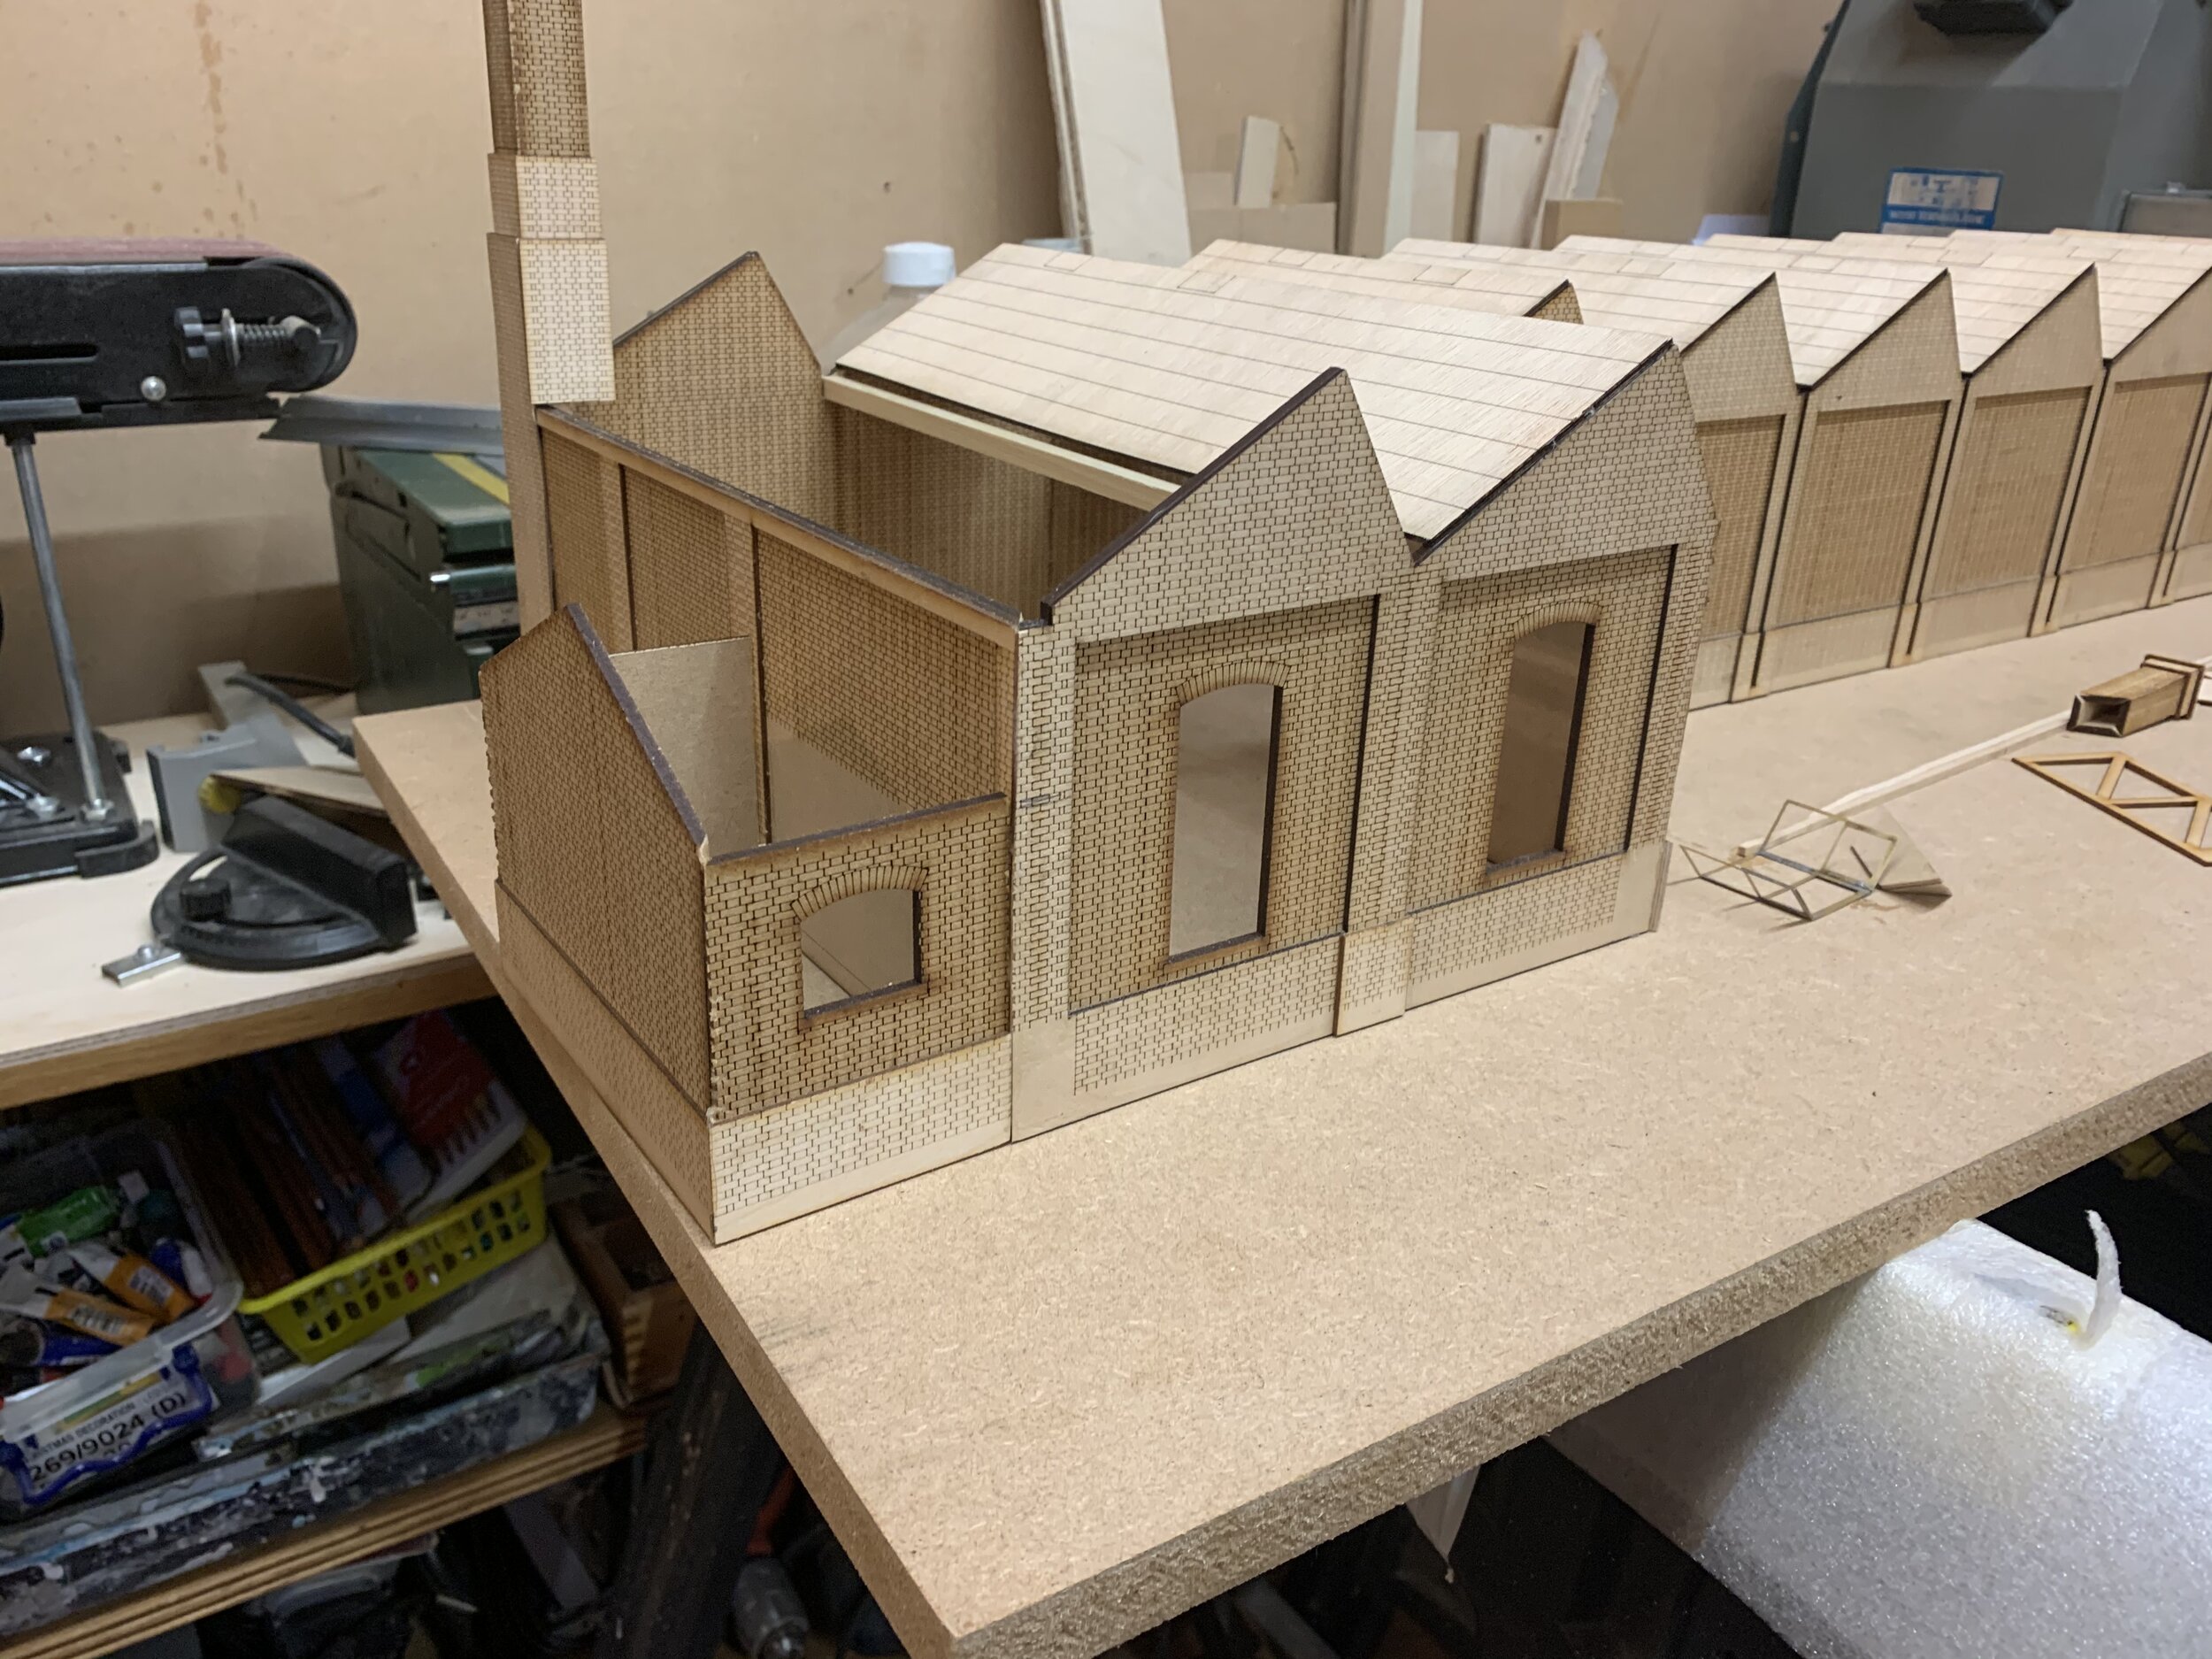
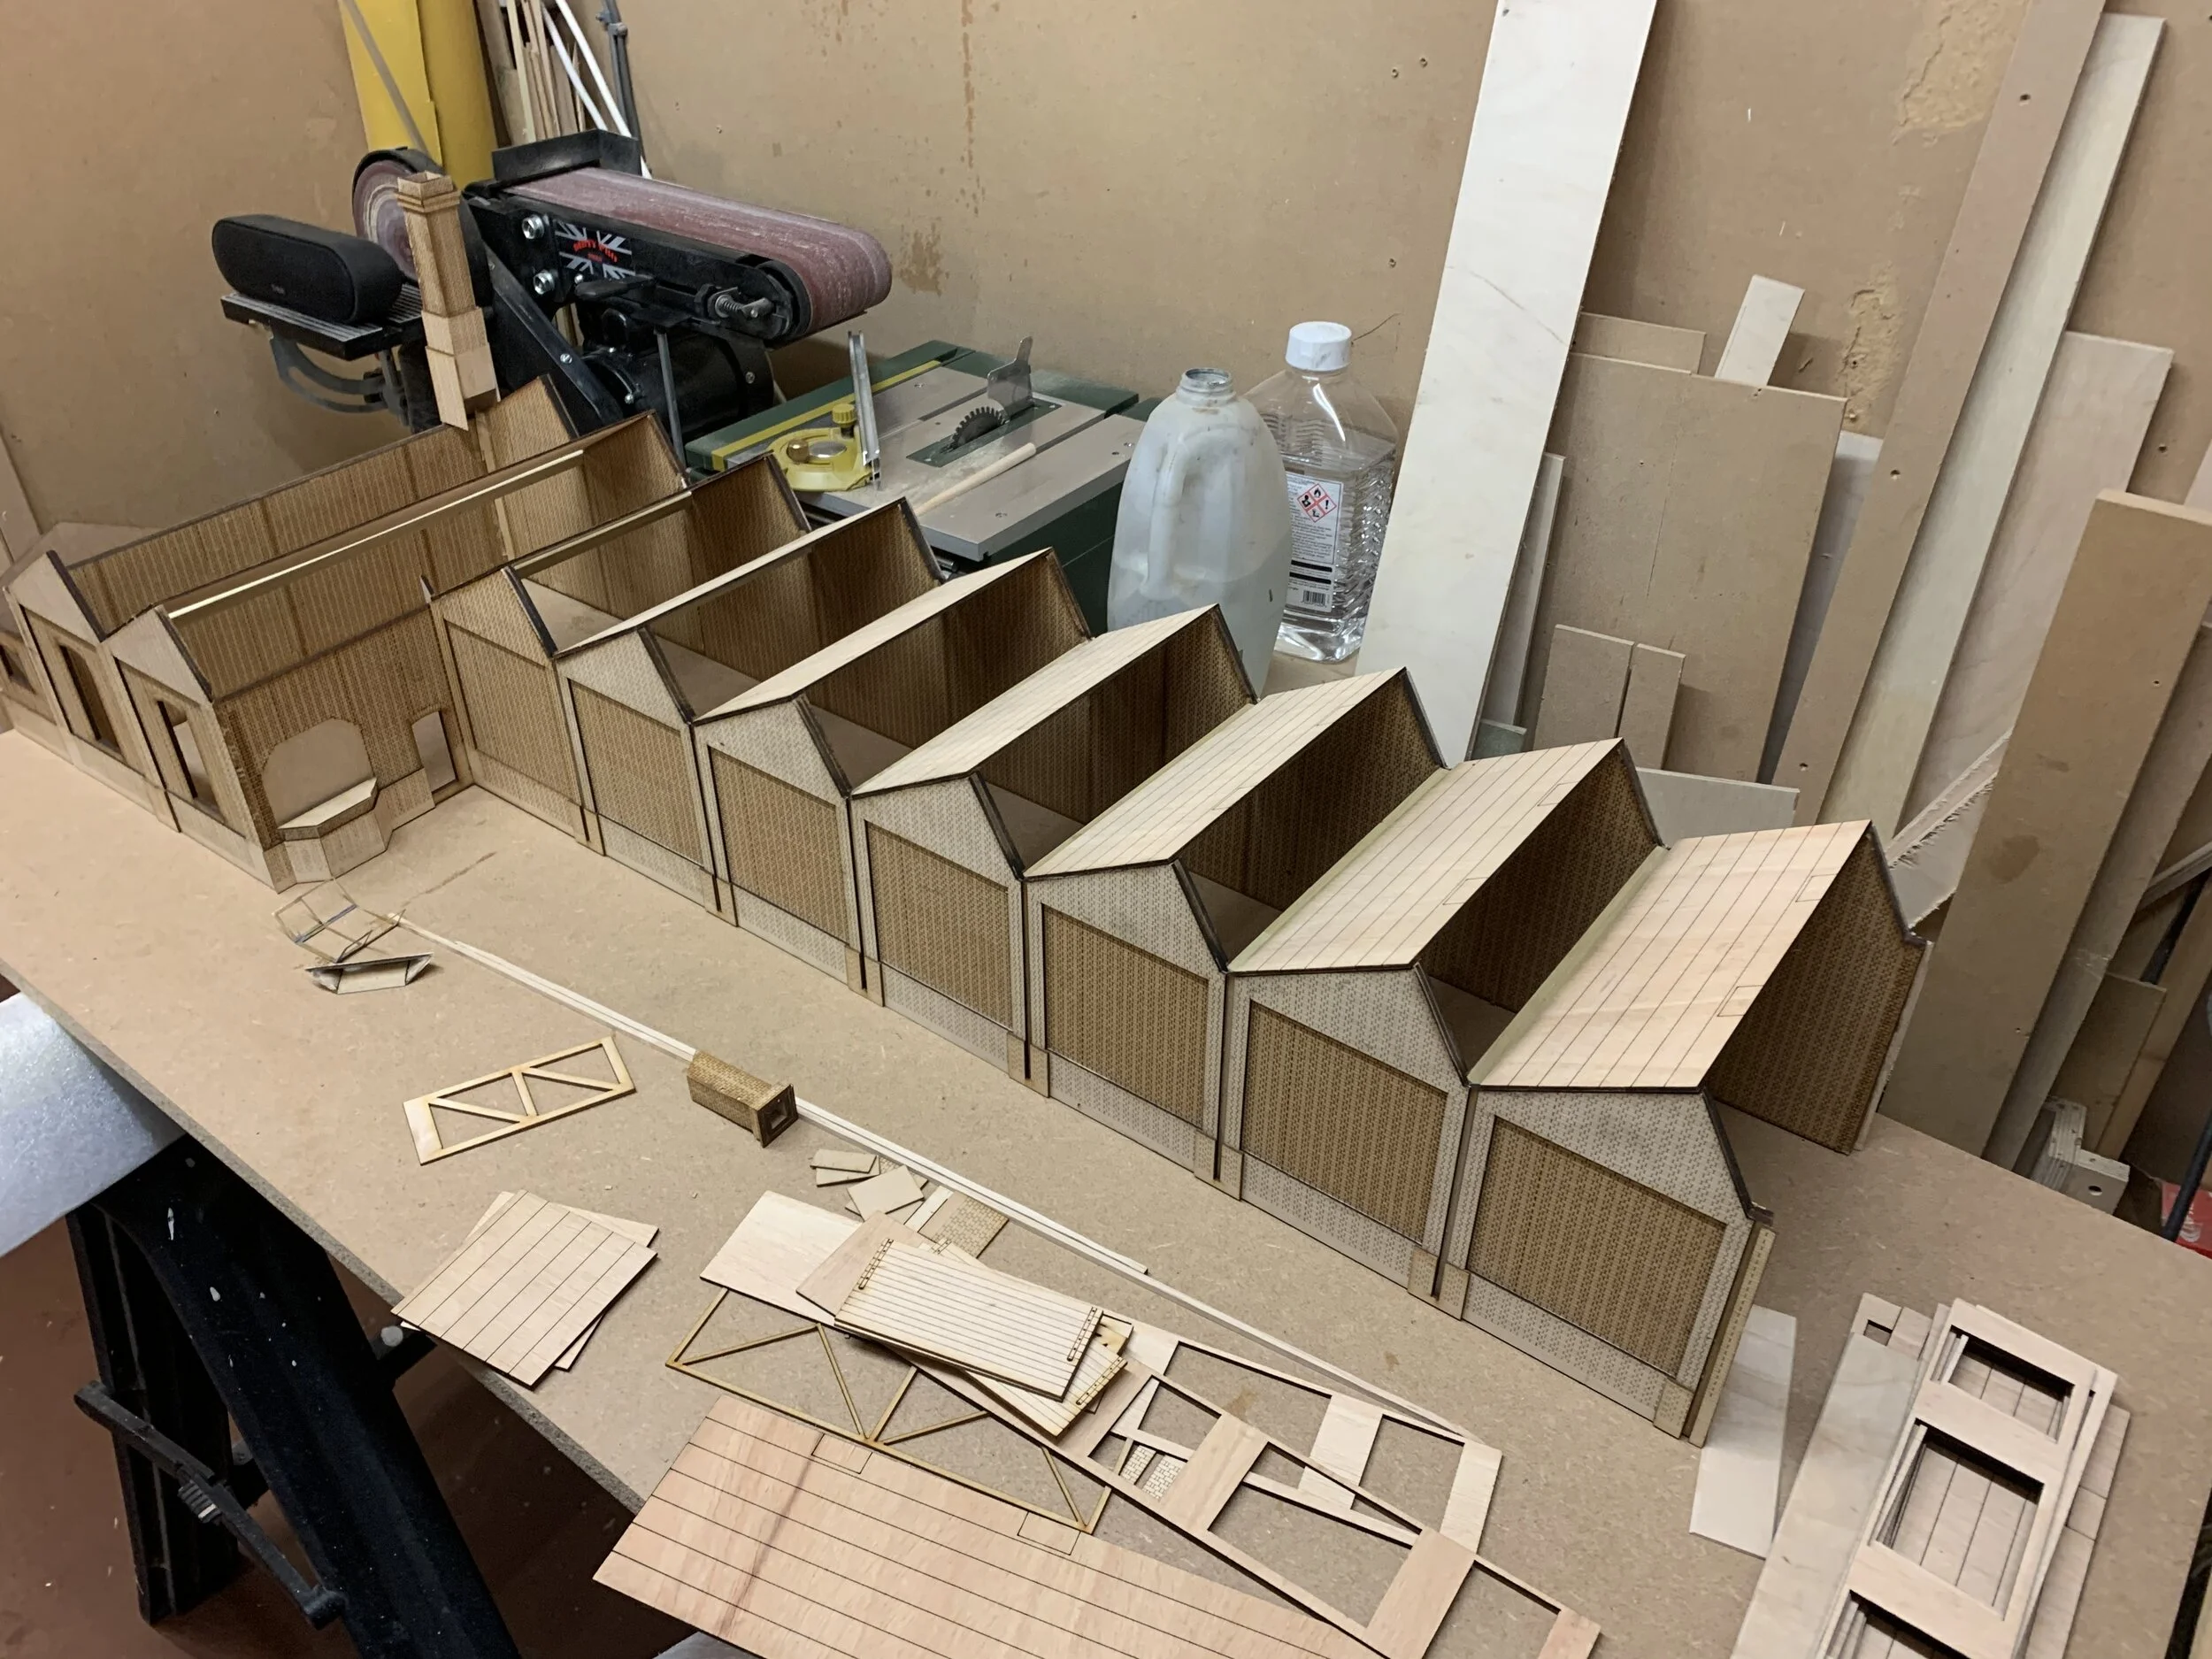
From the site remains, Derek Hore, an expert on Berkeley Station history, was able to provide me with a survey of the remaining footings, along with many photos of the building prior to demolition. From these I was able to produce my own AutoCAD drawings of all the elevations. These were then used to laser cut the walls and roof sections out of 3mm MDF. The brickwork and arches were engraved into the walls and doors and window openings cut out in one go. I also engraved short vertical lines at the tops of the walls to guide me when it came to sticking on over 100 soffit board brackets – just hoping these lines wouldn’t get covered over when I came to paint the brickwork! The brackets themselves are also laser cut from 3mm MDF, the idea being that they would be painted before gluing onto the model. To do this I stuck them down in long rows to a scrap strip of MDF and sprayed them with primer followed by Halfords Rover Sandalwood Beige which sounds a hideous colour for a car, but is a very close match to the colour swatch of ‘Denby Pottery Cream’ in ‘Midland Style’ by George Dow. 

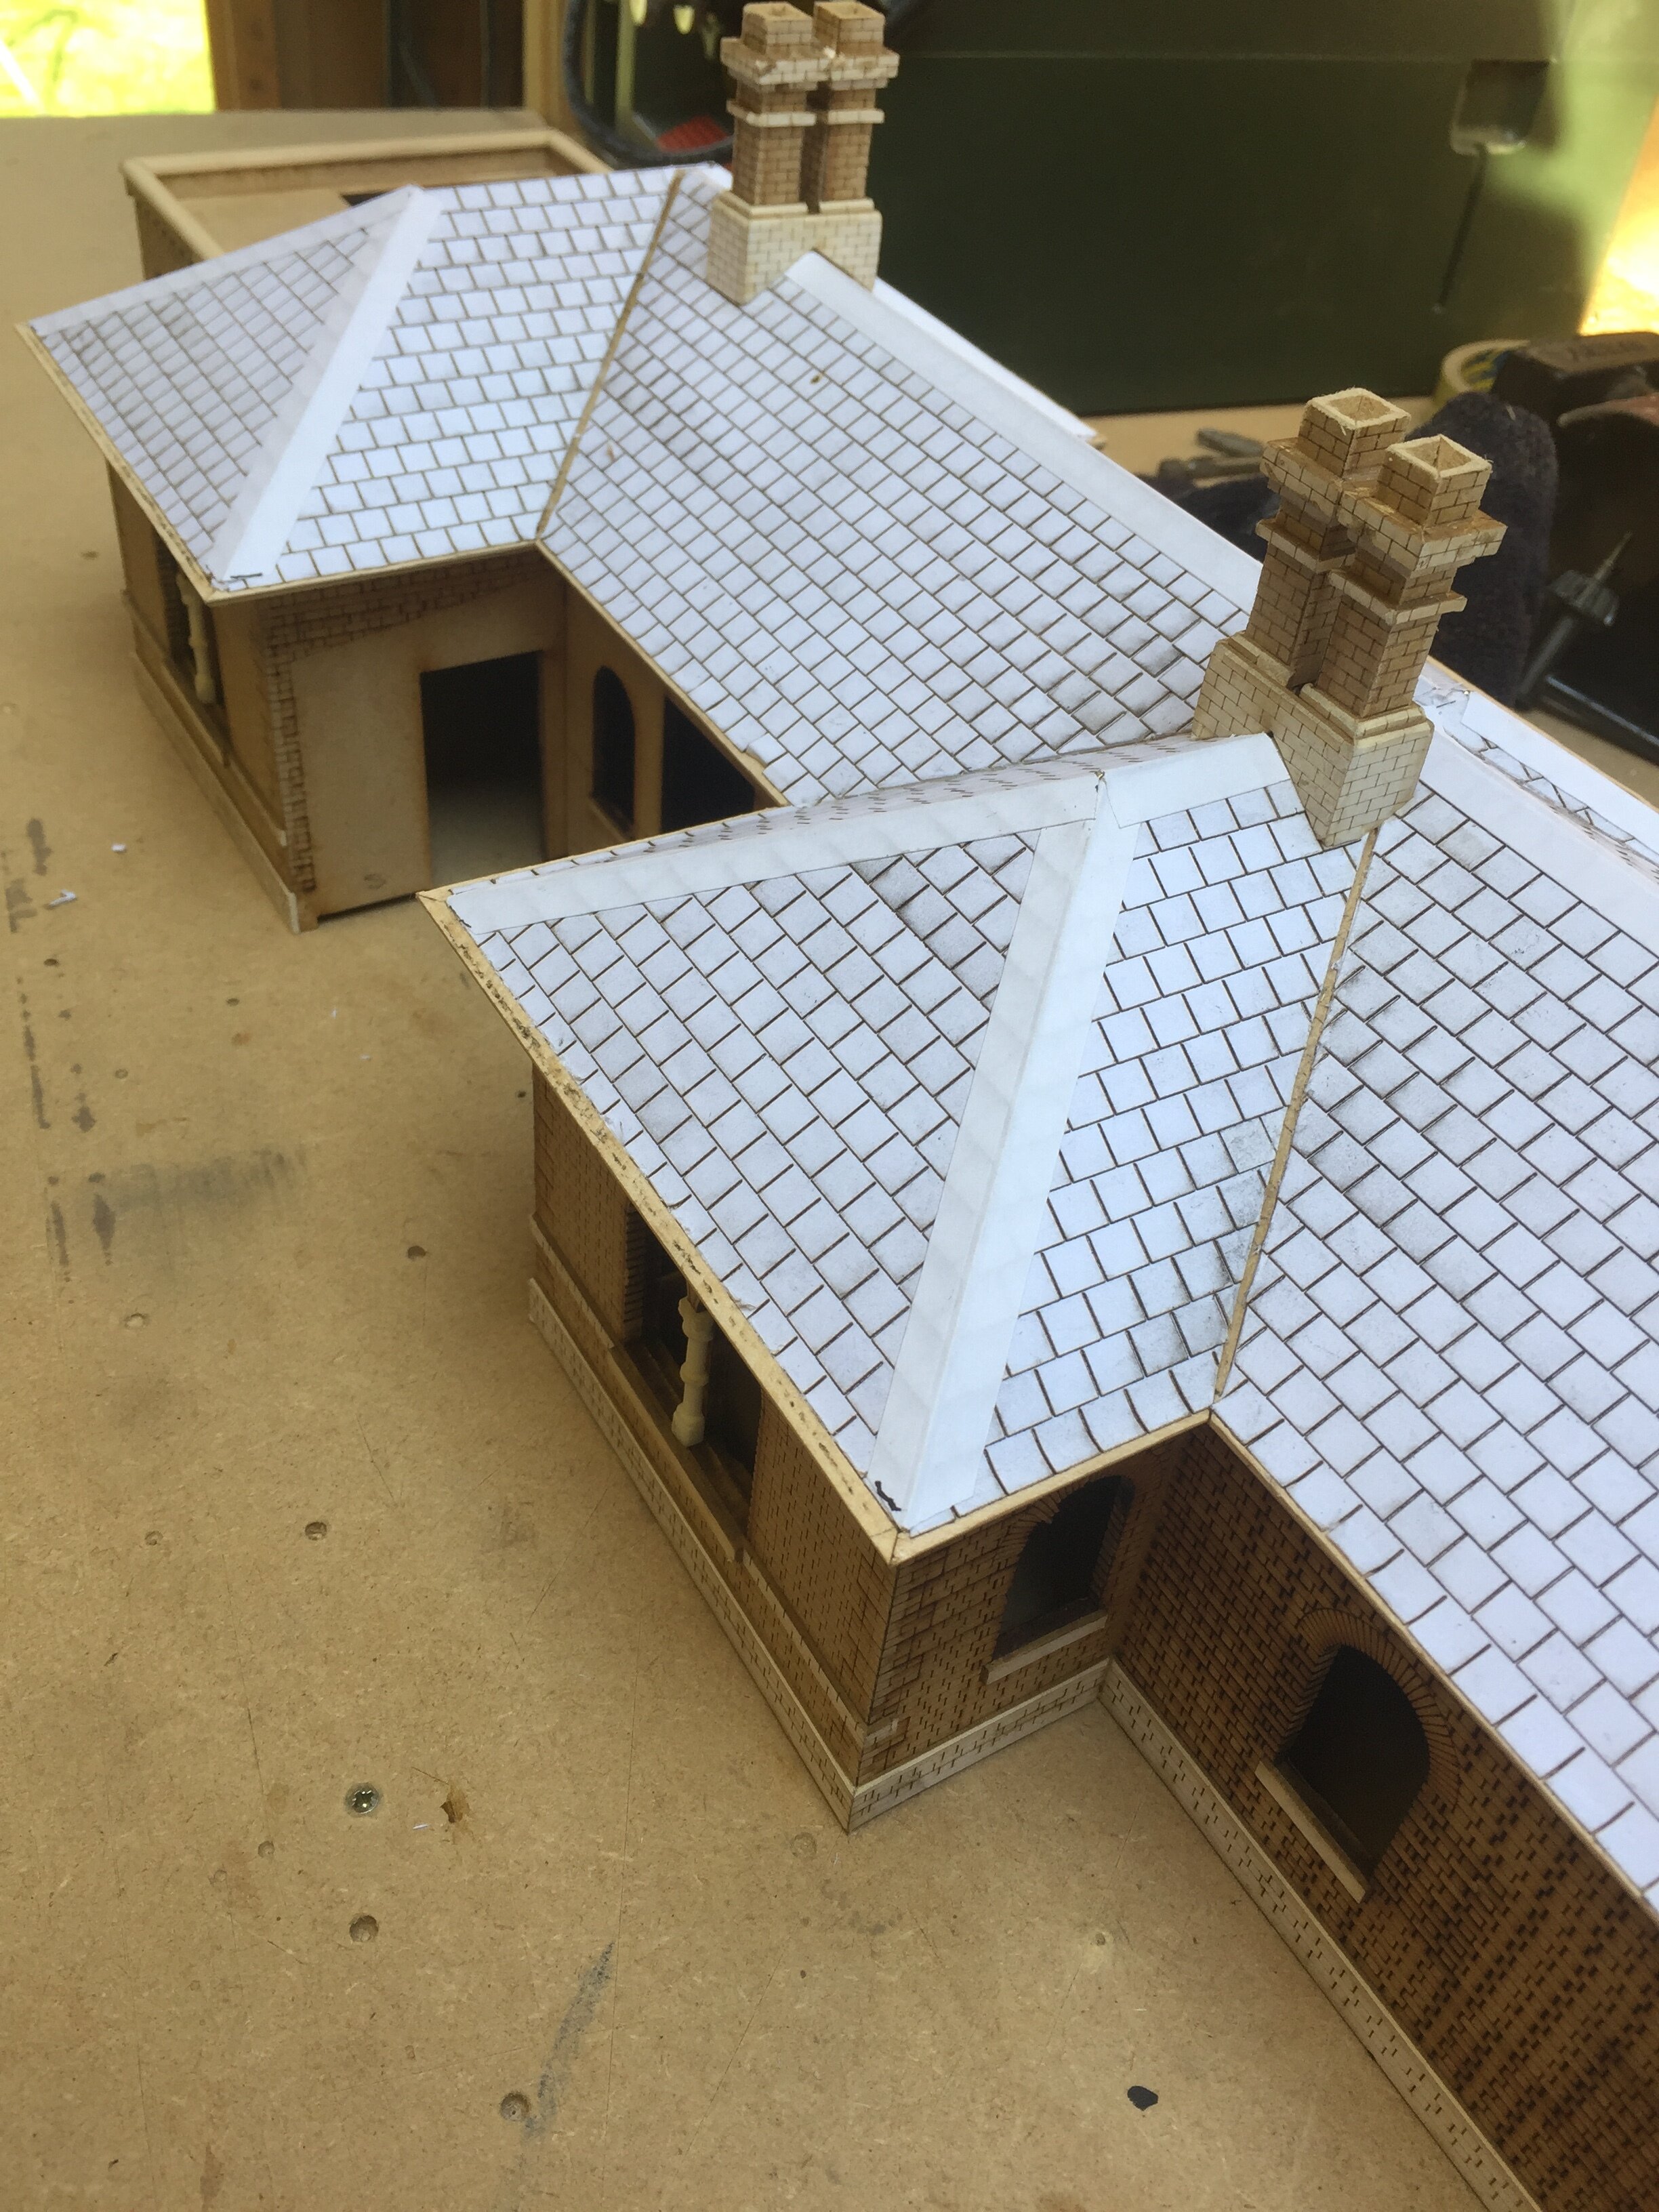
I decided to make the building itself in two halves; the lower half being the walls up to, but not including, the soffit boards. The top half being the soffit boards, roof and chimneys, only being brought together once the soffit boards were sprayed in the same Halfords Beige.

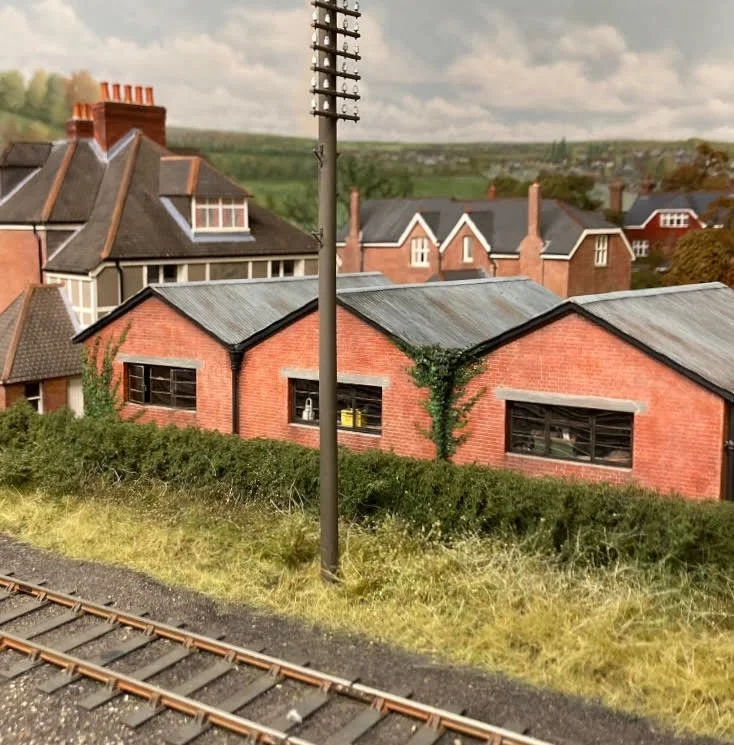
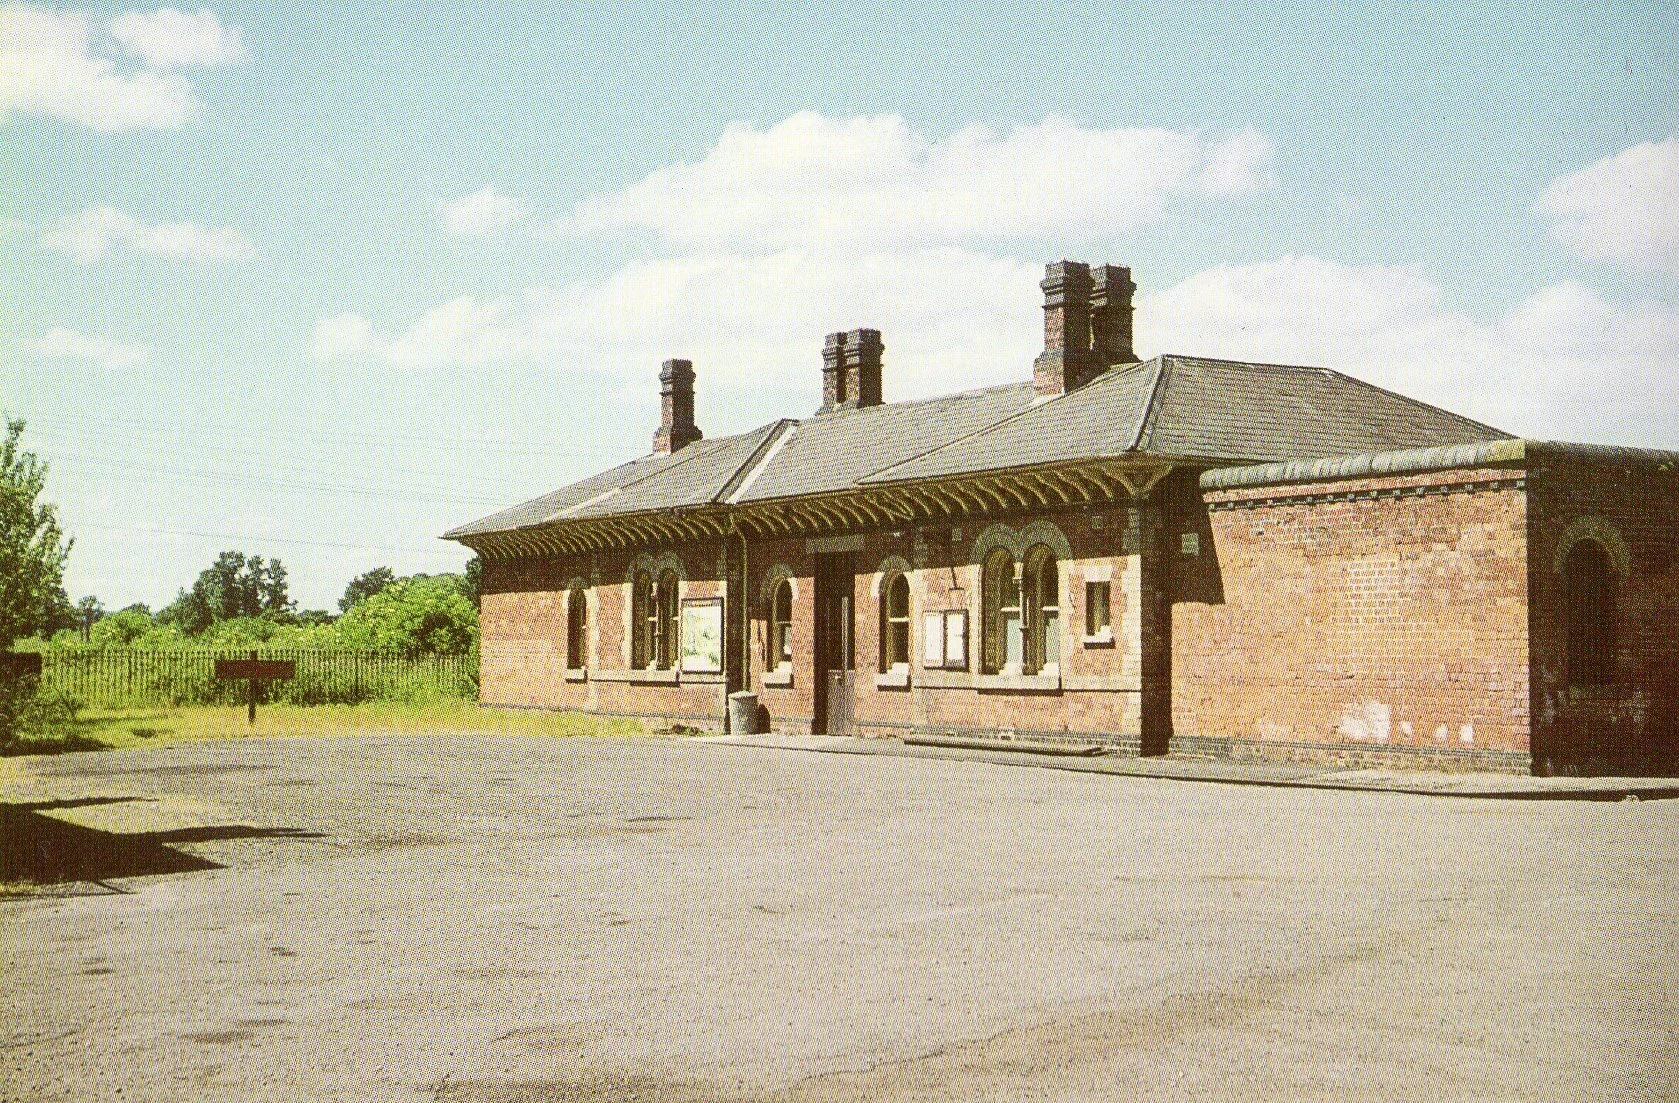
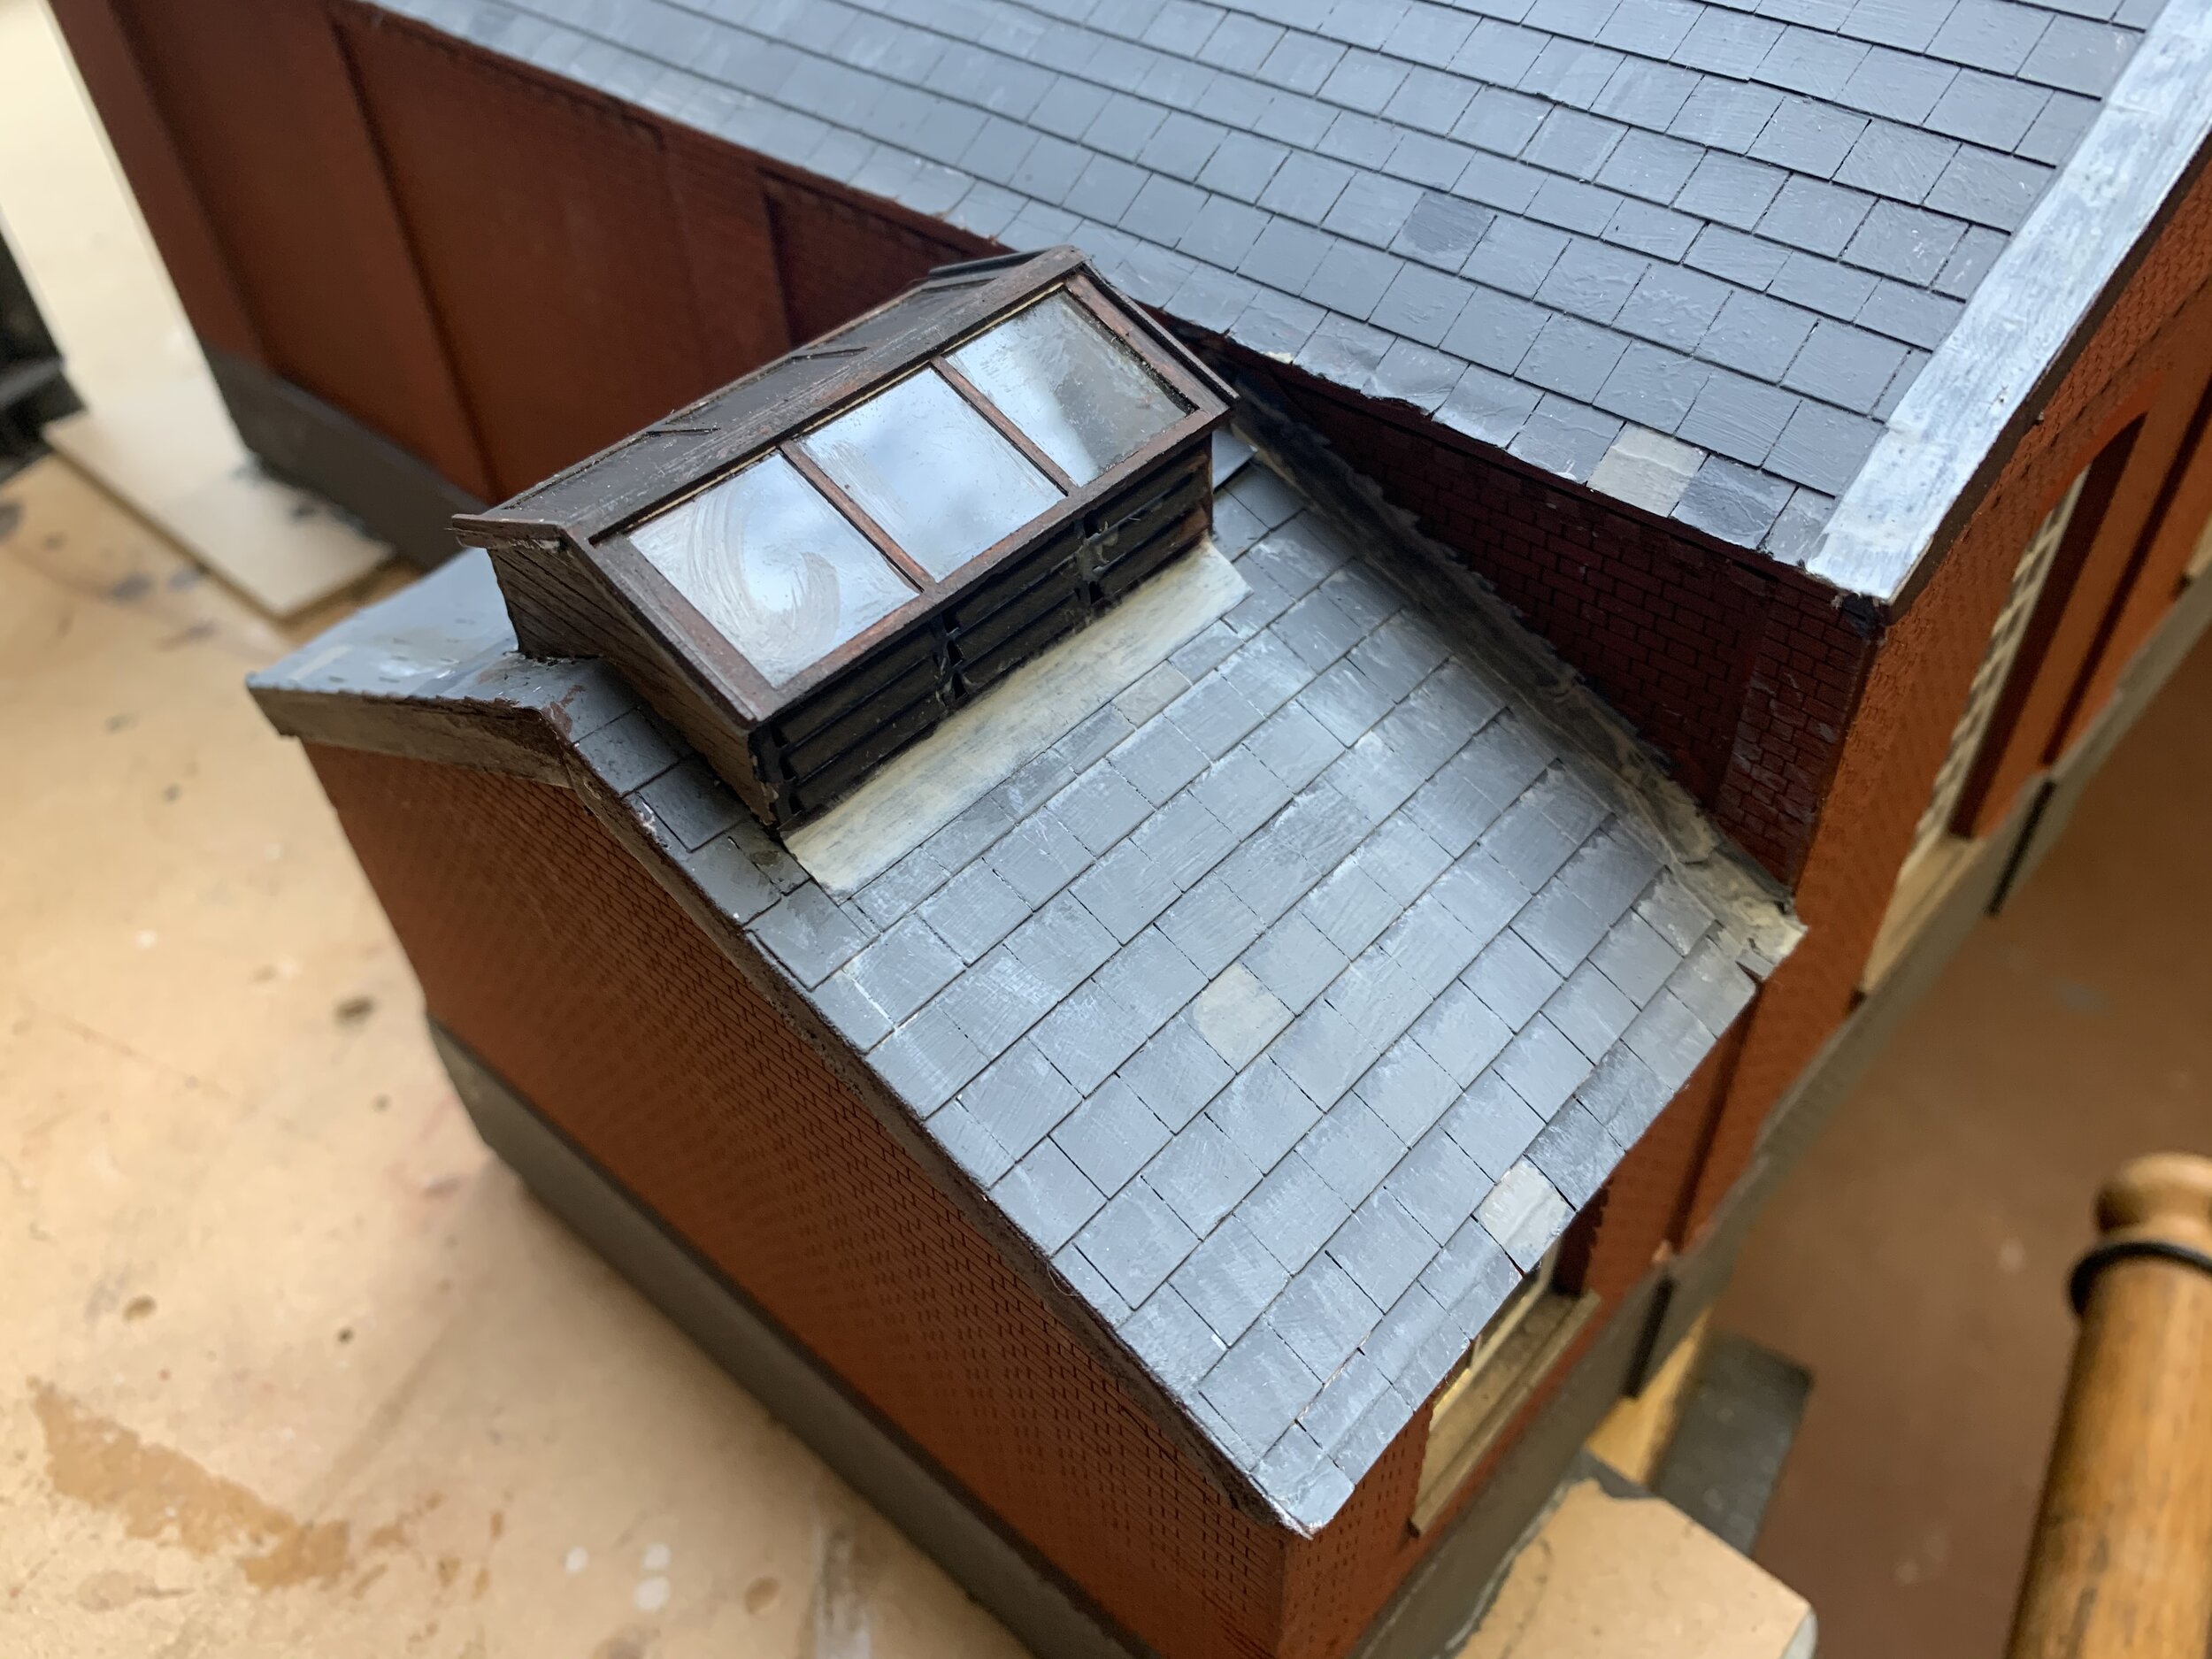
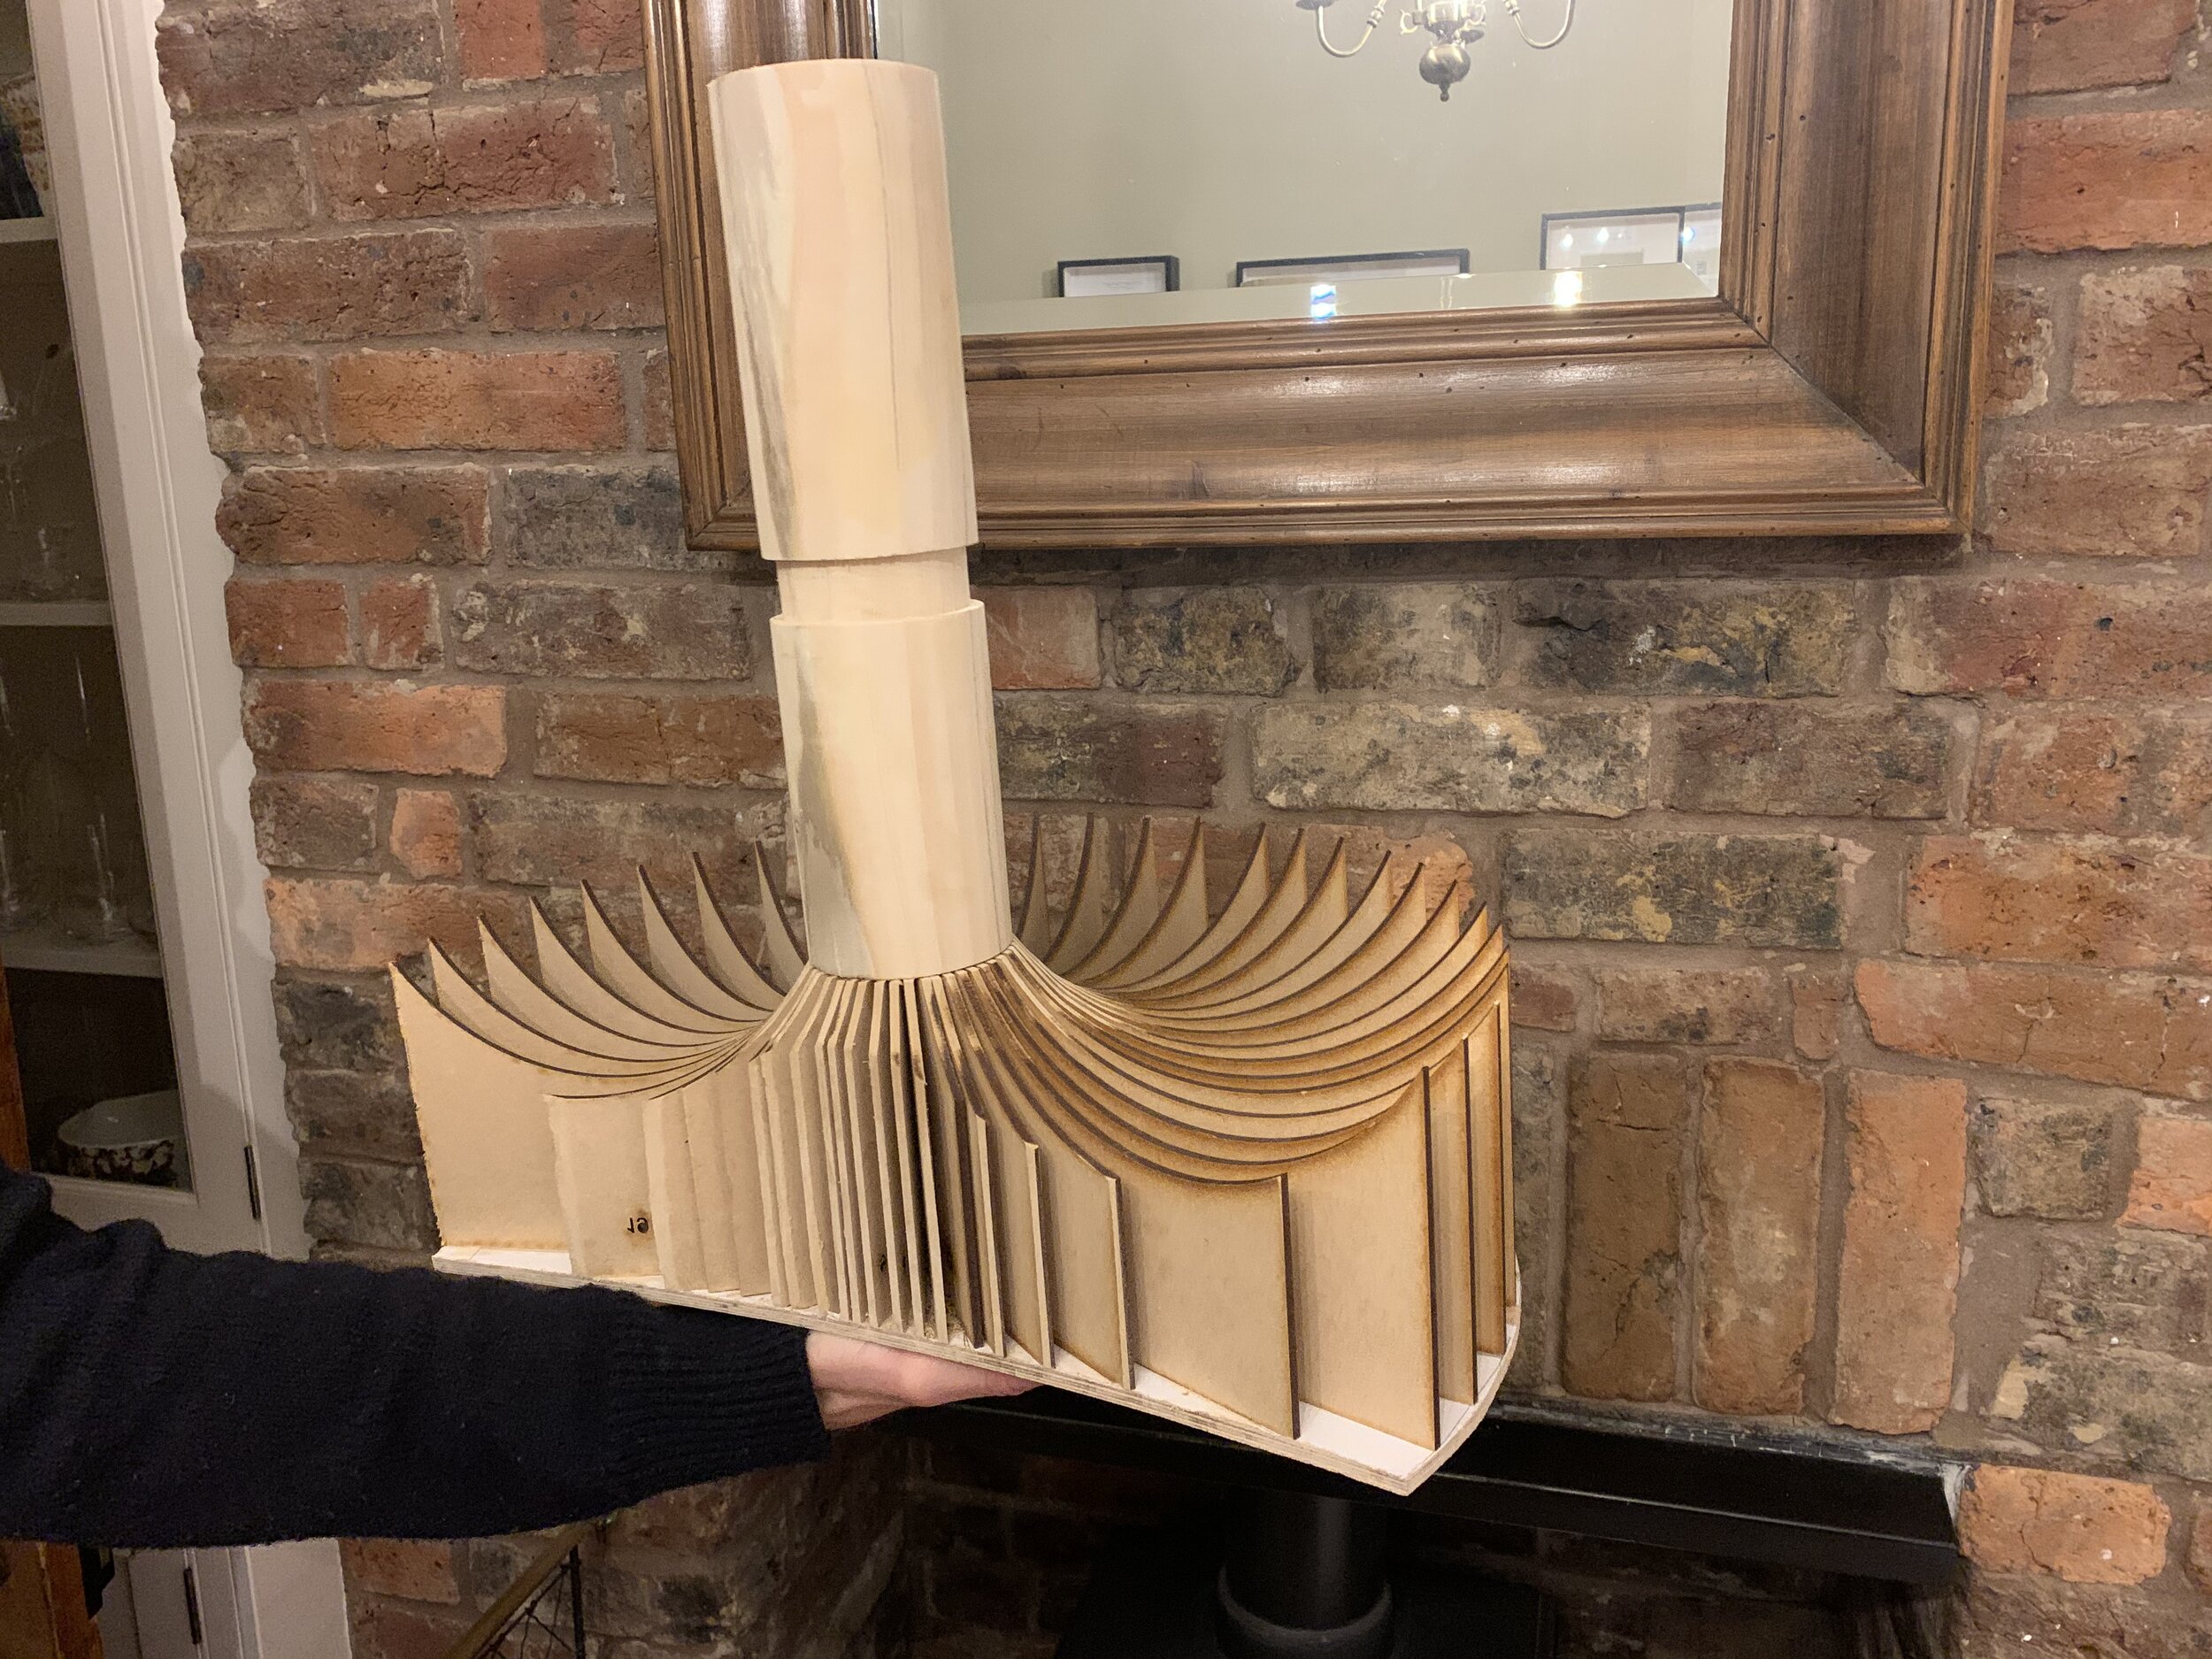
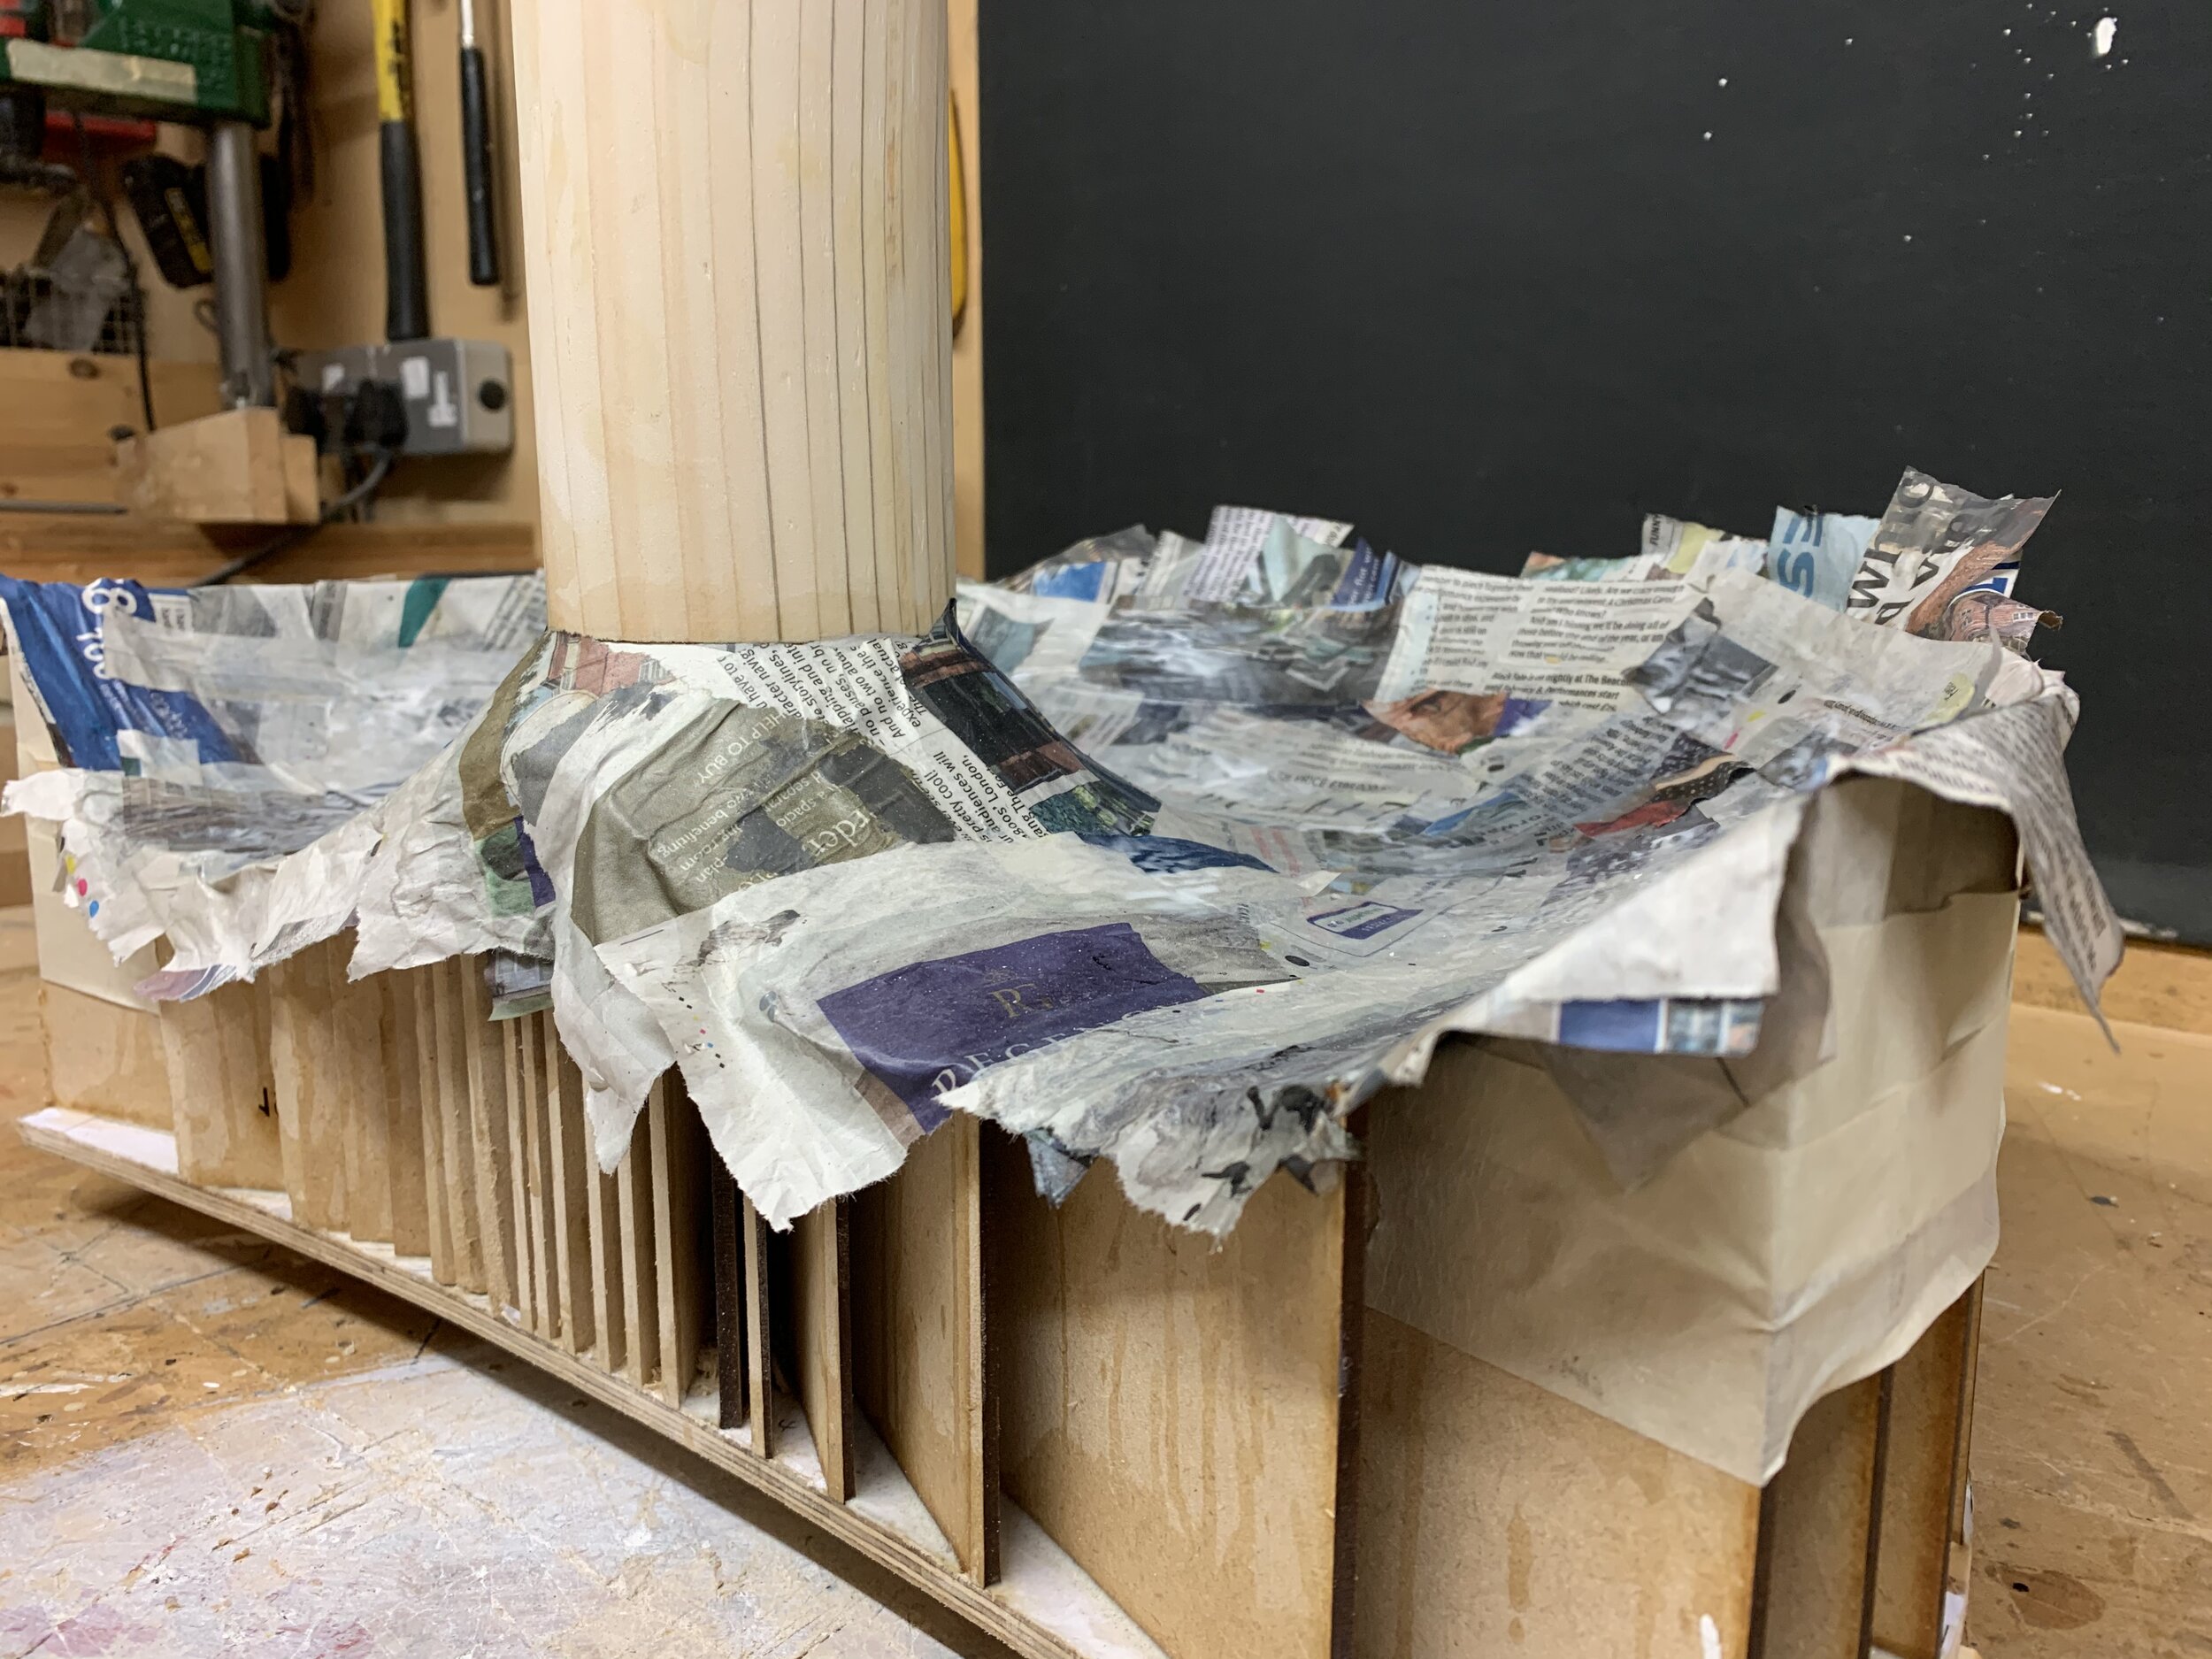
The roof itself comprises no less than five hipped ends and a central portion joining them all, so producing the angles of the ridges and valleys was a challenge but made considerably easier by being able to draw and laser cut the parts very accurately. I also scribed guide-lines on the faces of the roof parts to make sticking and aligning the slates easier later on. The slates themselves were represented by strips of self-adhesive paper with laser cuts made at slate-width intervals and then stuck down. Lead-work on the ridges is again self-adhesive paper cut to 7mm wide strips but with lengths of brass wire stuck centrally down the back of the strips before being stuck down and folded over the roof ridges. This brass wire gives a representation of the ‘broom handle’ timber moulding that is fitted underneath real lead. Apparently the original ridges were covered with an elaborate style of extra-long ridge tile but this information unfortunately came to light a bit too late for my build. Paper was also used to add the flashing around the chimney stacks. I will be interested to see how these roof details work out when the real thing is built, as some junctions of chimney/ridge/valley/flashing are quite complicated! The roof was first sprayed with Halfords grey primer and then detail-painted using acrylics, with the flashing and ridges being picked out in very light grey, complete with lead staining running down the slates. A roof of this age and general excellent state of repair would be very unlikely to have any broken, slipped or missing slates so I’ve resisted the common urge to show any.

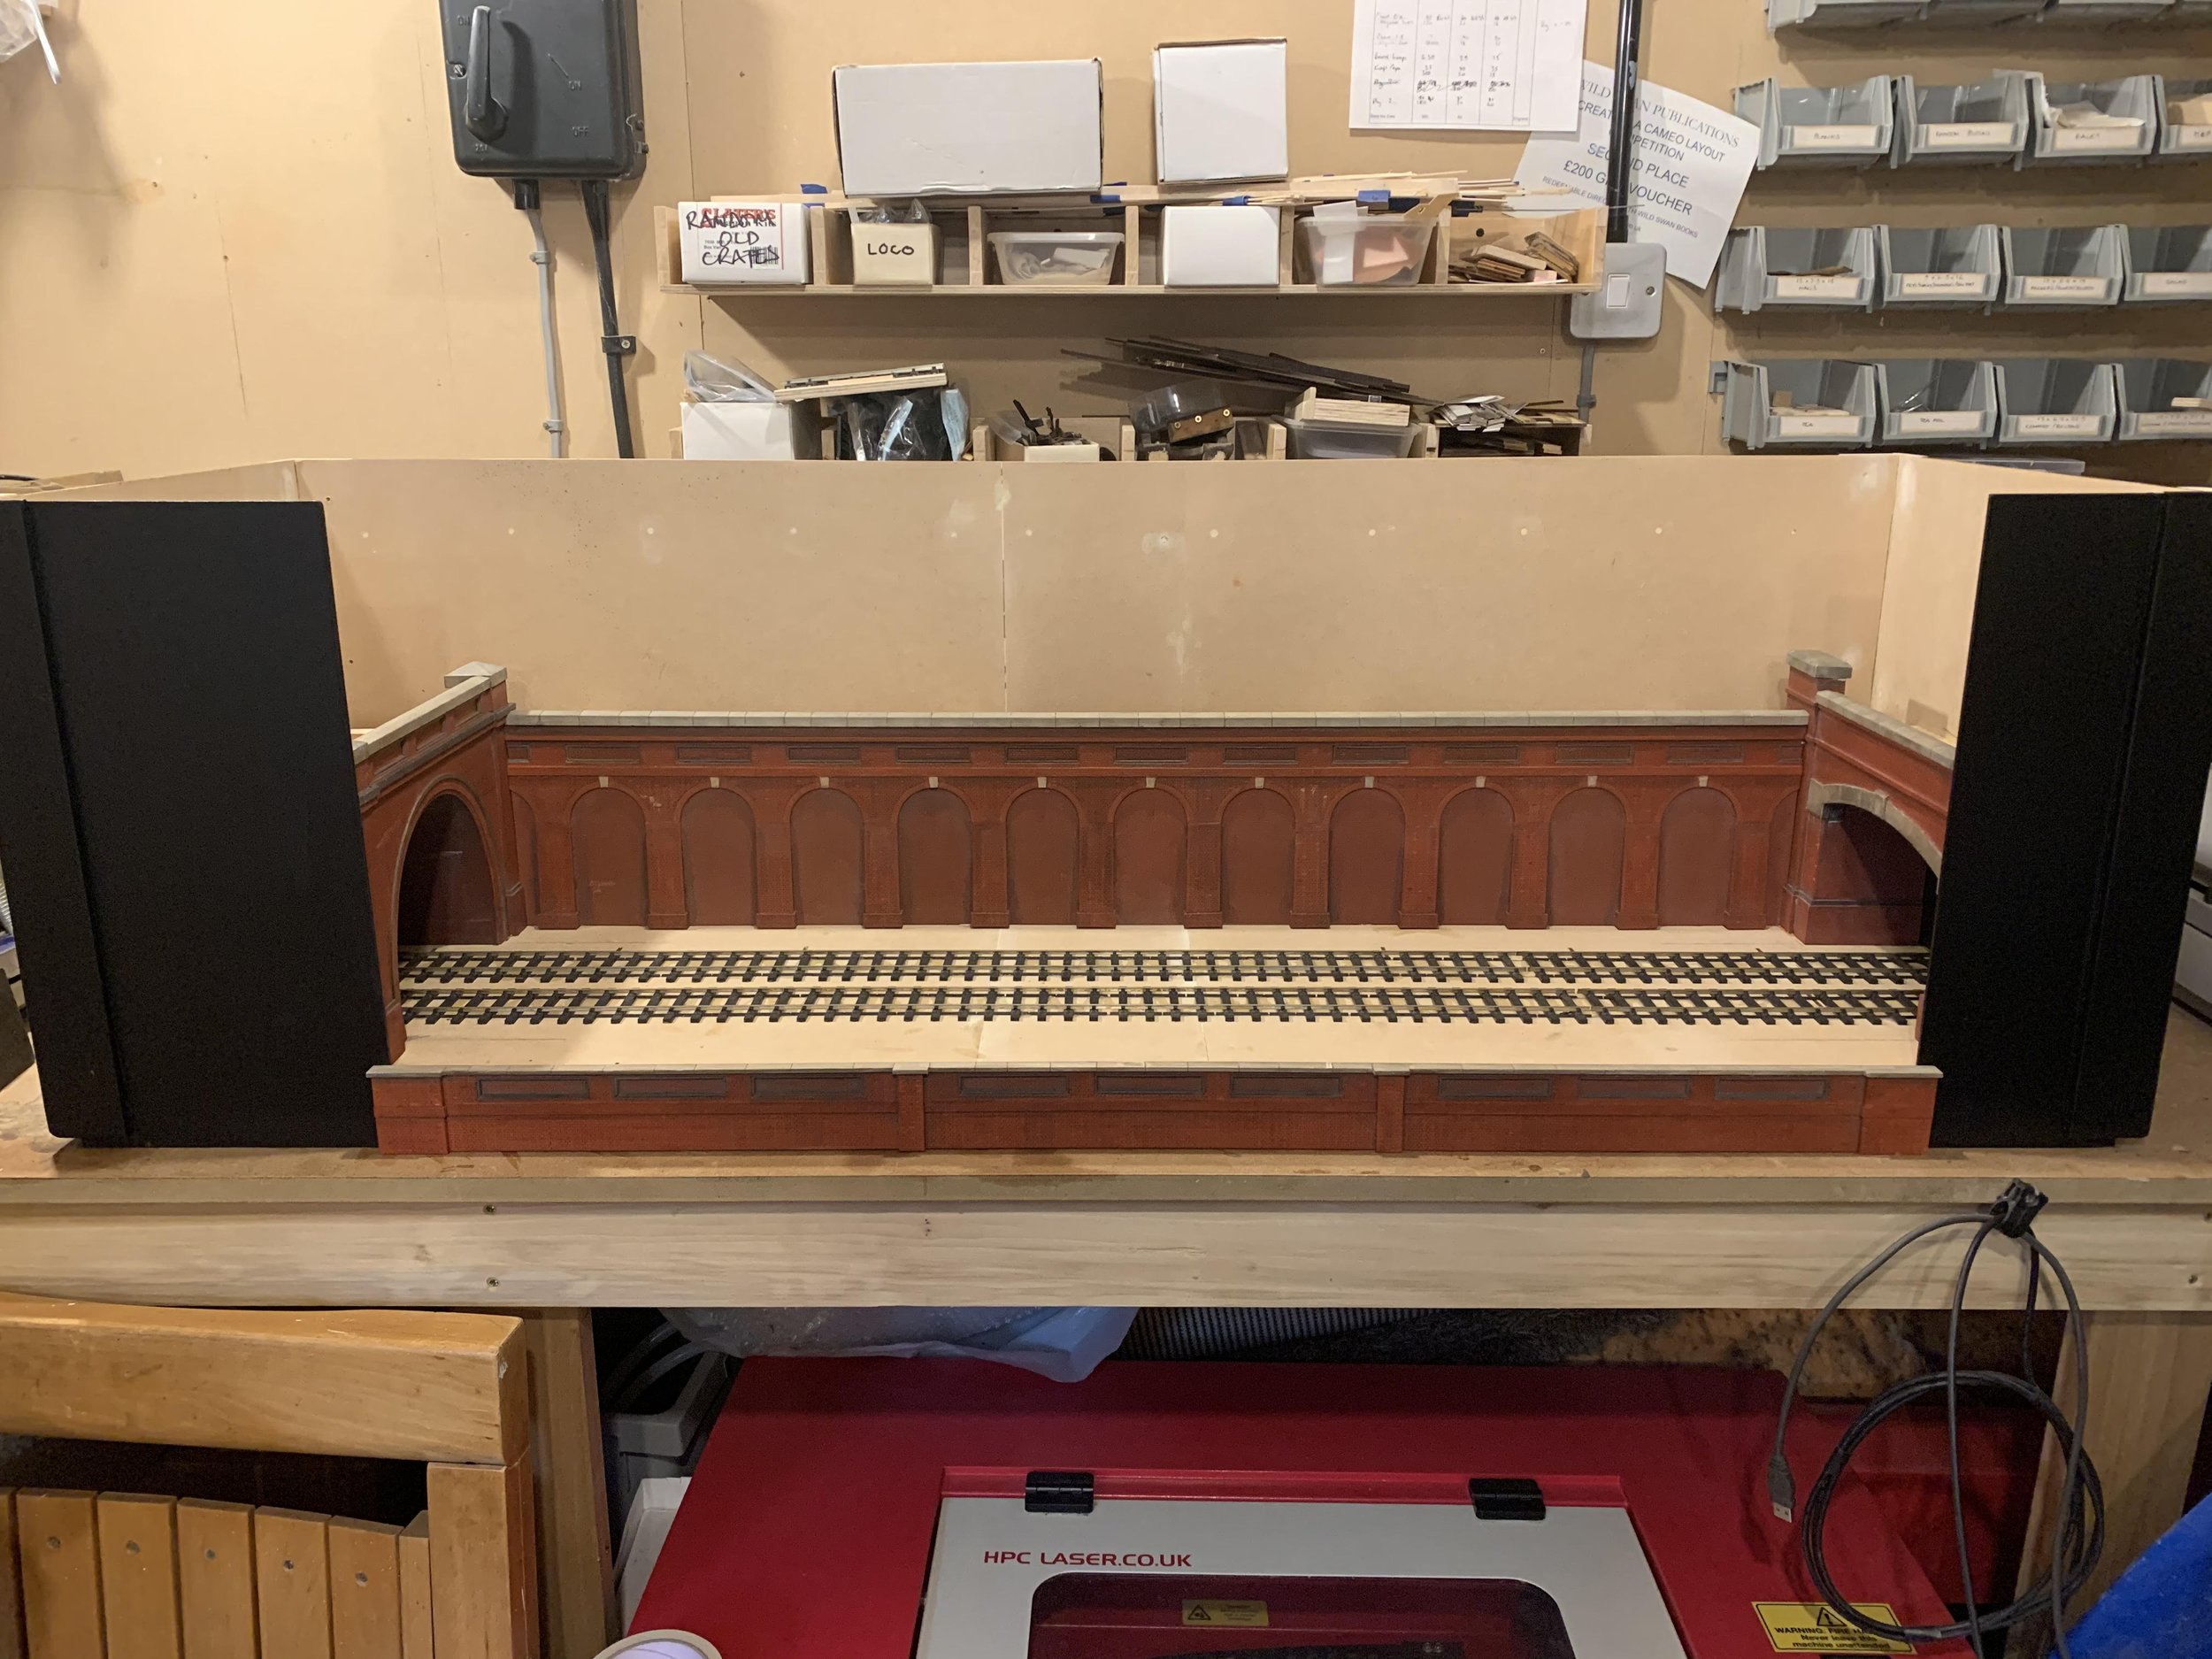
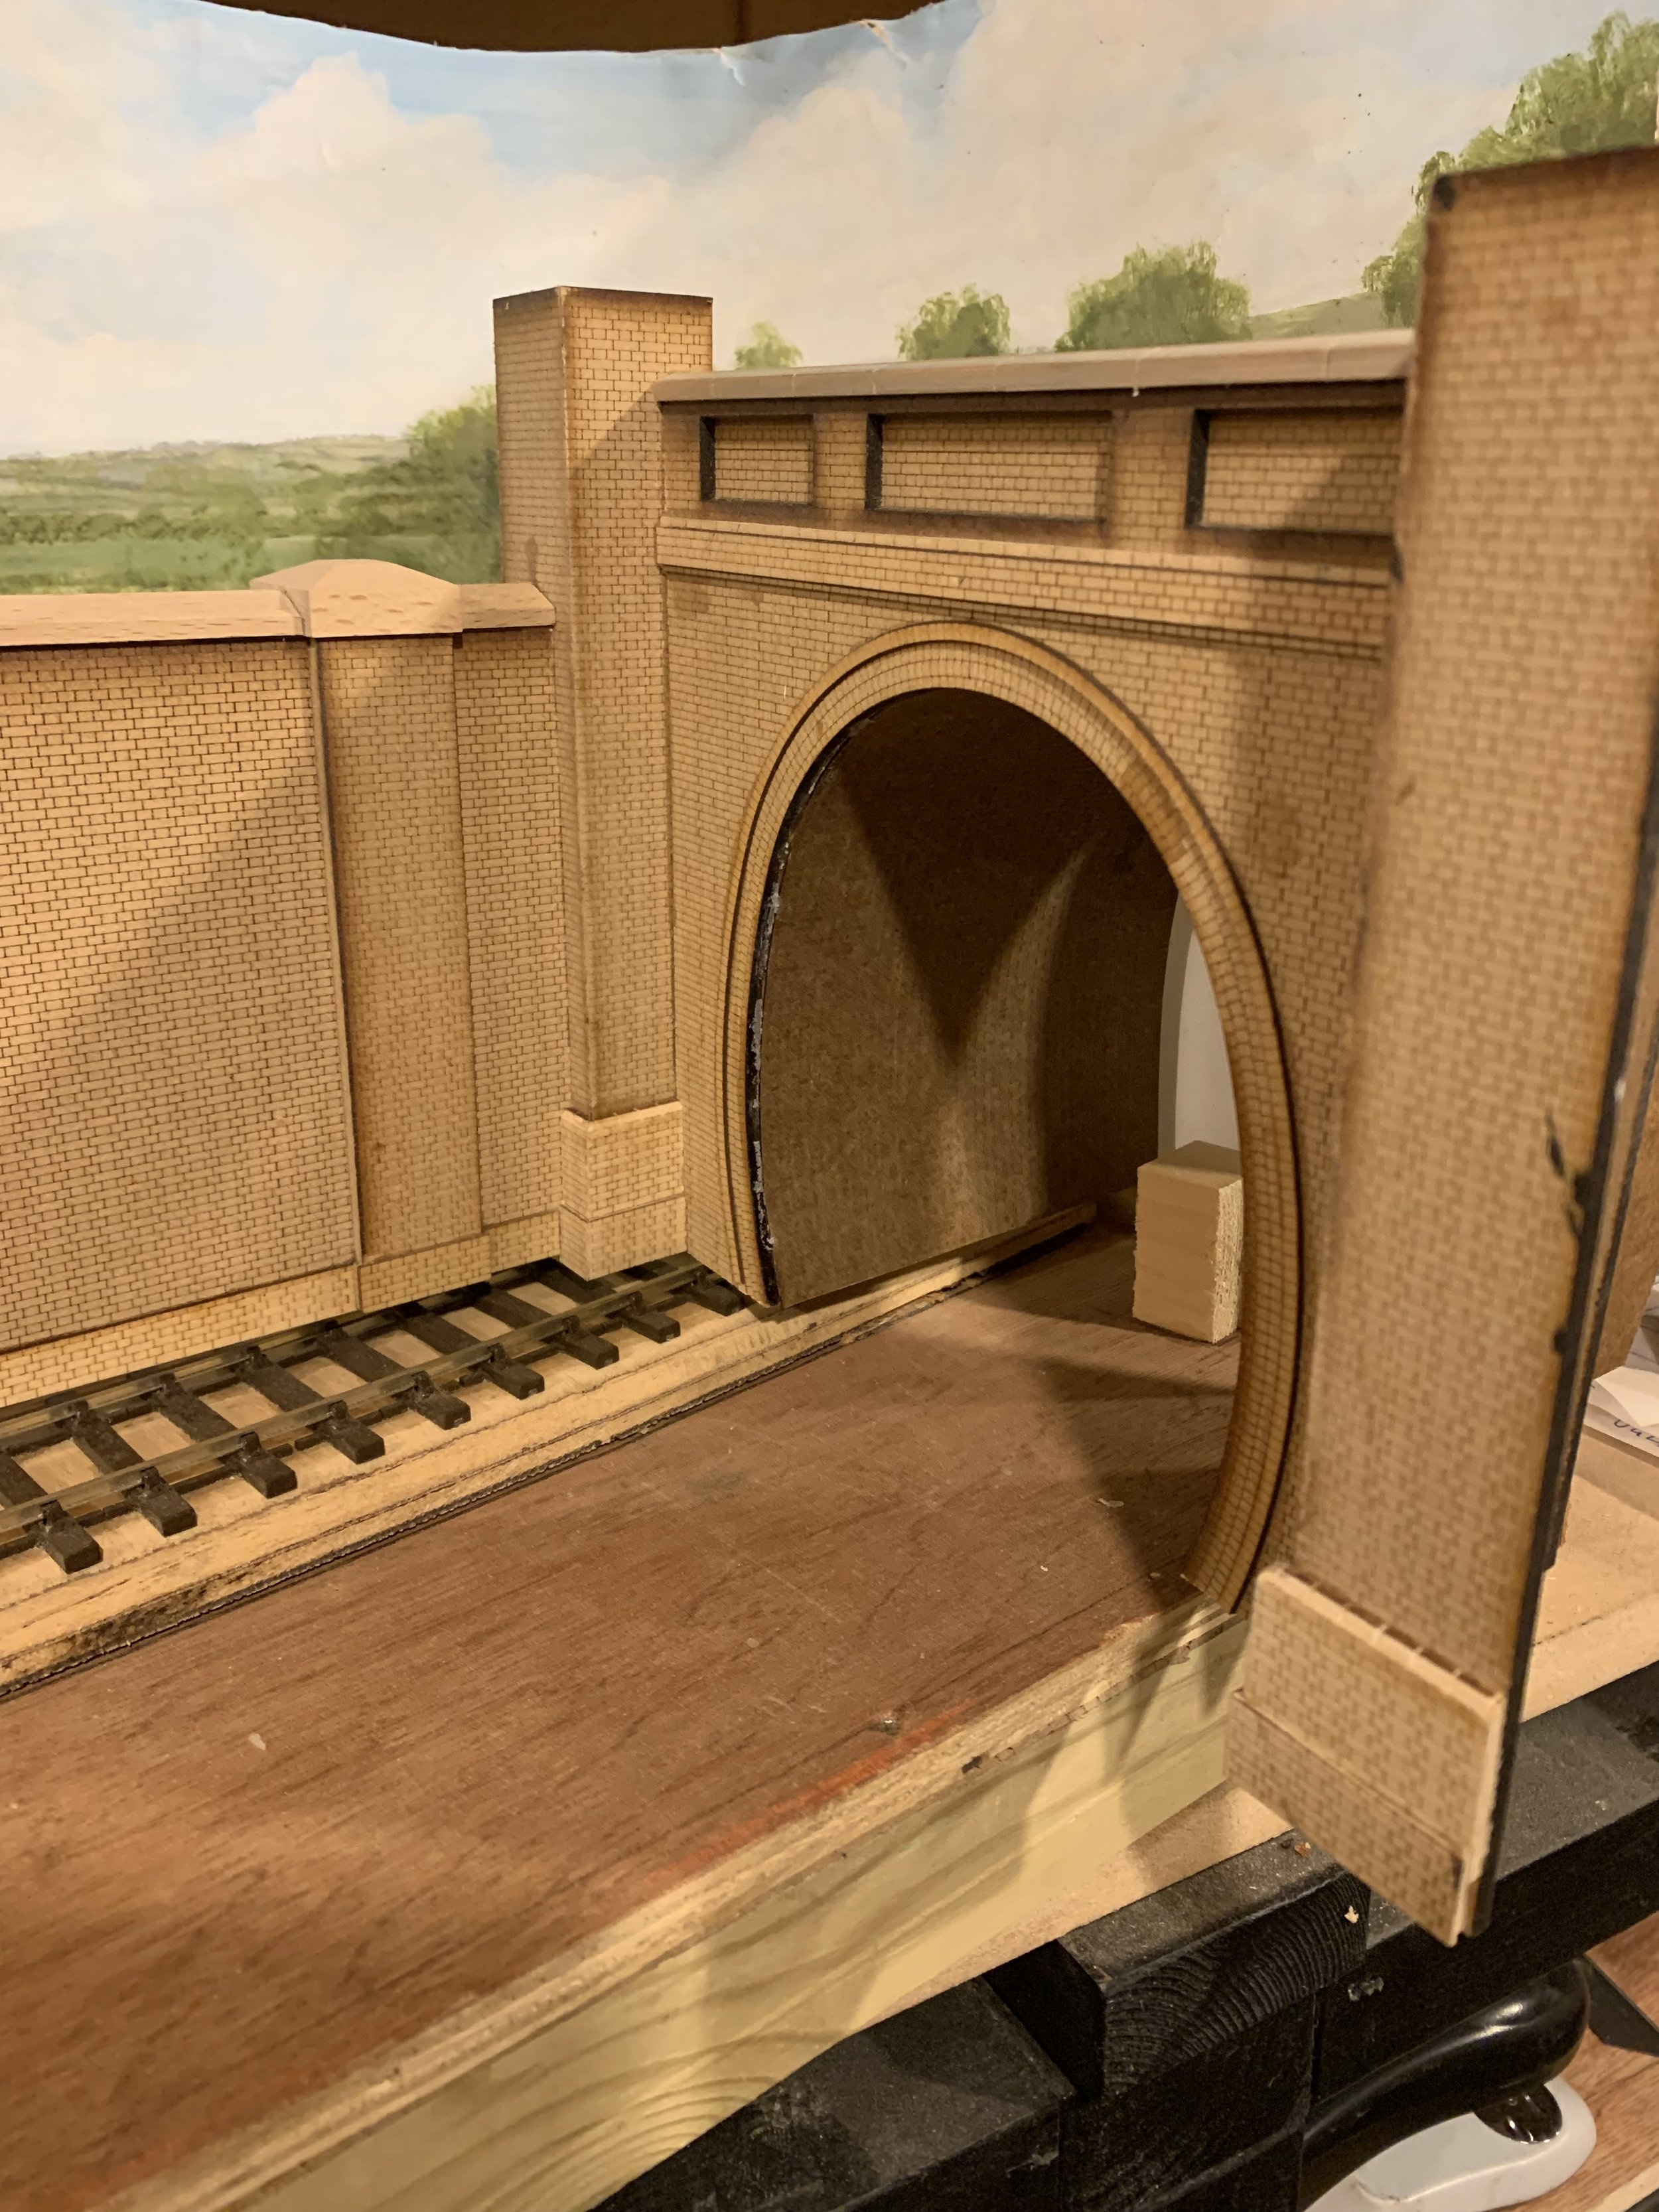
Painting of the brickwork, which is laid to the correct Flemish bond, was carried out also using acrylics. The trick I find is to mix the paint one or two shades ‘brighter’ than the intended final look; the final operation being to wash over a very, very thin wash of off-white mortar colour which settles in the mortar courses and softens the colouring as well. Using acrylics in this way is also doubly tricky as they tend to dry darker than when you first apply them. However, the advantage is they dry quickly and depth of colour with successive coats and shade variations can be achieved within one sitting. The yellow bricks around the window reveals and external corners were quite fiddly to paint neatly, added to this, the initial colour of buff yellow looked quite startling until I gave it a wash of grey enamel which dulled them down to exactly the right shade.

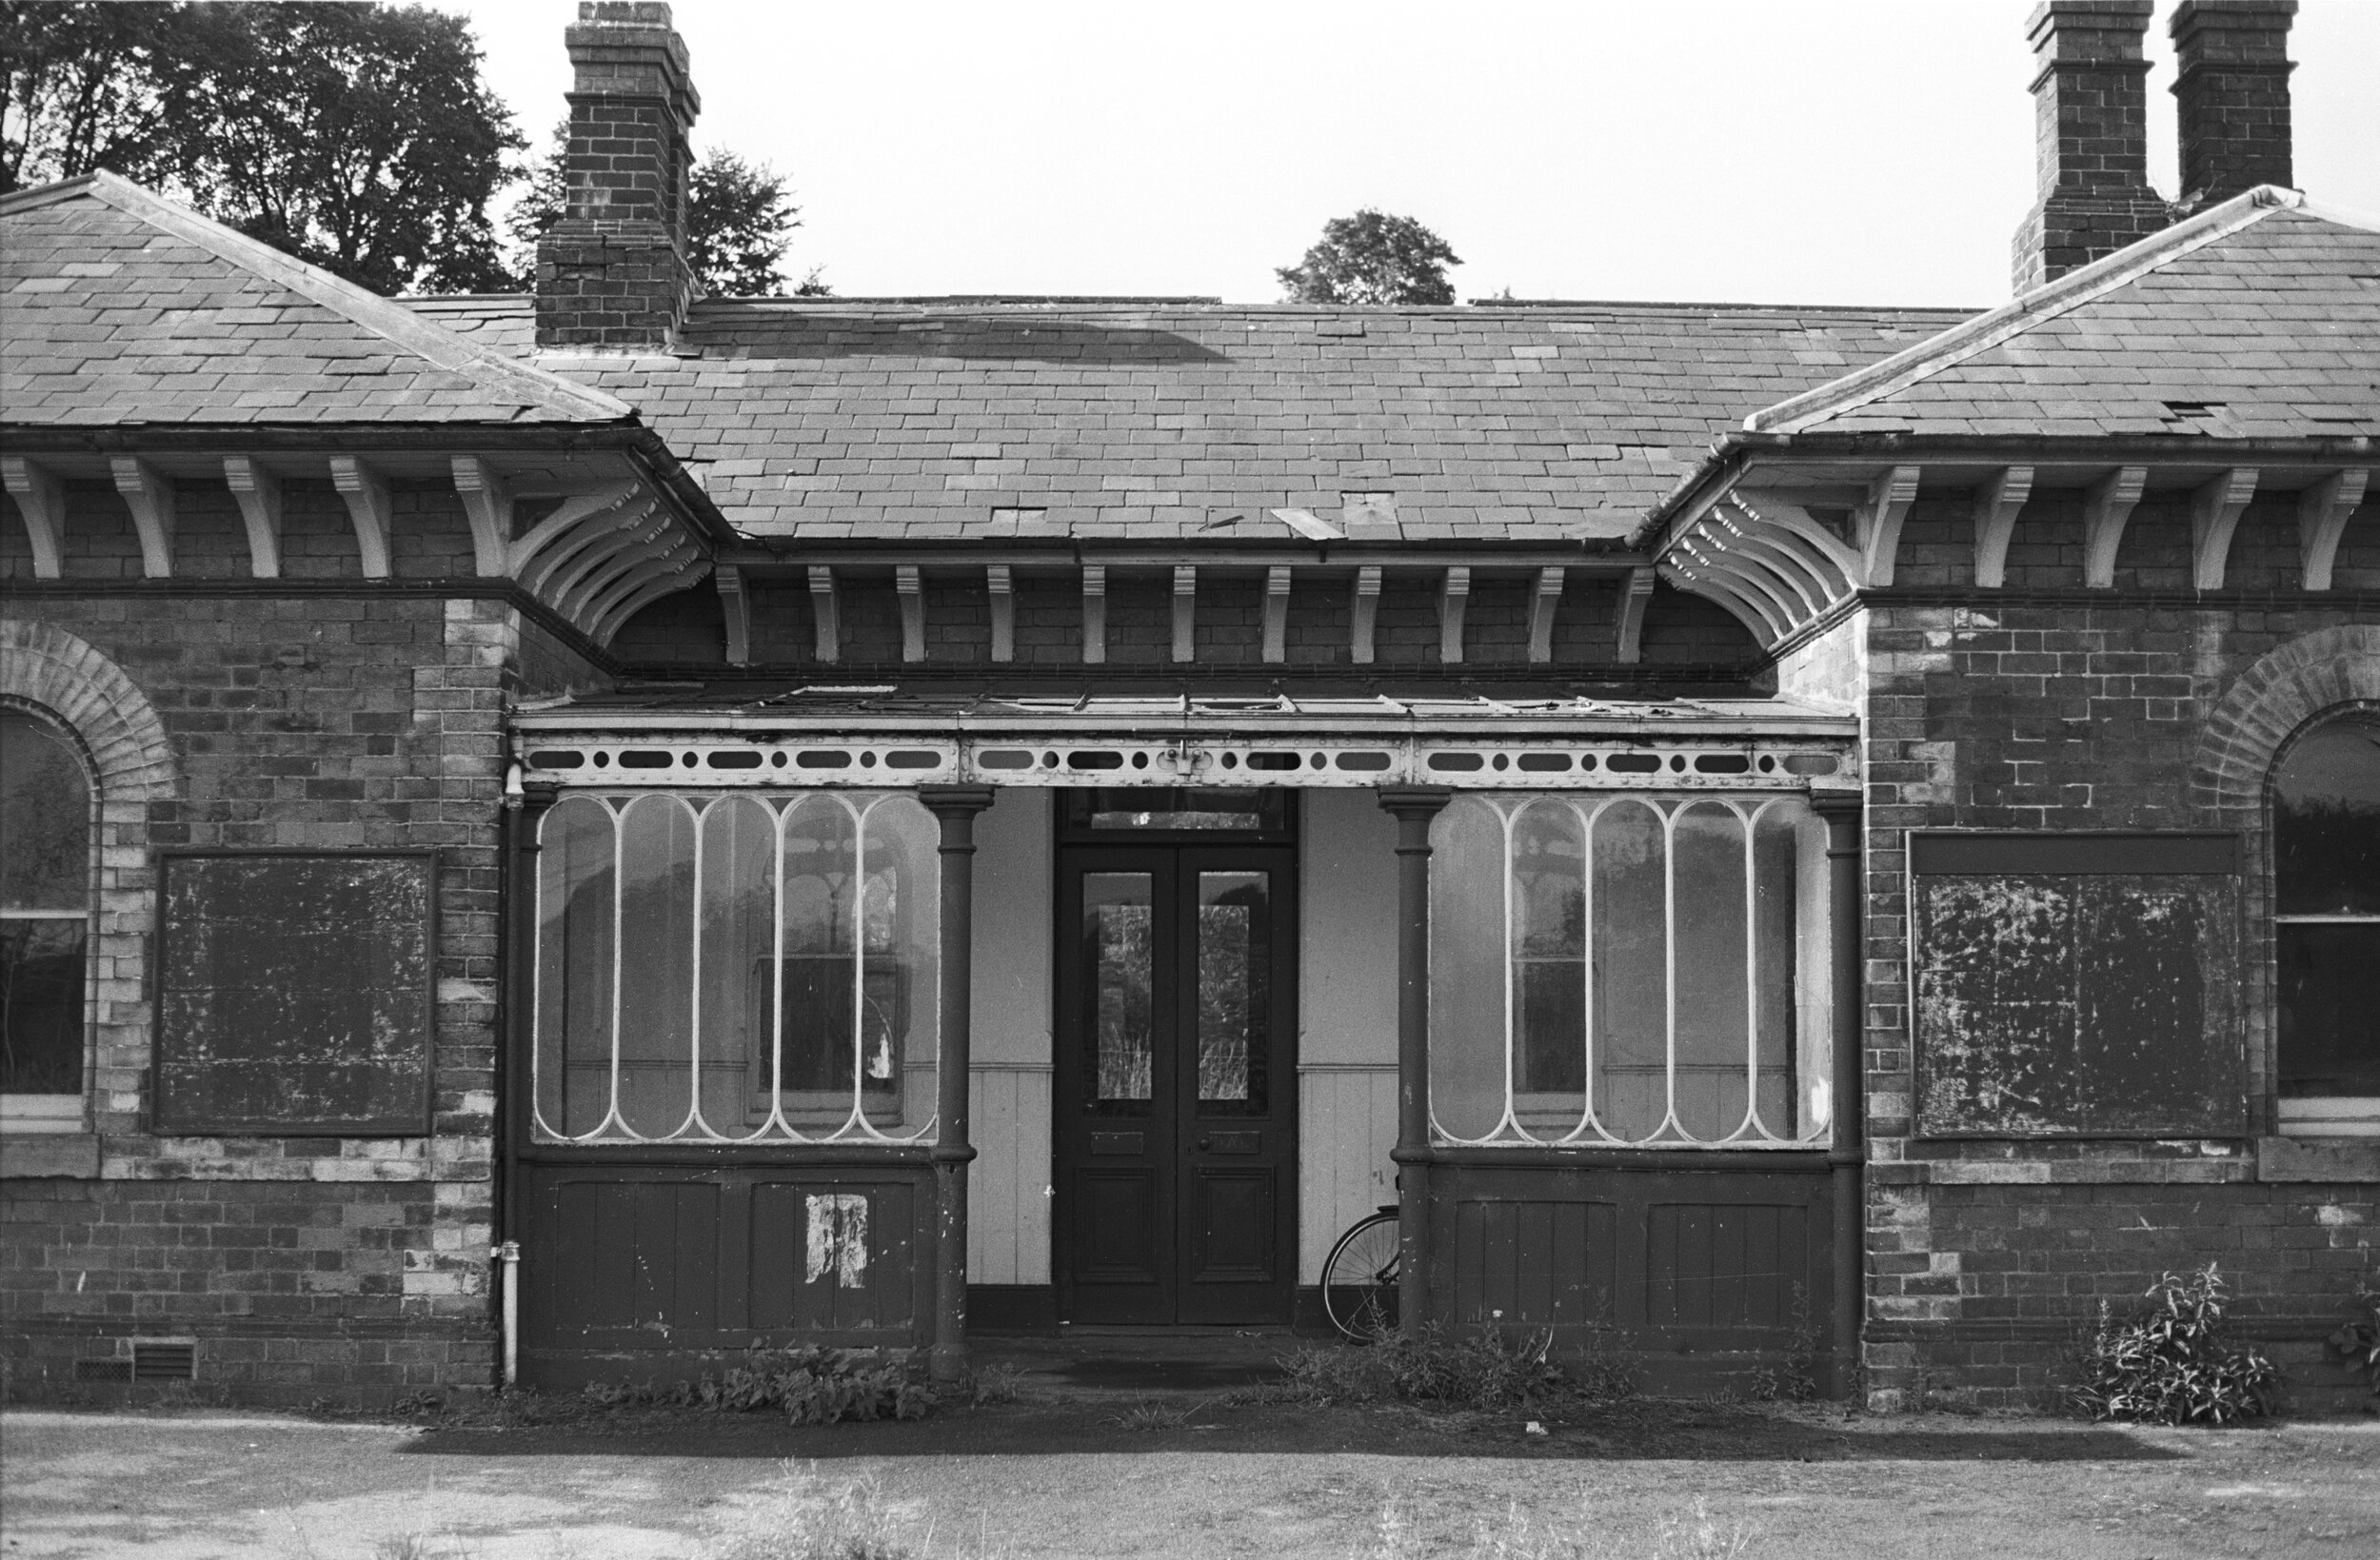
Windows are made up of layers of laser-cut paper and 0.75mm clear acrylic, with the paper being sprayed Beige before assembling onto the acrylic. There are two separate pieces of acrylic in each sash separated by a layer of paper which gives the appearance of the top sash being set forward of the bottom one, just like a real window. Doors are also layers of paper and mountboard, also laser cut for accuracy. I find paper and mountboard incredibly versatile as mediums for architectural detailing; coupled with the ability to draw and cut accurately means intricate window and door designs, thin glazing bars and raised panels are relatively simple to create.

The porch on the platform side was left pretty much until last as it caused me the most headaches to think how I might make it. As often happens though, the actual execution is not as complicated as I made it out to be in my head. Once I started to draw it, it became clear how I would make it from various layers (again of paper and mountboard) sprayed either Crimson Lake or Denby Pottery Cream (aka Halfords Beige!) before being assembled over 0.75mm clear acrylic glazing. One oversight on my part was not finishing the inside backs of the lower red panels as I thought they wouldn’t be visible on the finished model. As it turns out they are, if you peer over the roof from the forecourt side! So I cut a couple of pieces of card and sprayed them red and stuck them inside to cover the unfinished surfaces.

Once the walls were united with the roof, I stuck on the soffit board brackets one by one. A tedious task but one which gives rewarding satisfaction to see the building suddenly become instantly ‘Midland’ before my eyes. No-one knows the arrangement of the sky-light over the Gents; or indeed if it had any sort of covering at all, and may have been open to the elements, as no photos exist. So I made this up, but based on snippets of detail I managed to spot in images of other preserved Midland station buildings of a similar type. Of course, if a photo does come to light (pardon the pun!) of the original then it could be altered accordingly.

Once the building was finished externally, the innards were roughly divided up with internal partitions and all painted black. The partitions are only there to prevent clear sight-lines through the building from one side to another. And painting it all black means that there are no internal unsightly reflections. Once done, the building was stuck down to the baseboard.

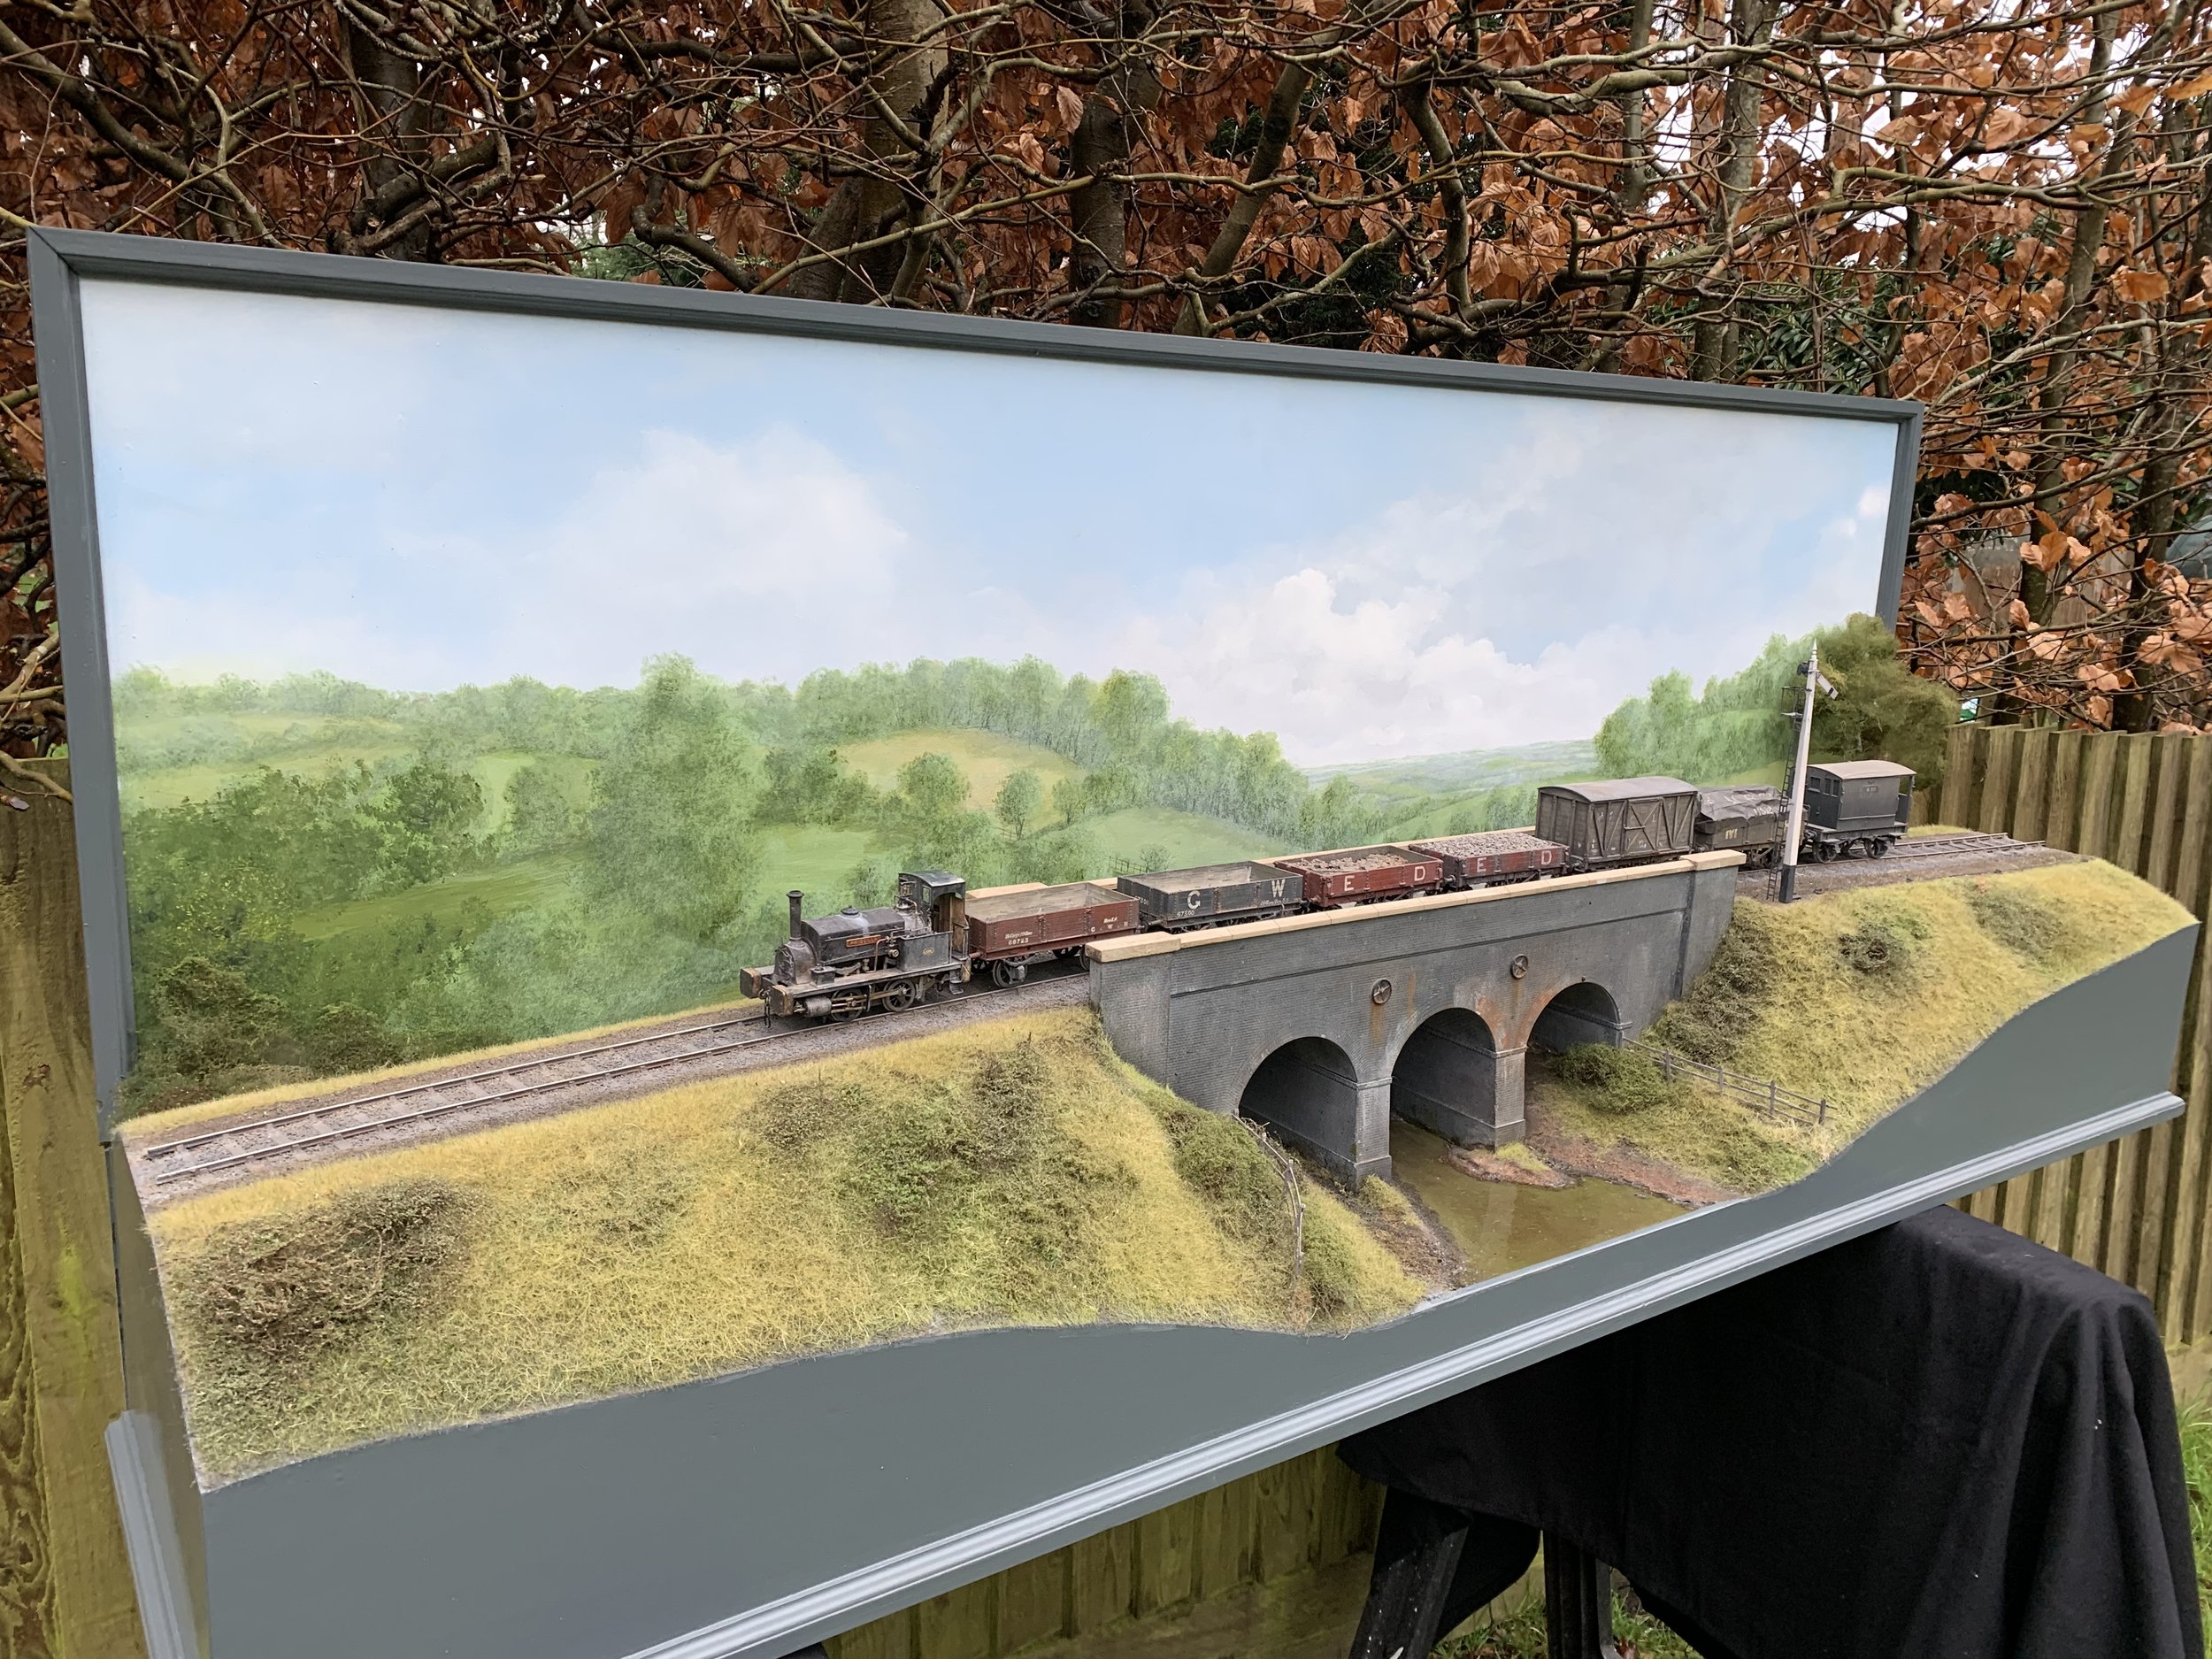
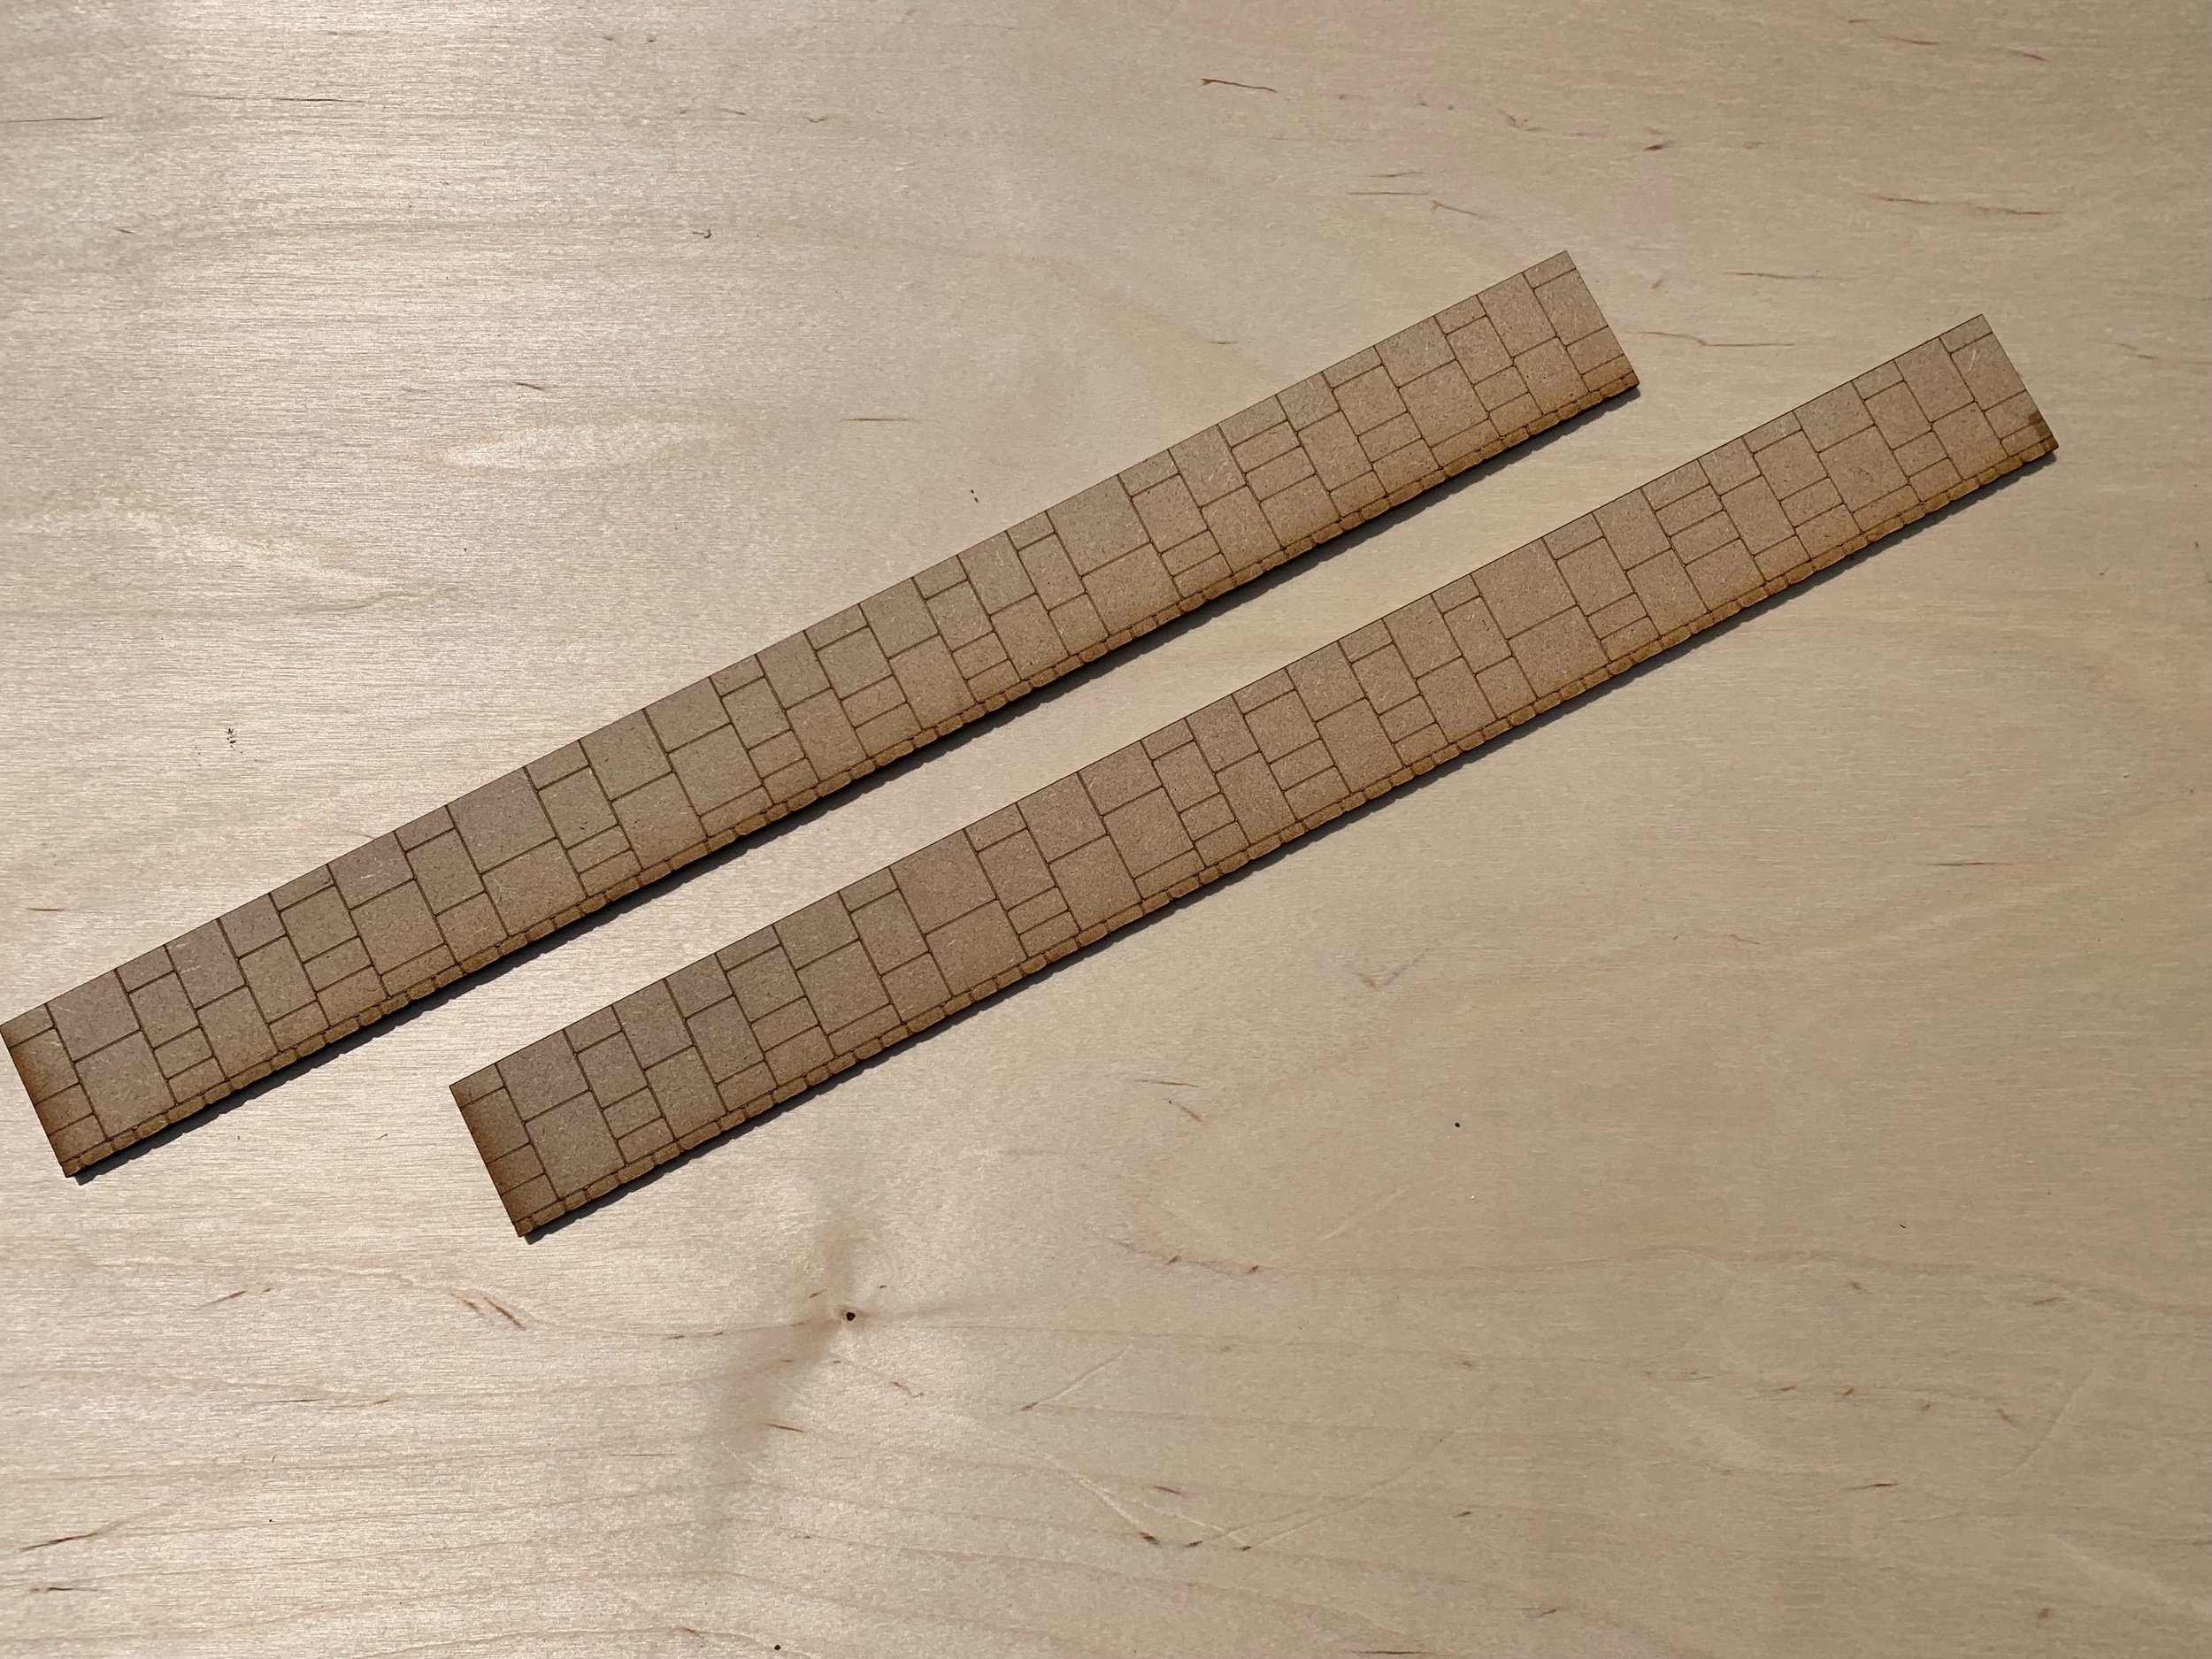
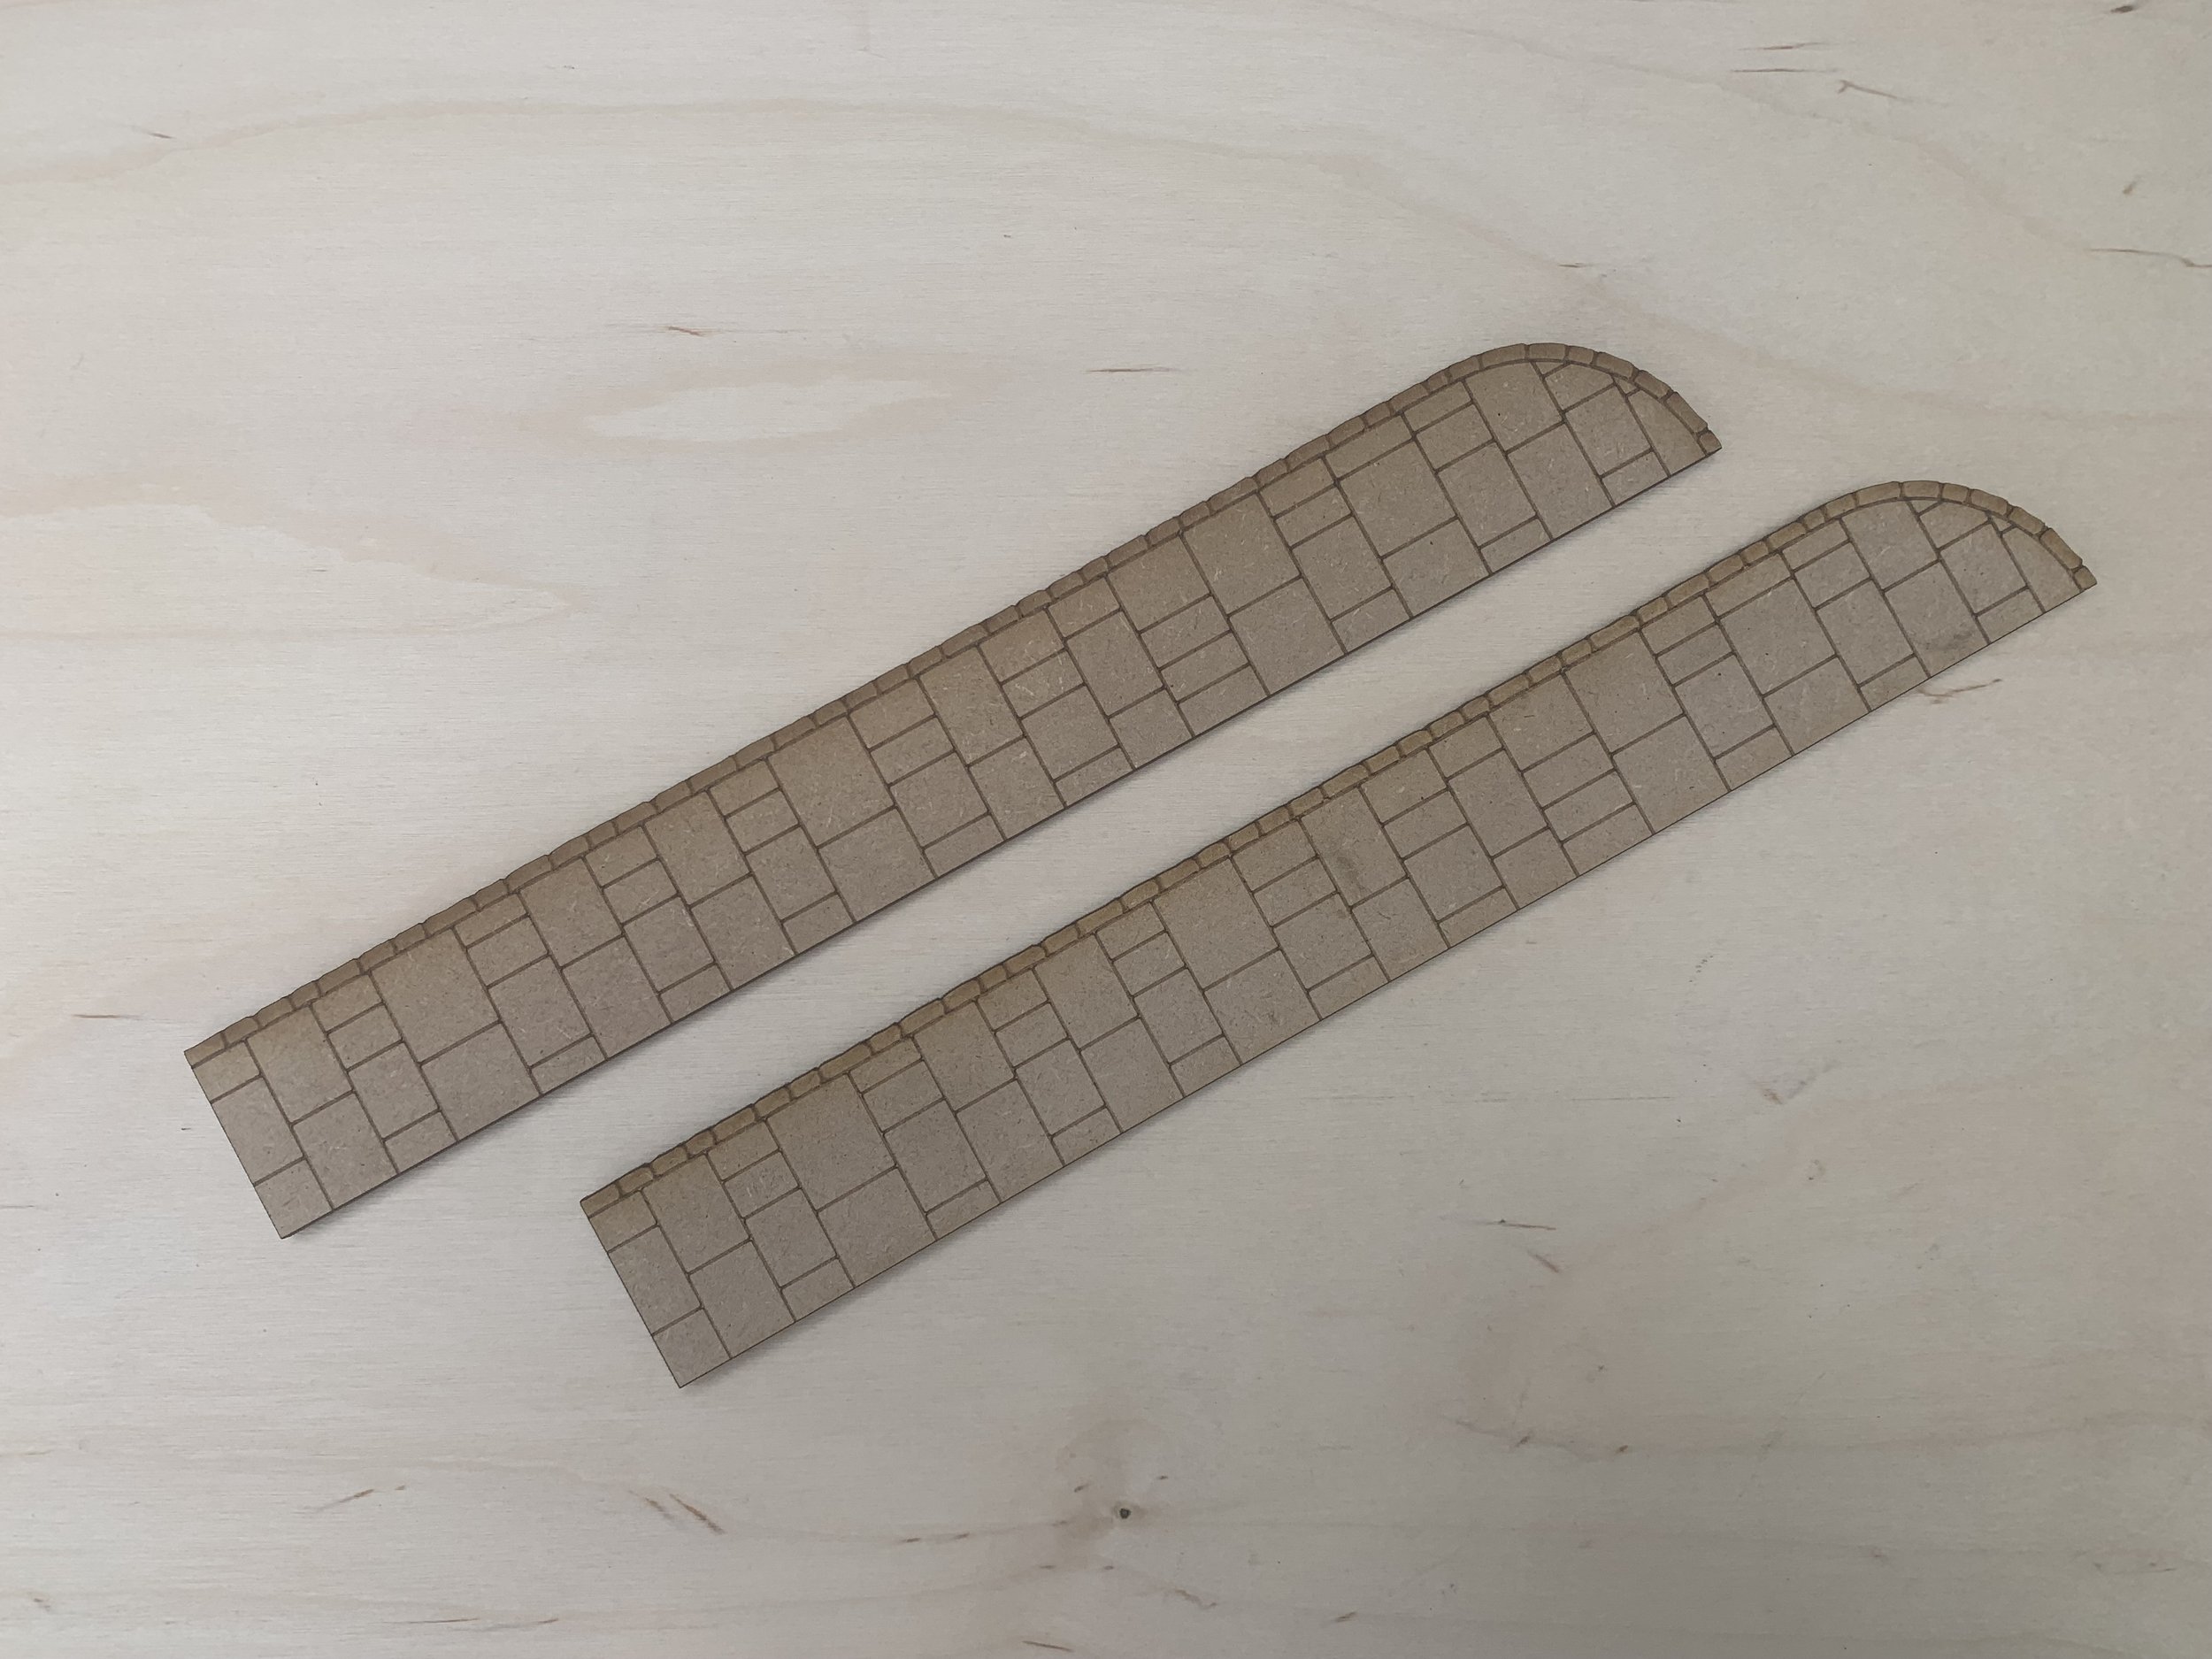
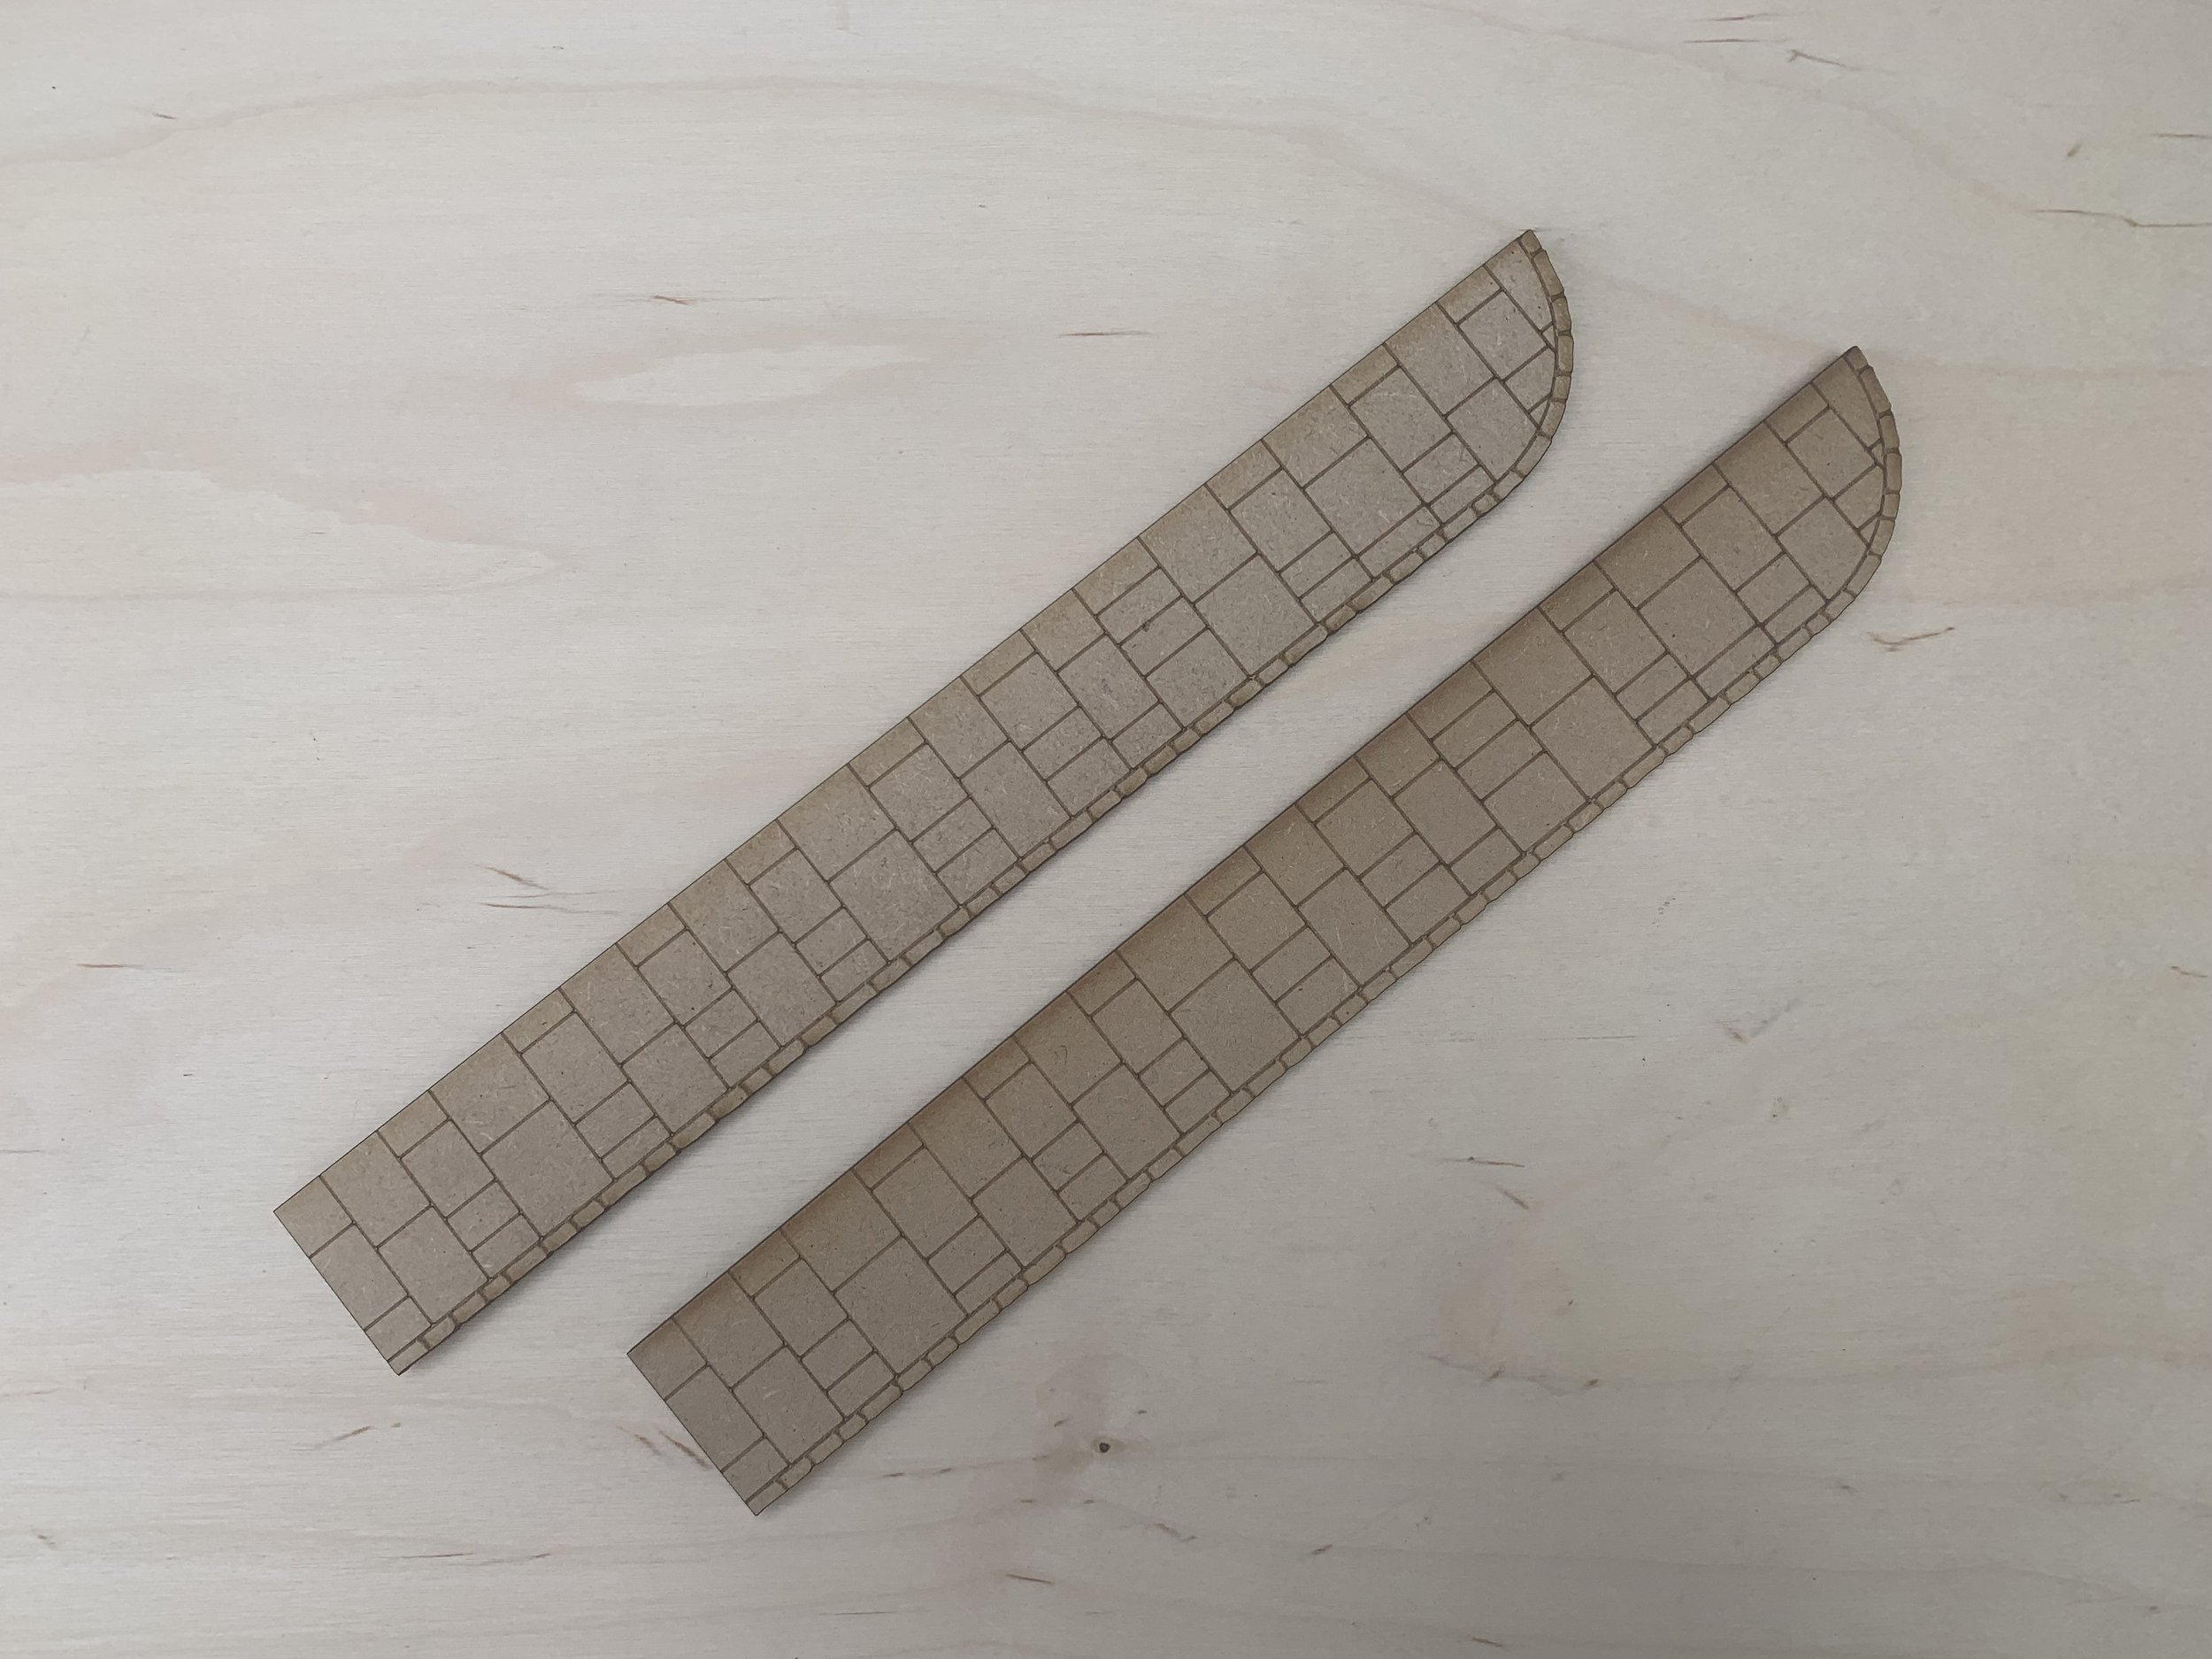
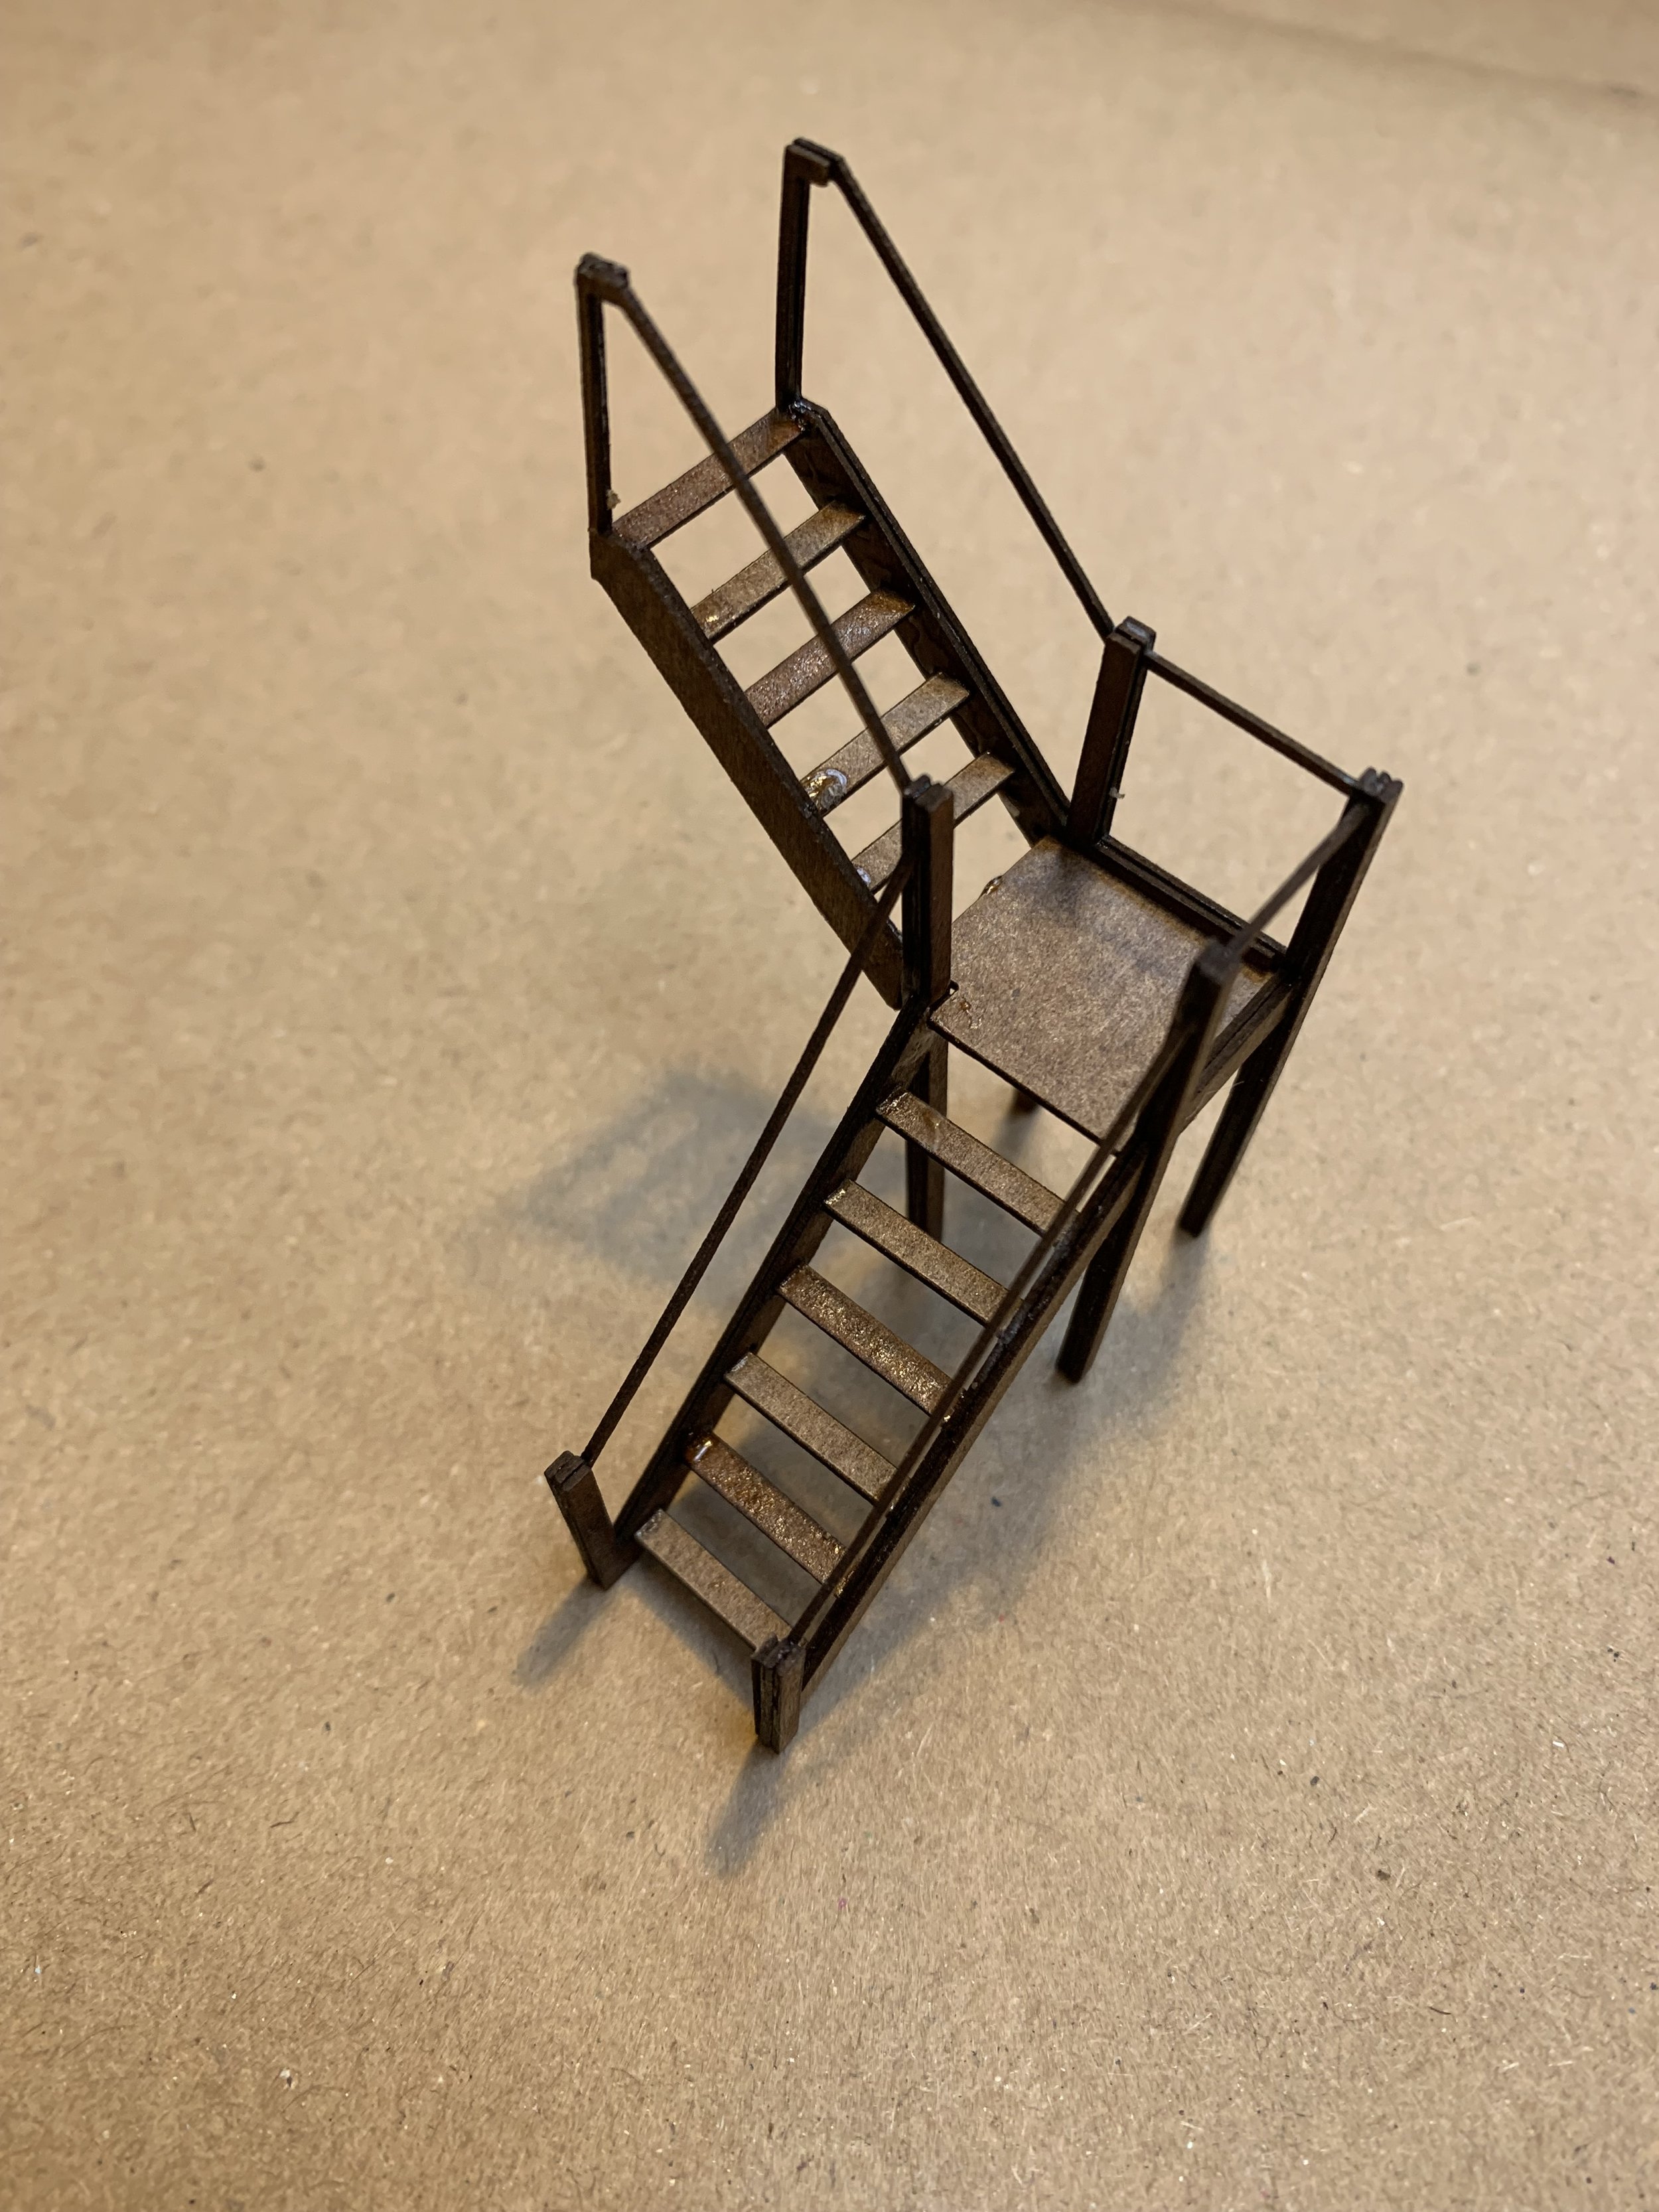
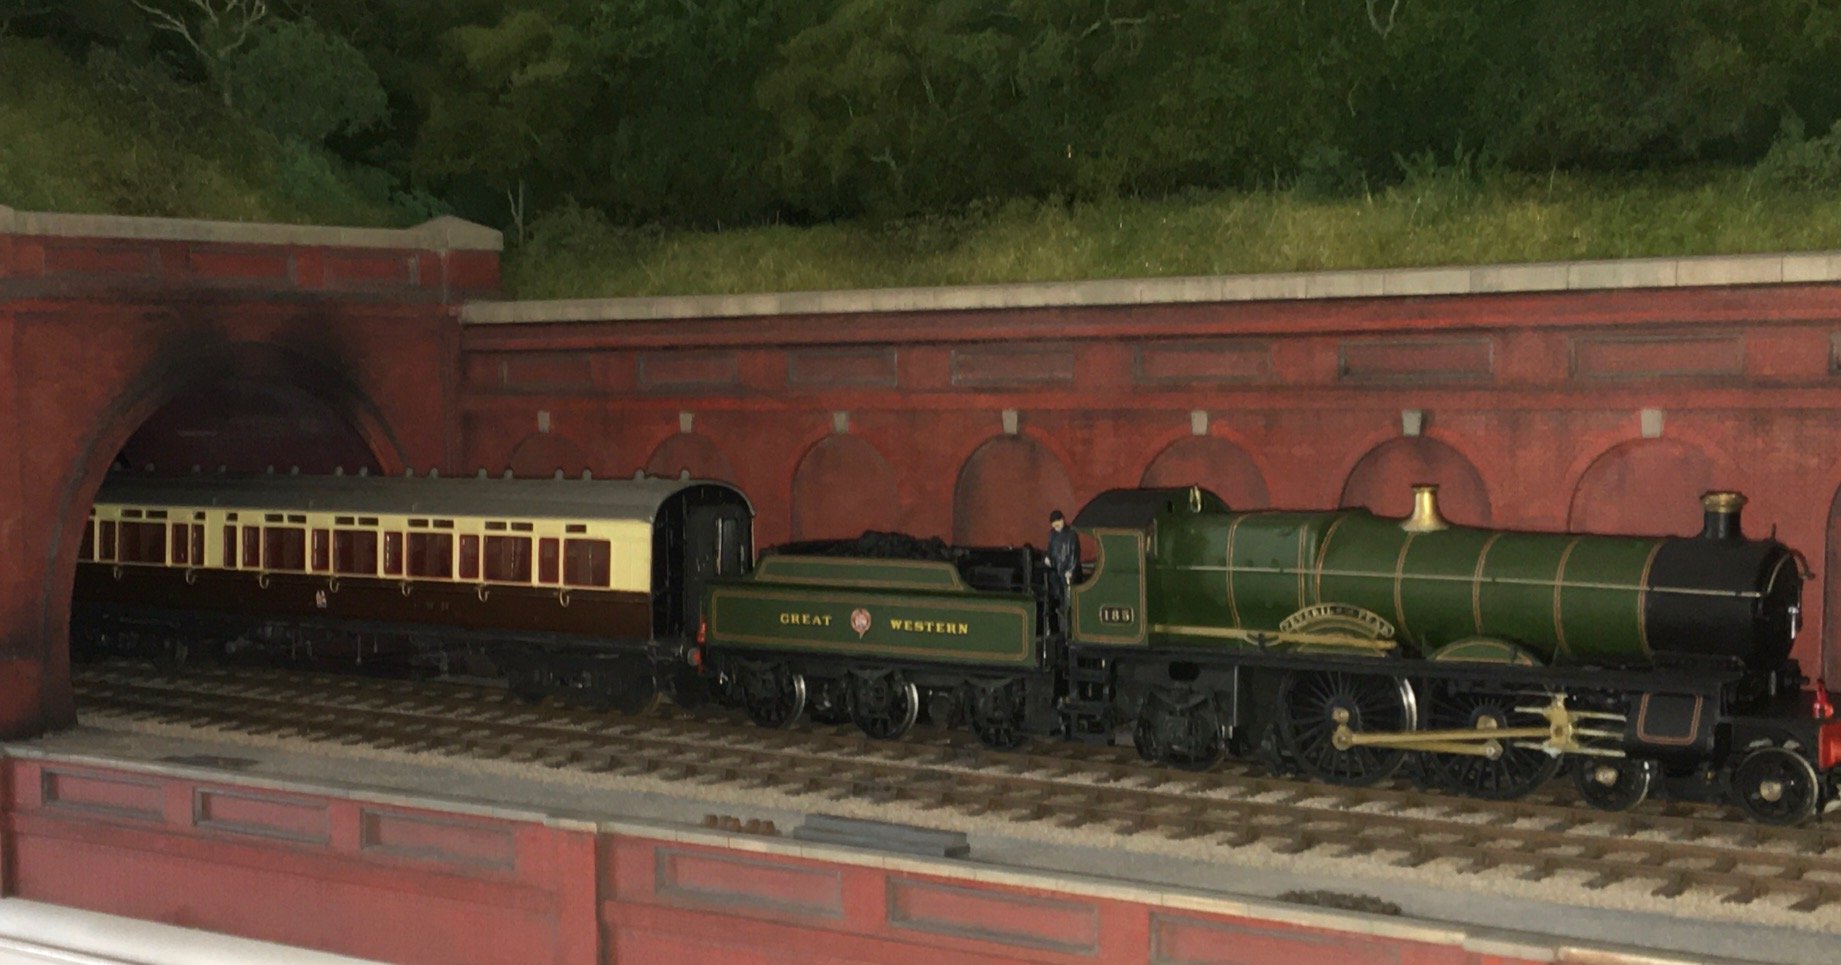
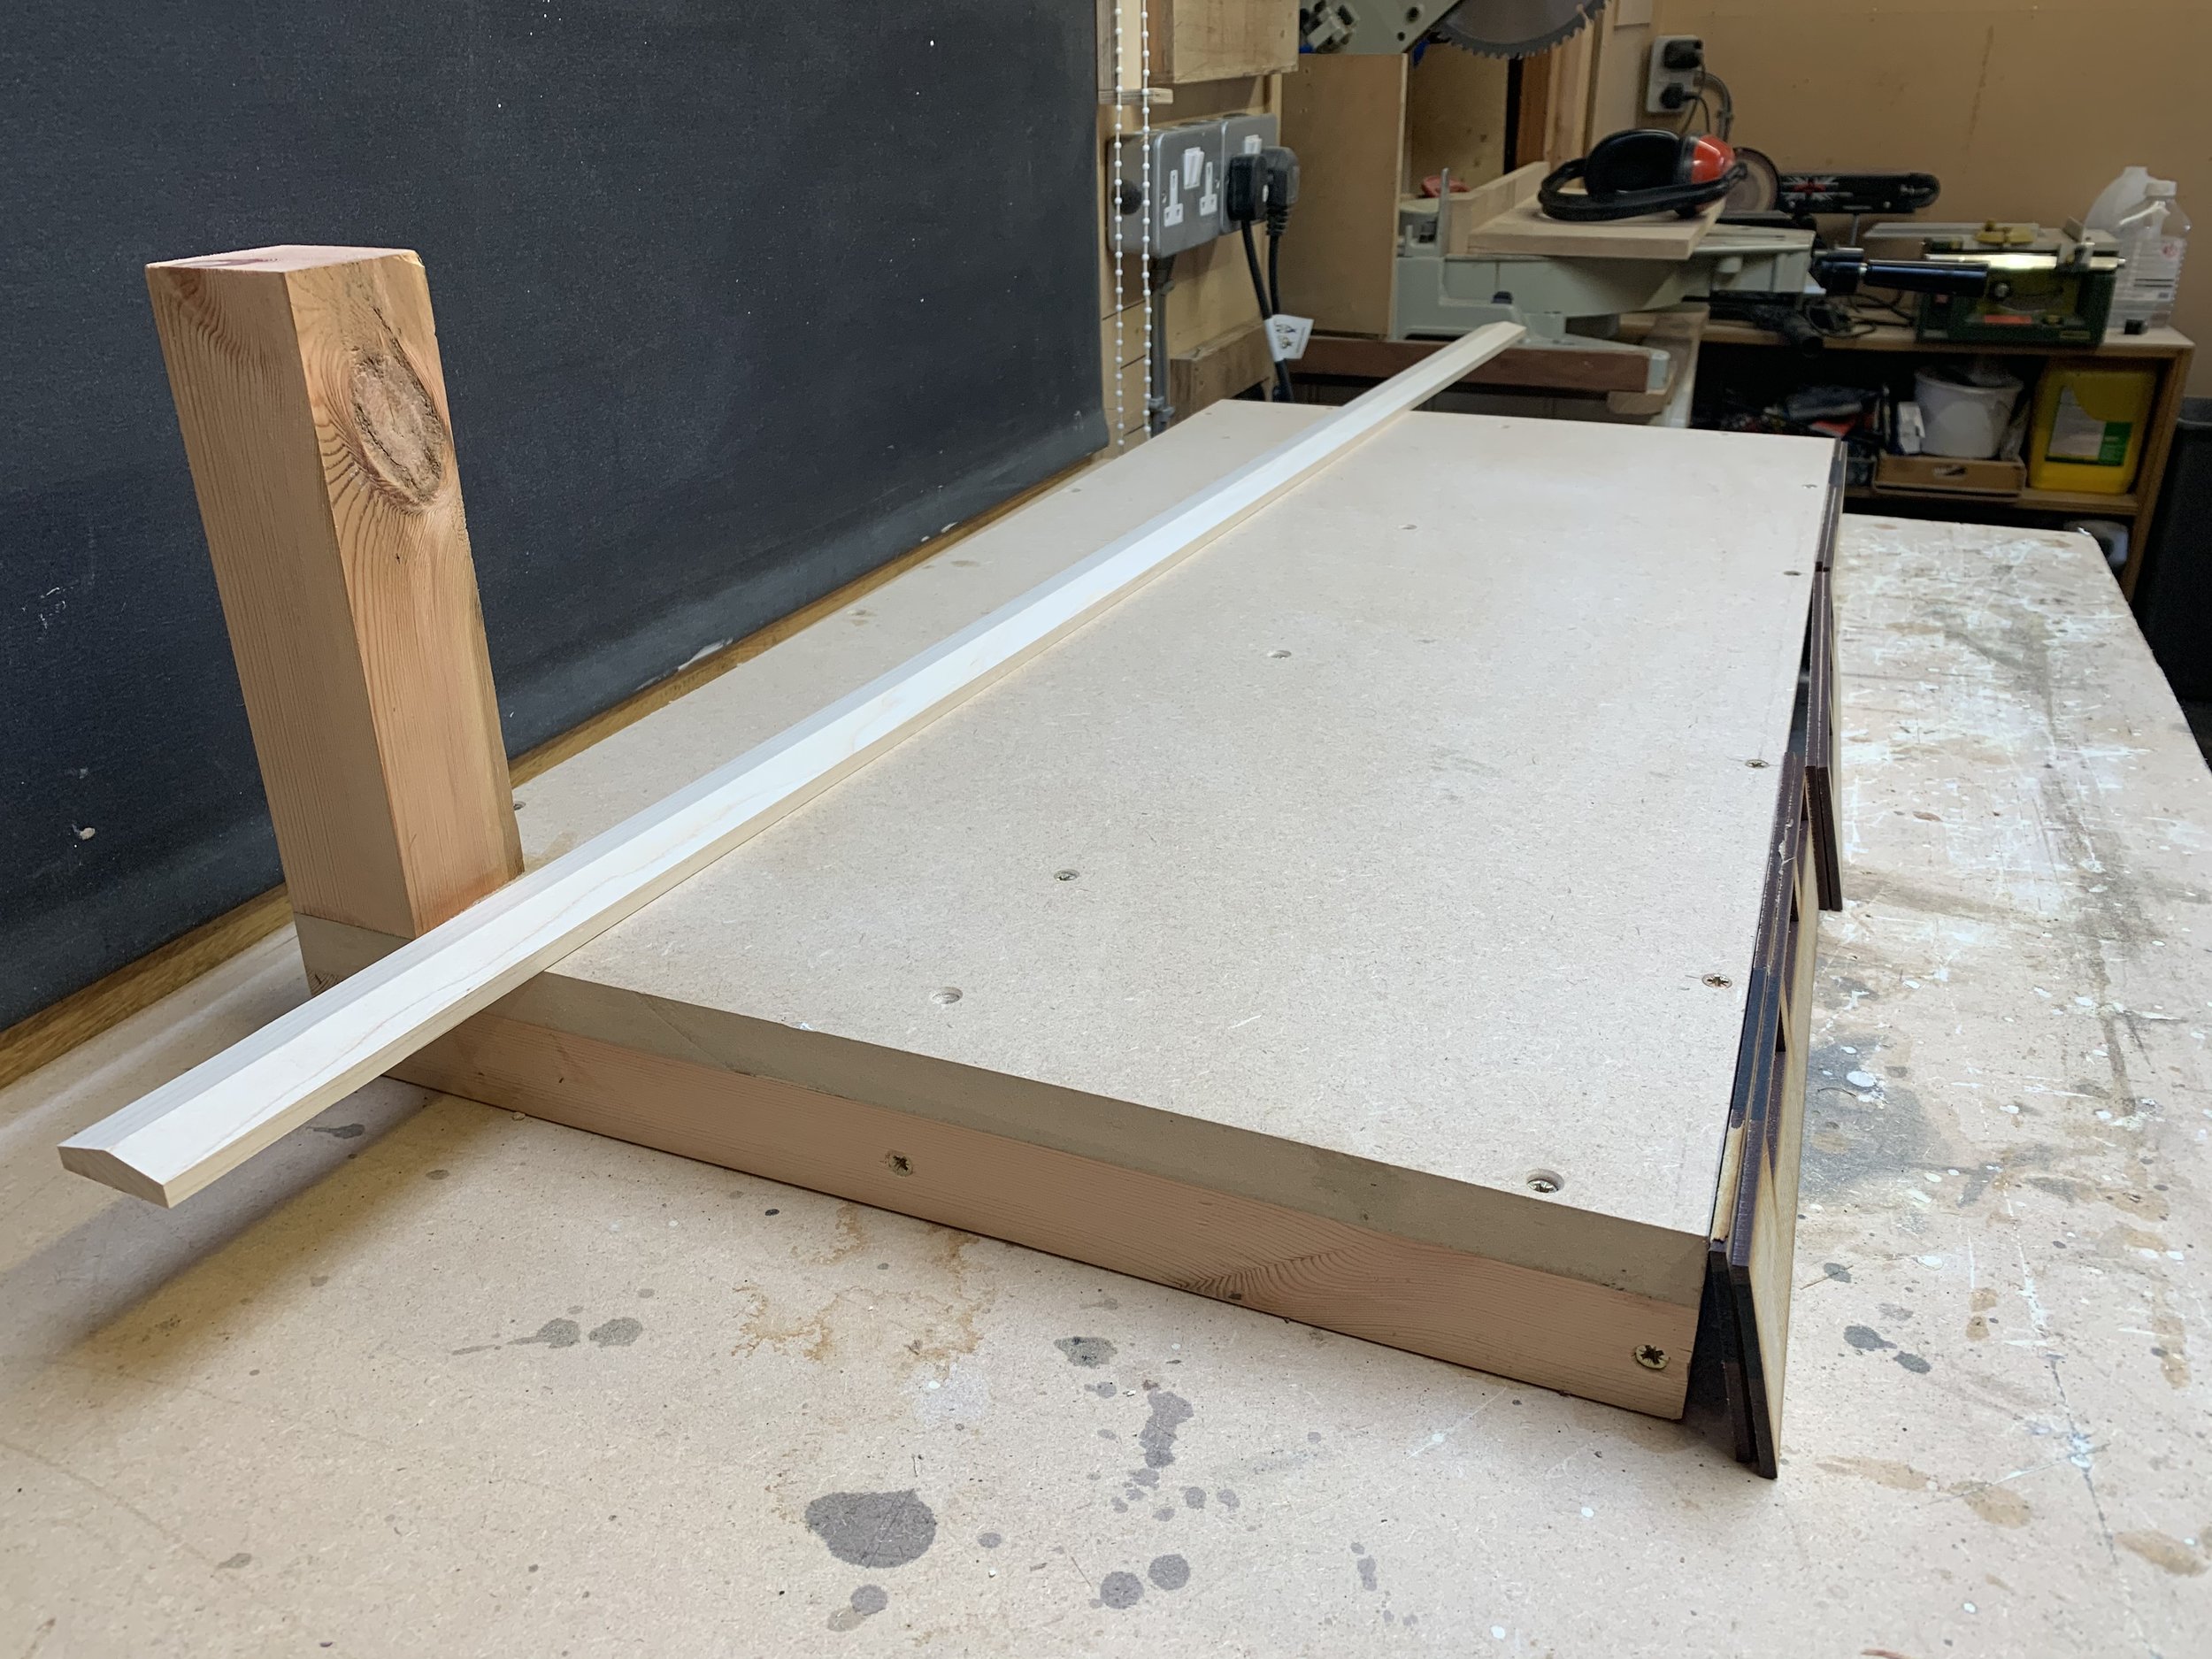
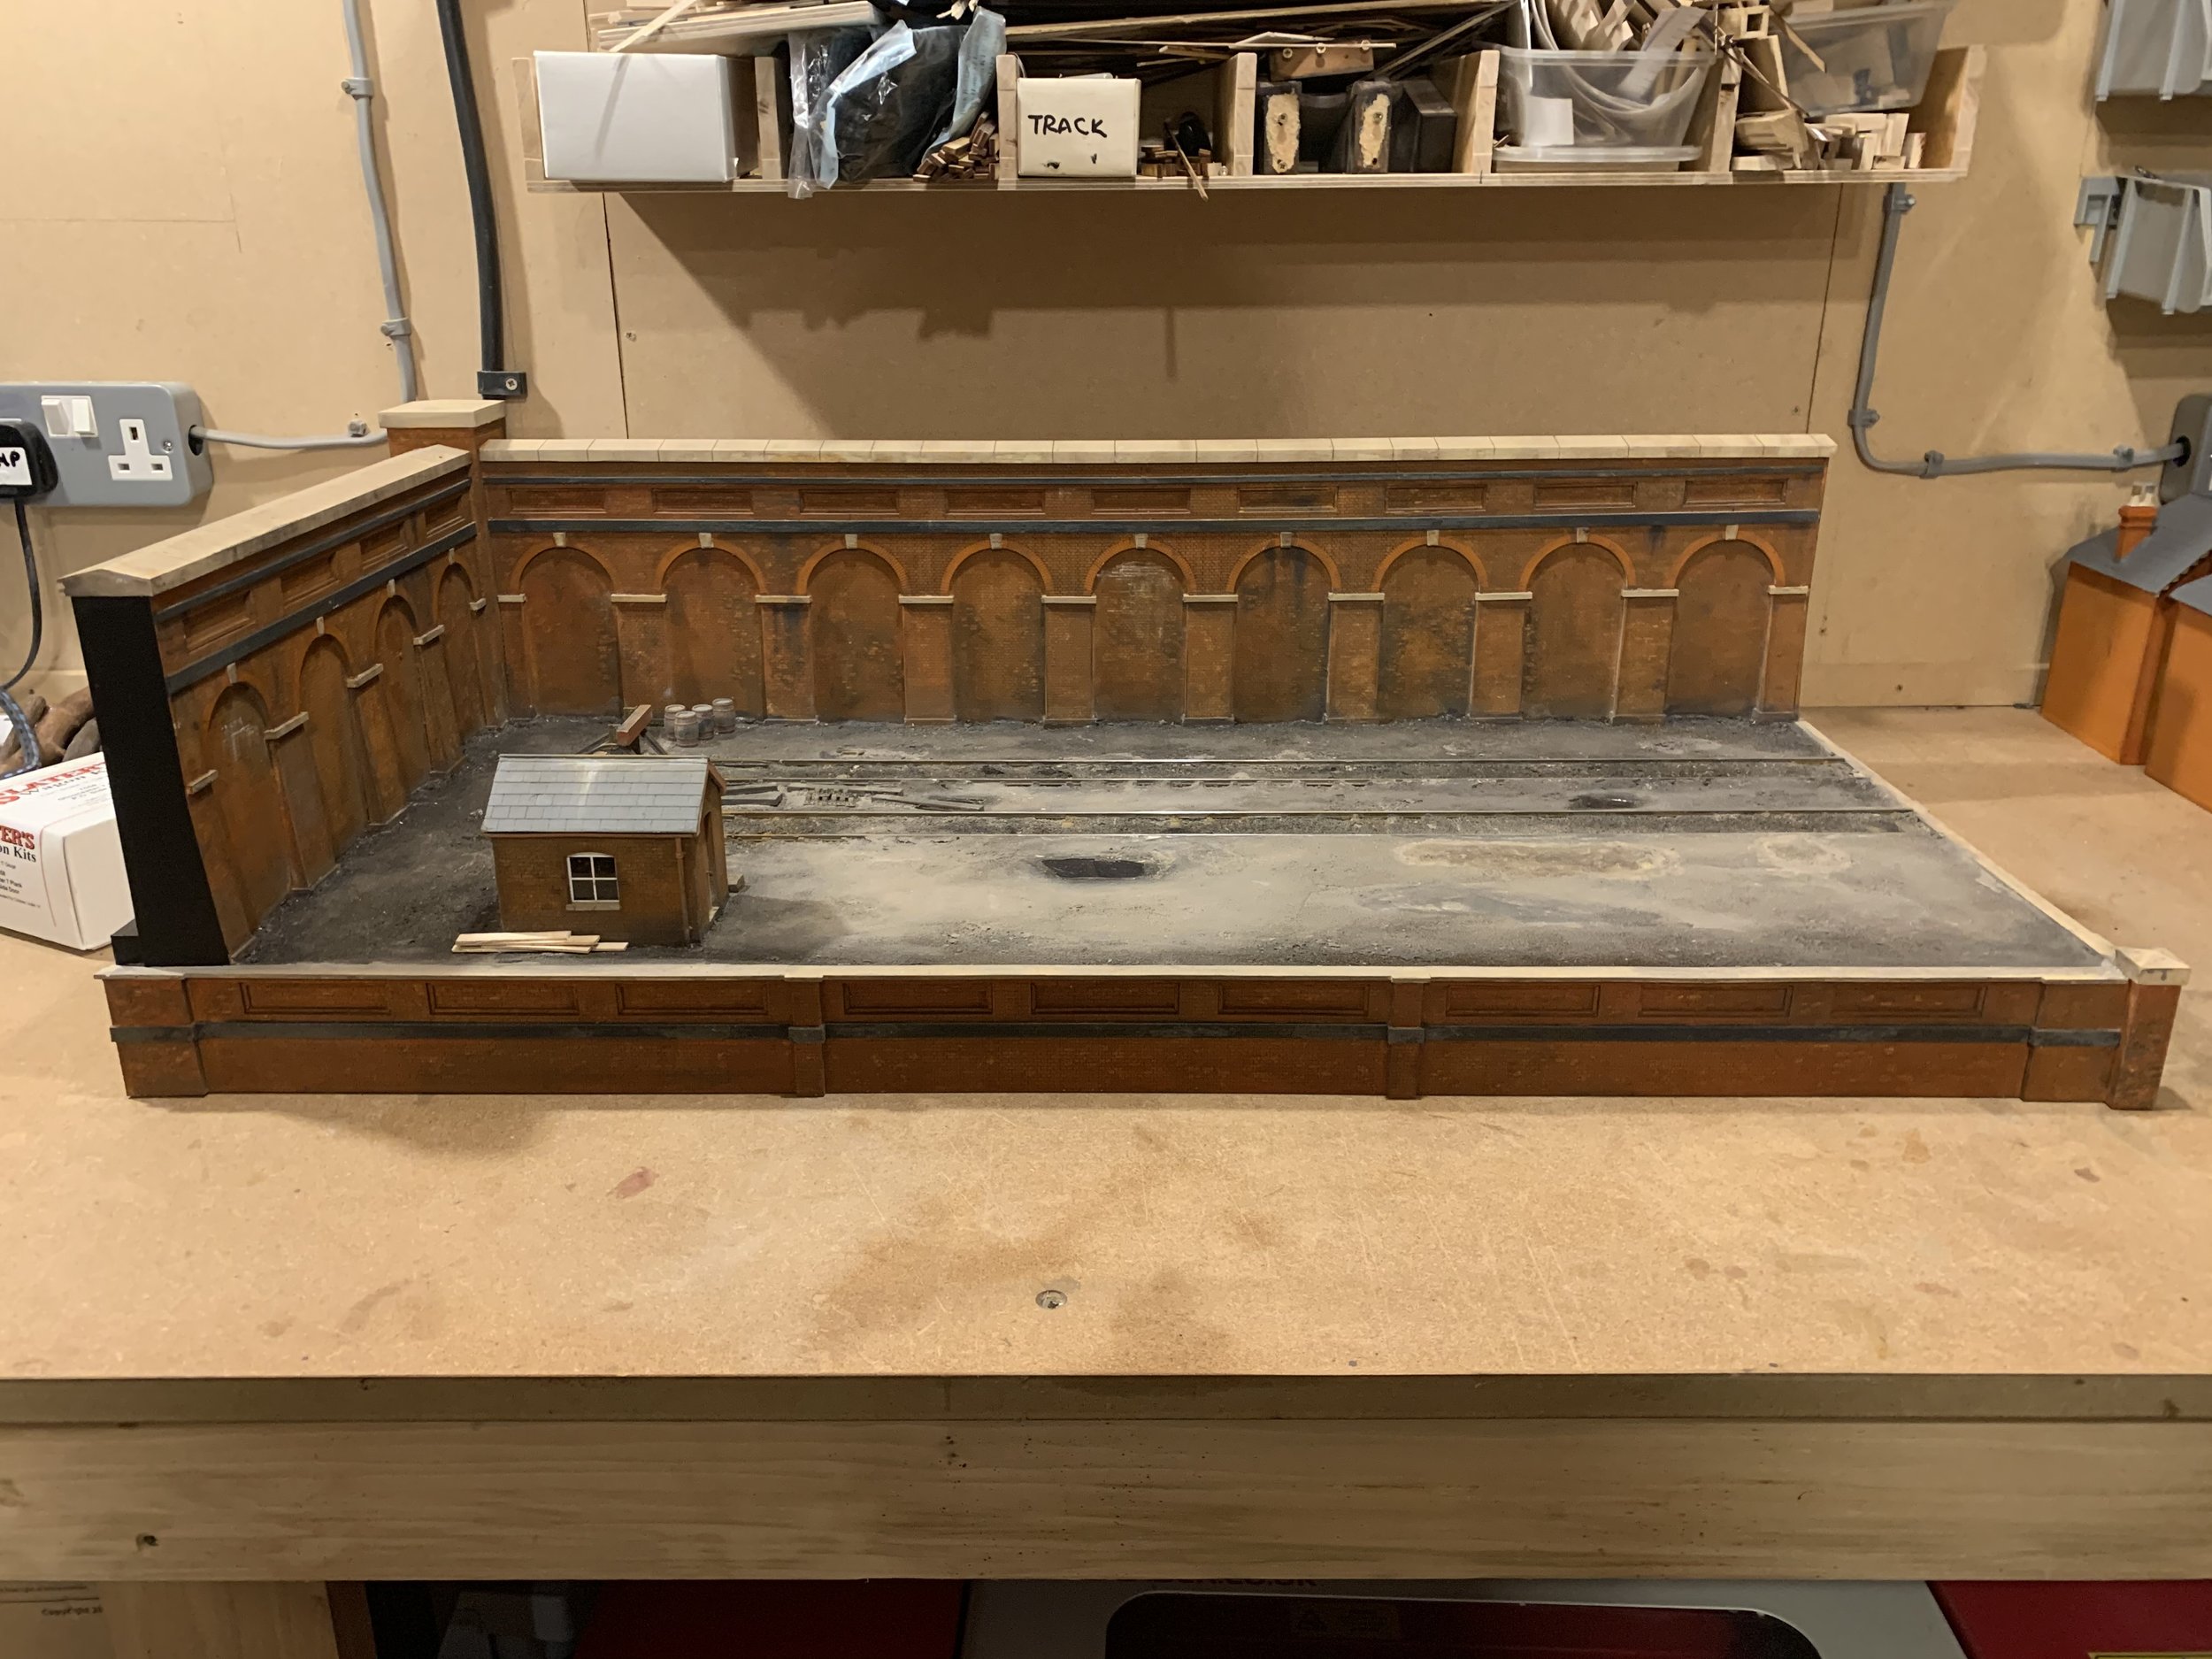
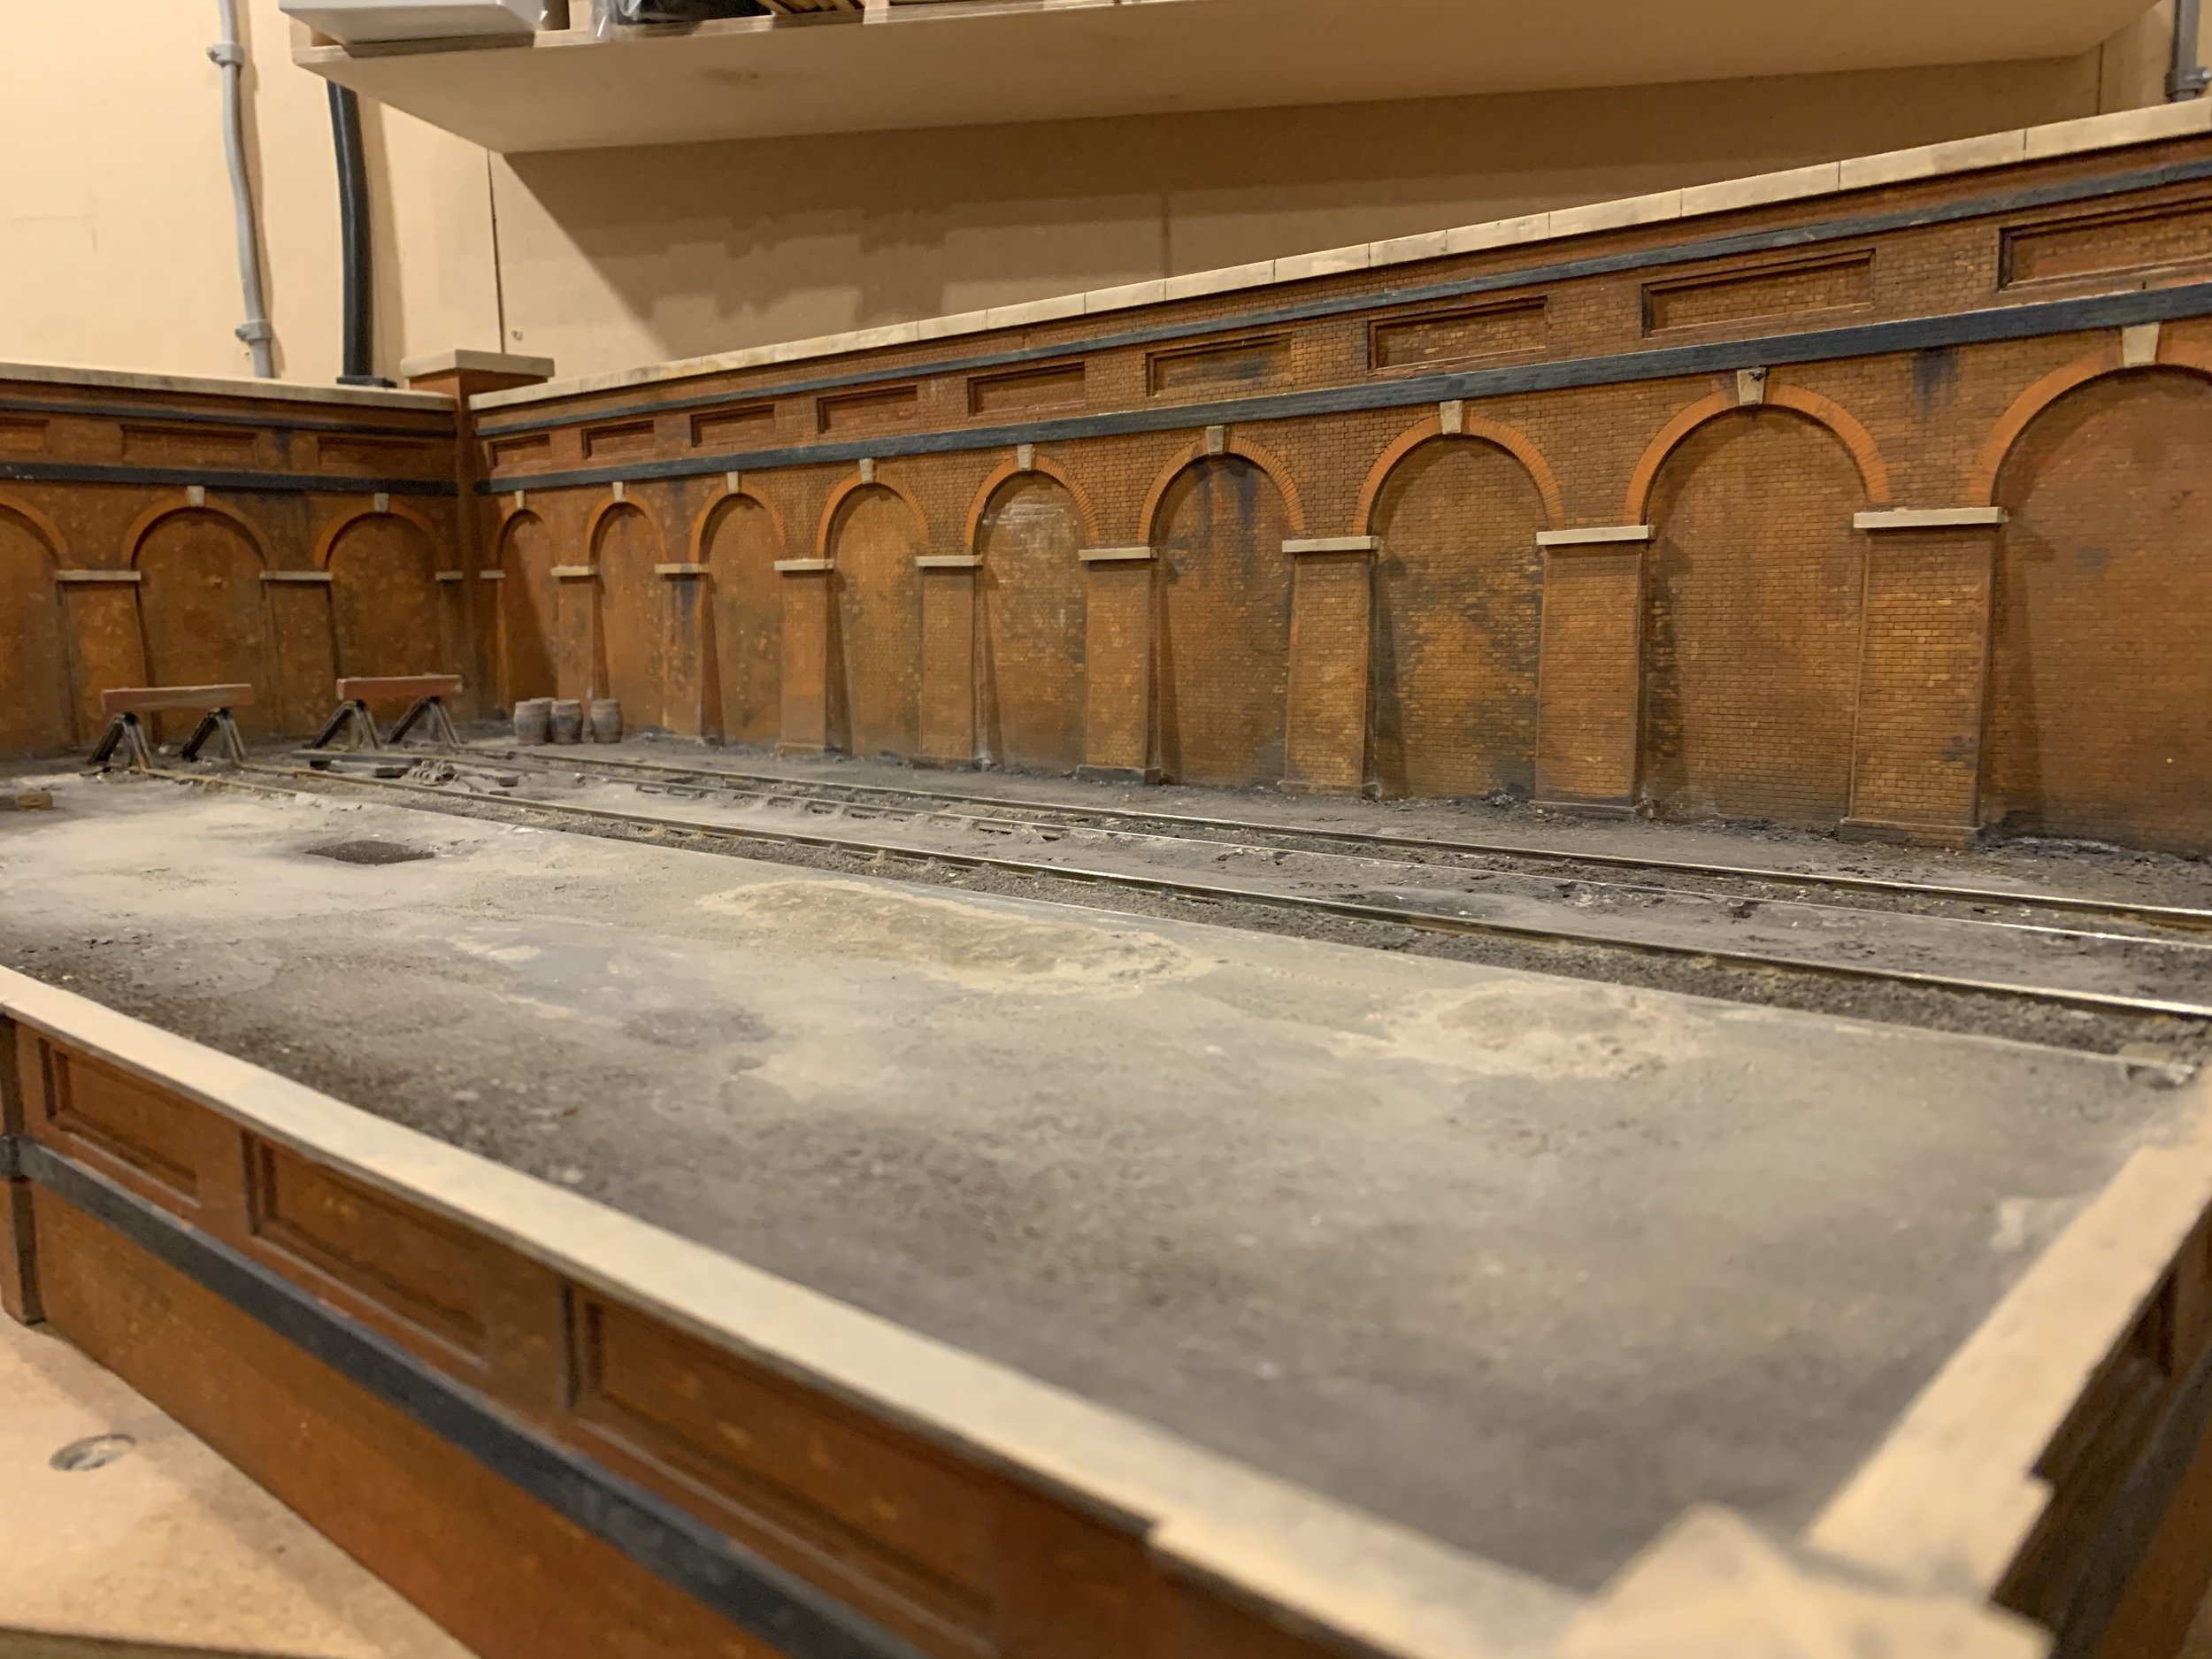
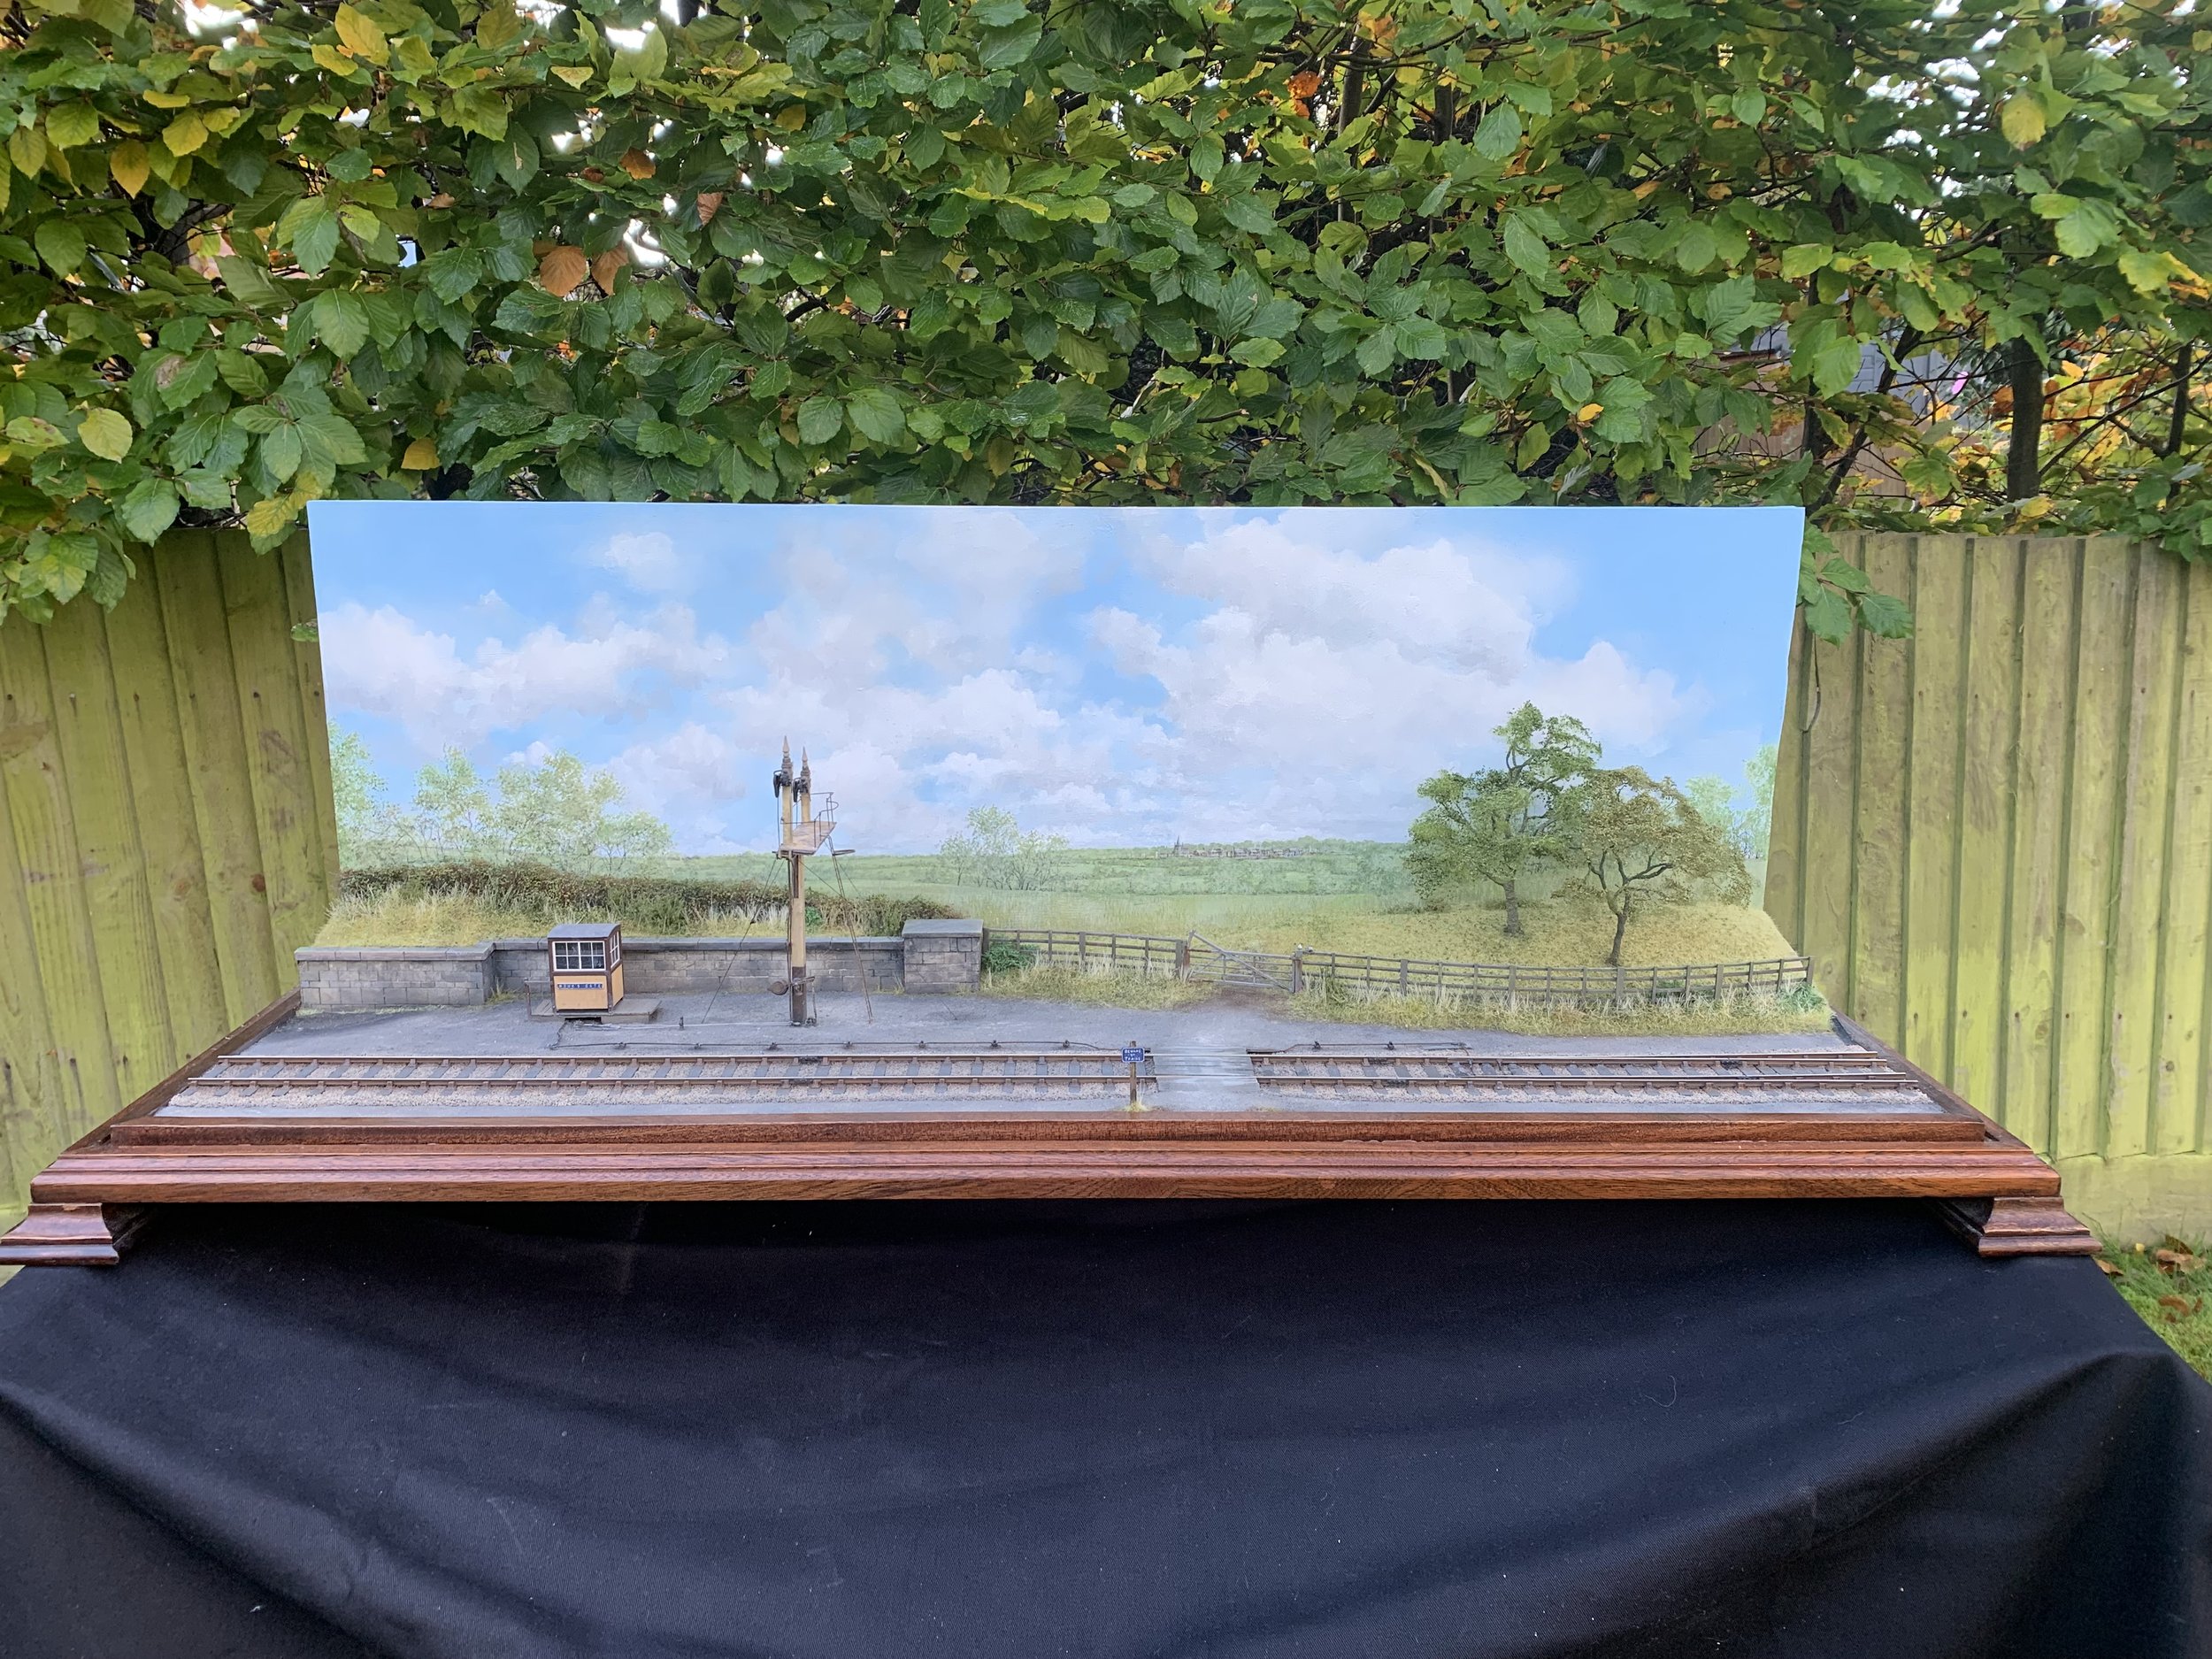
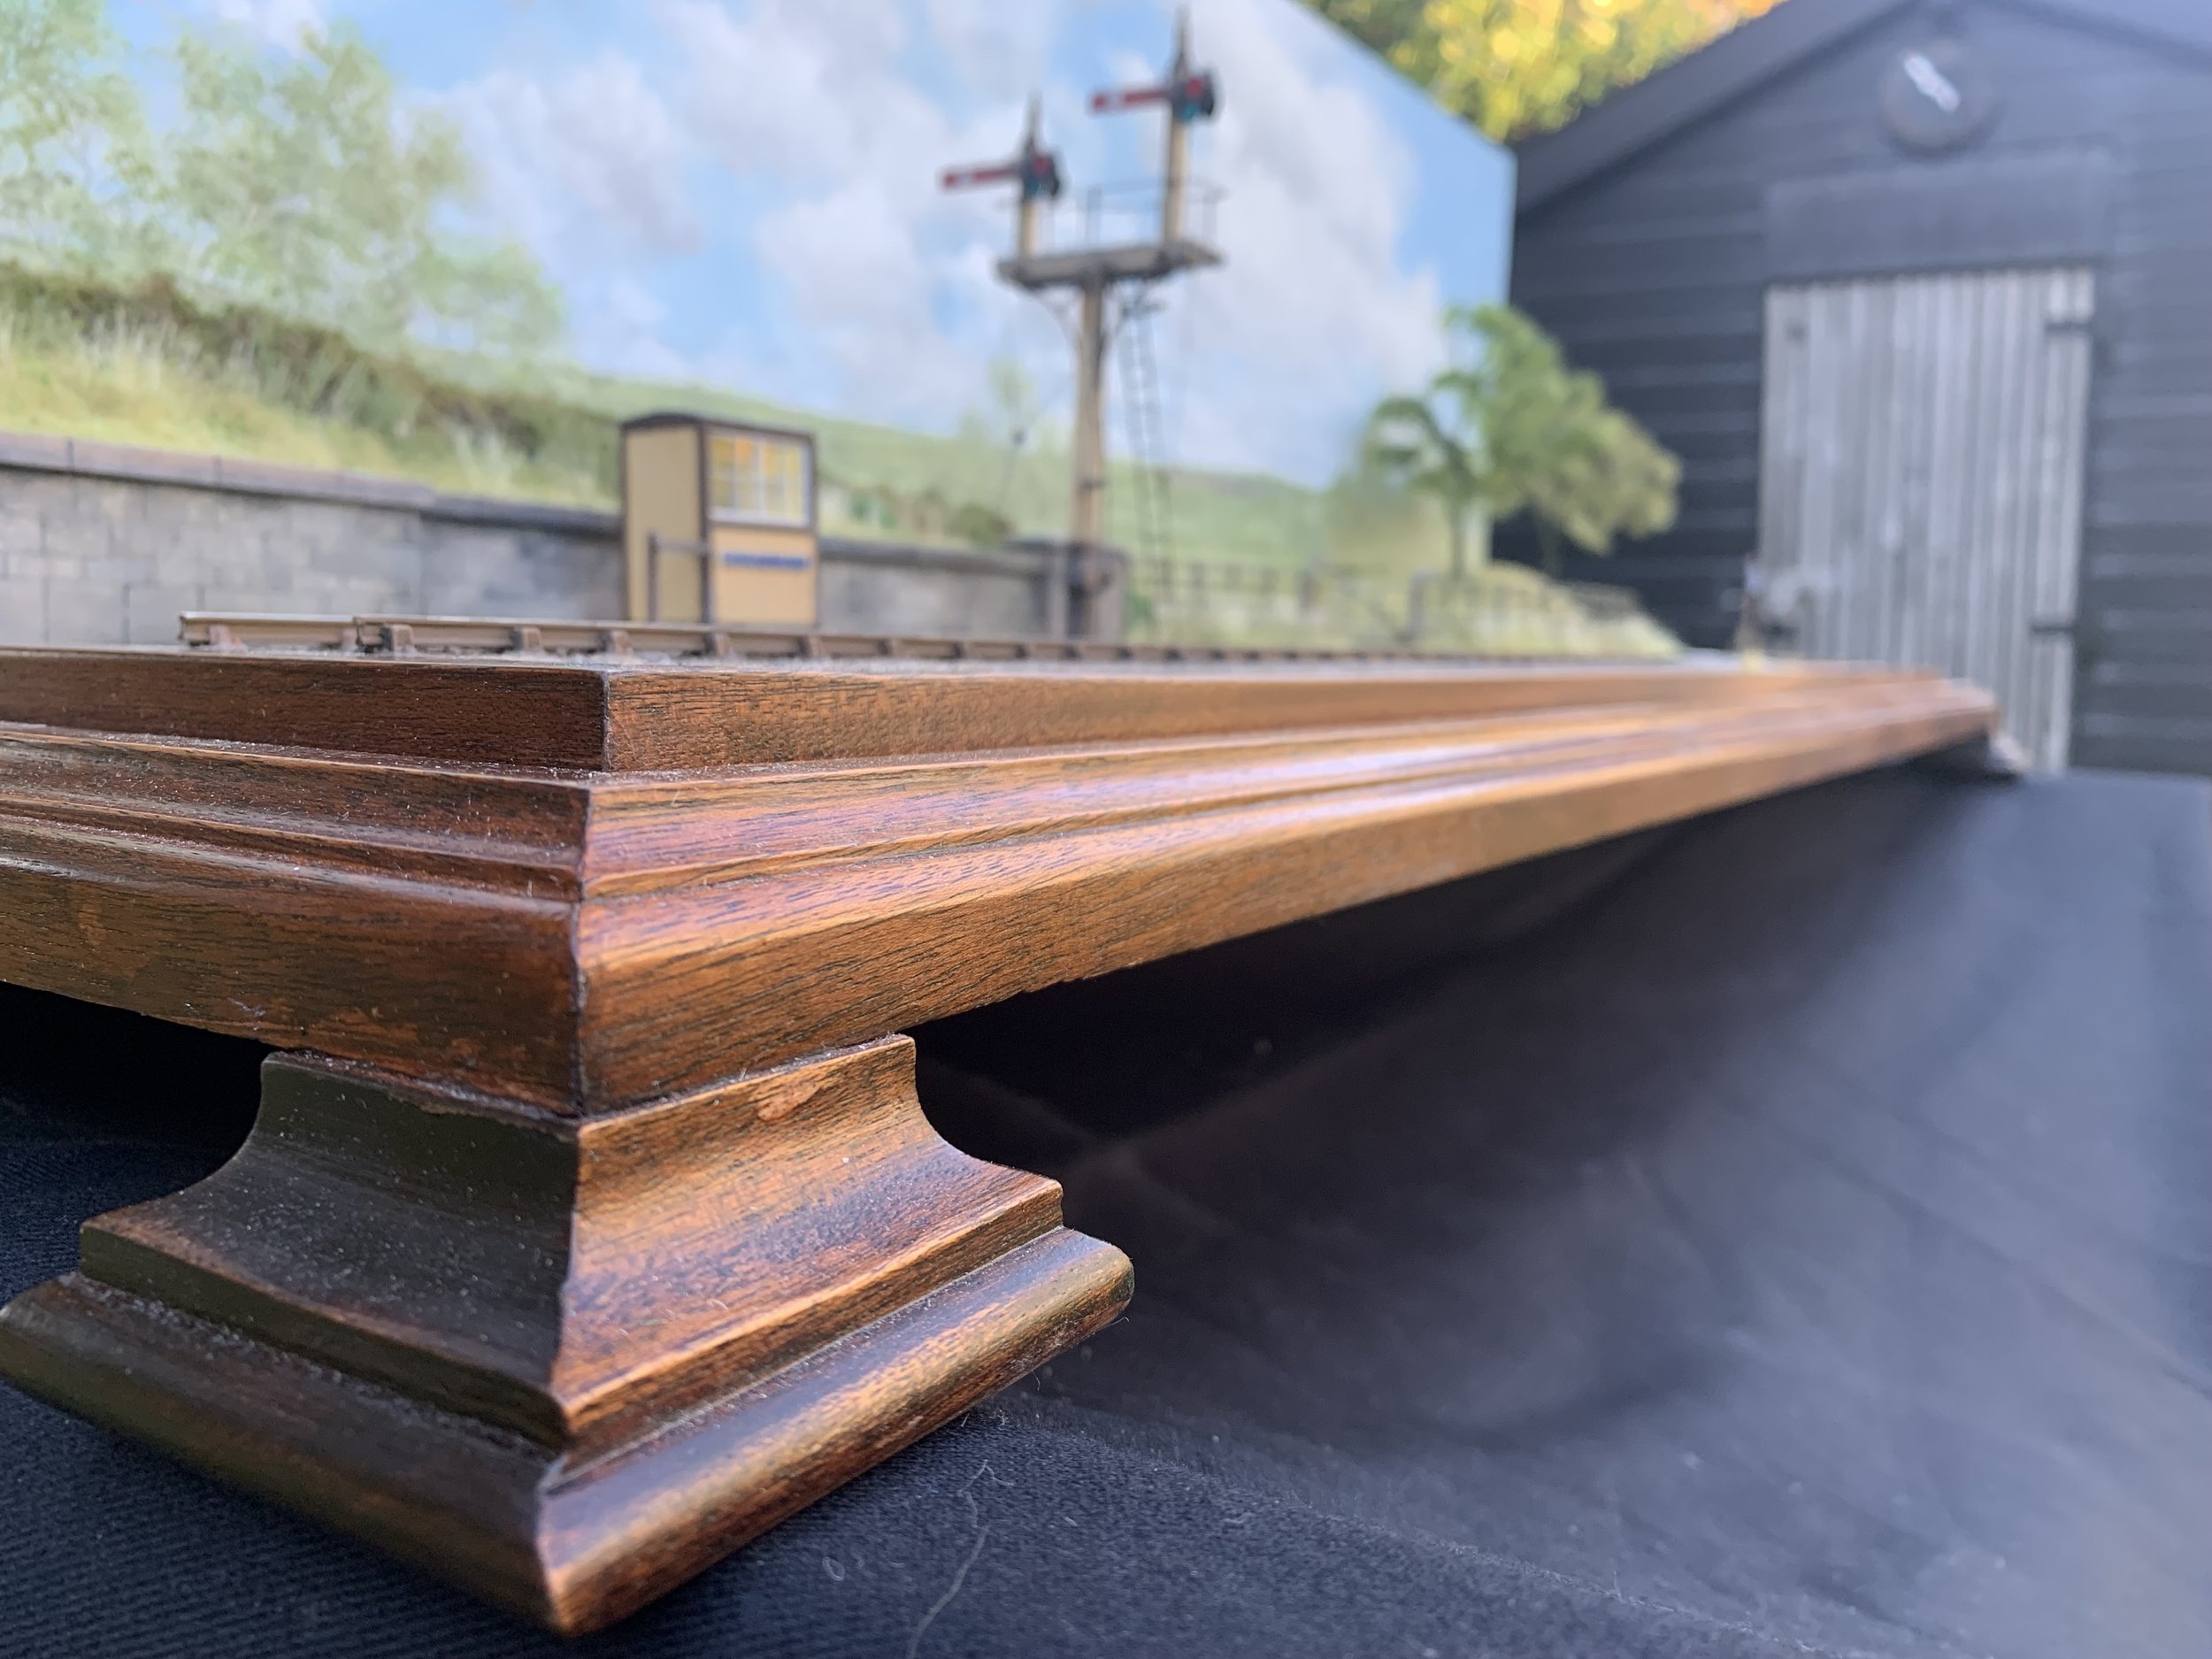
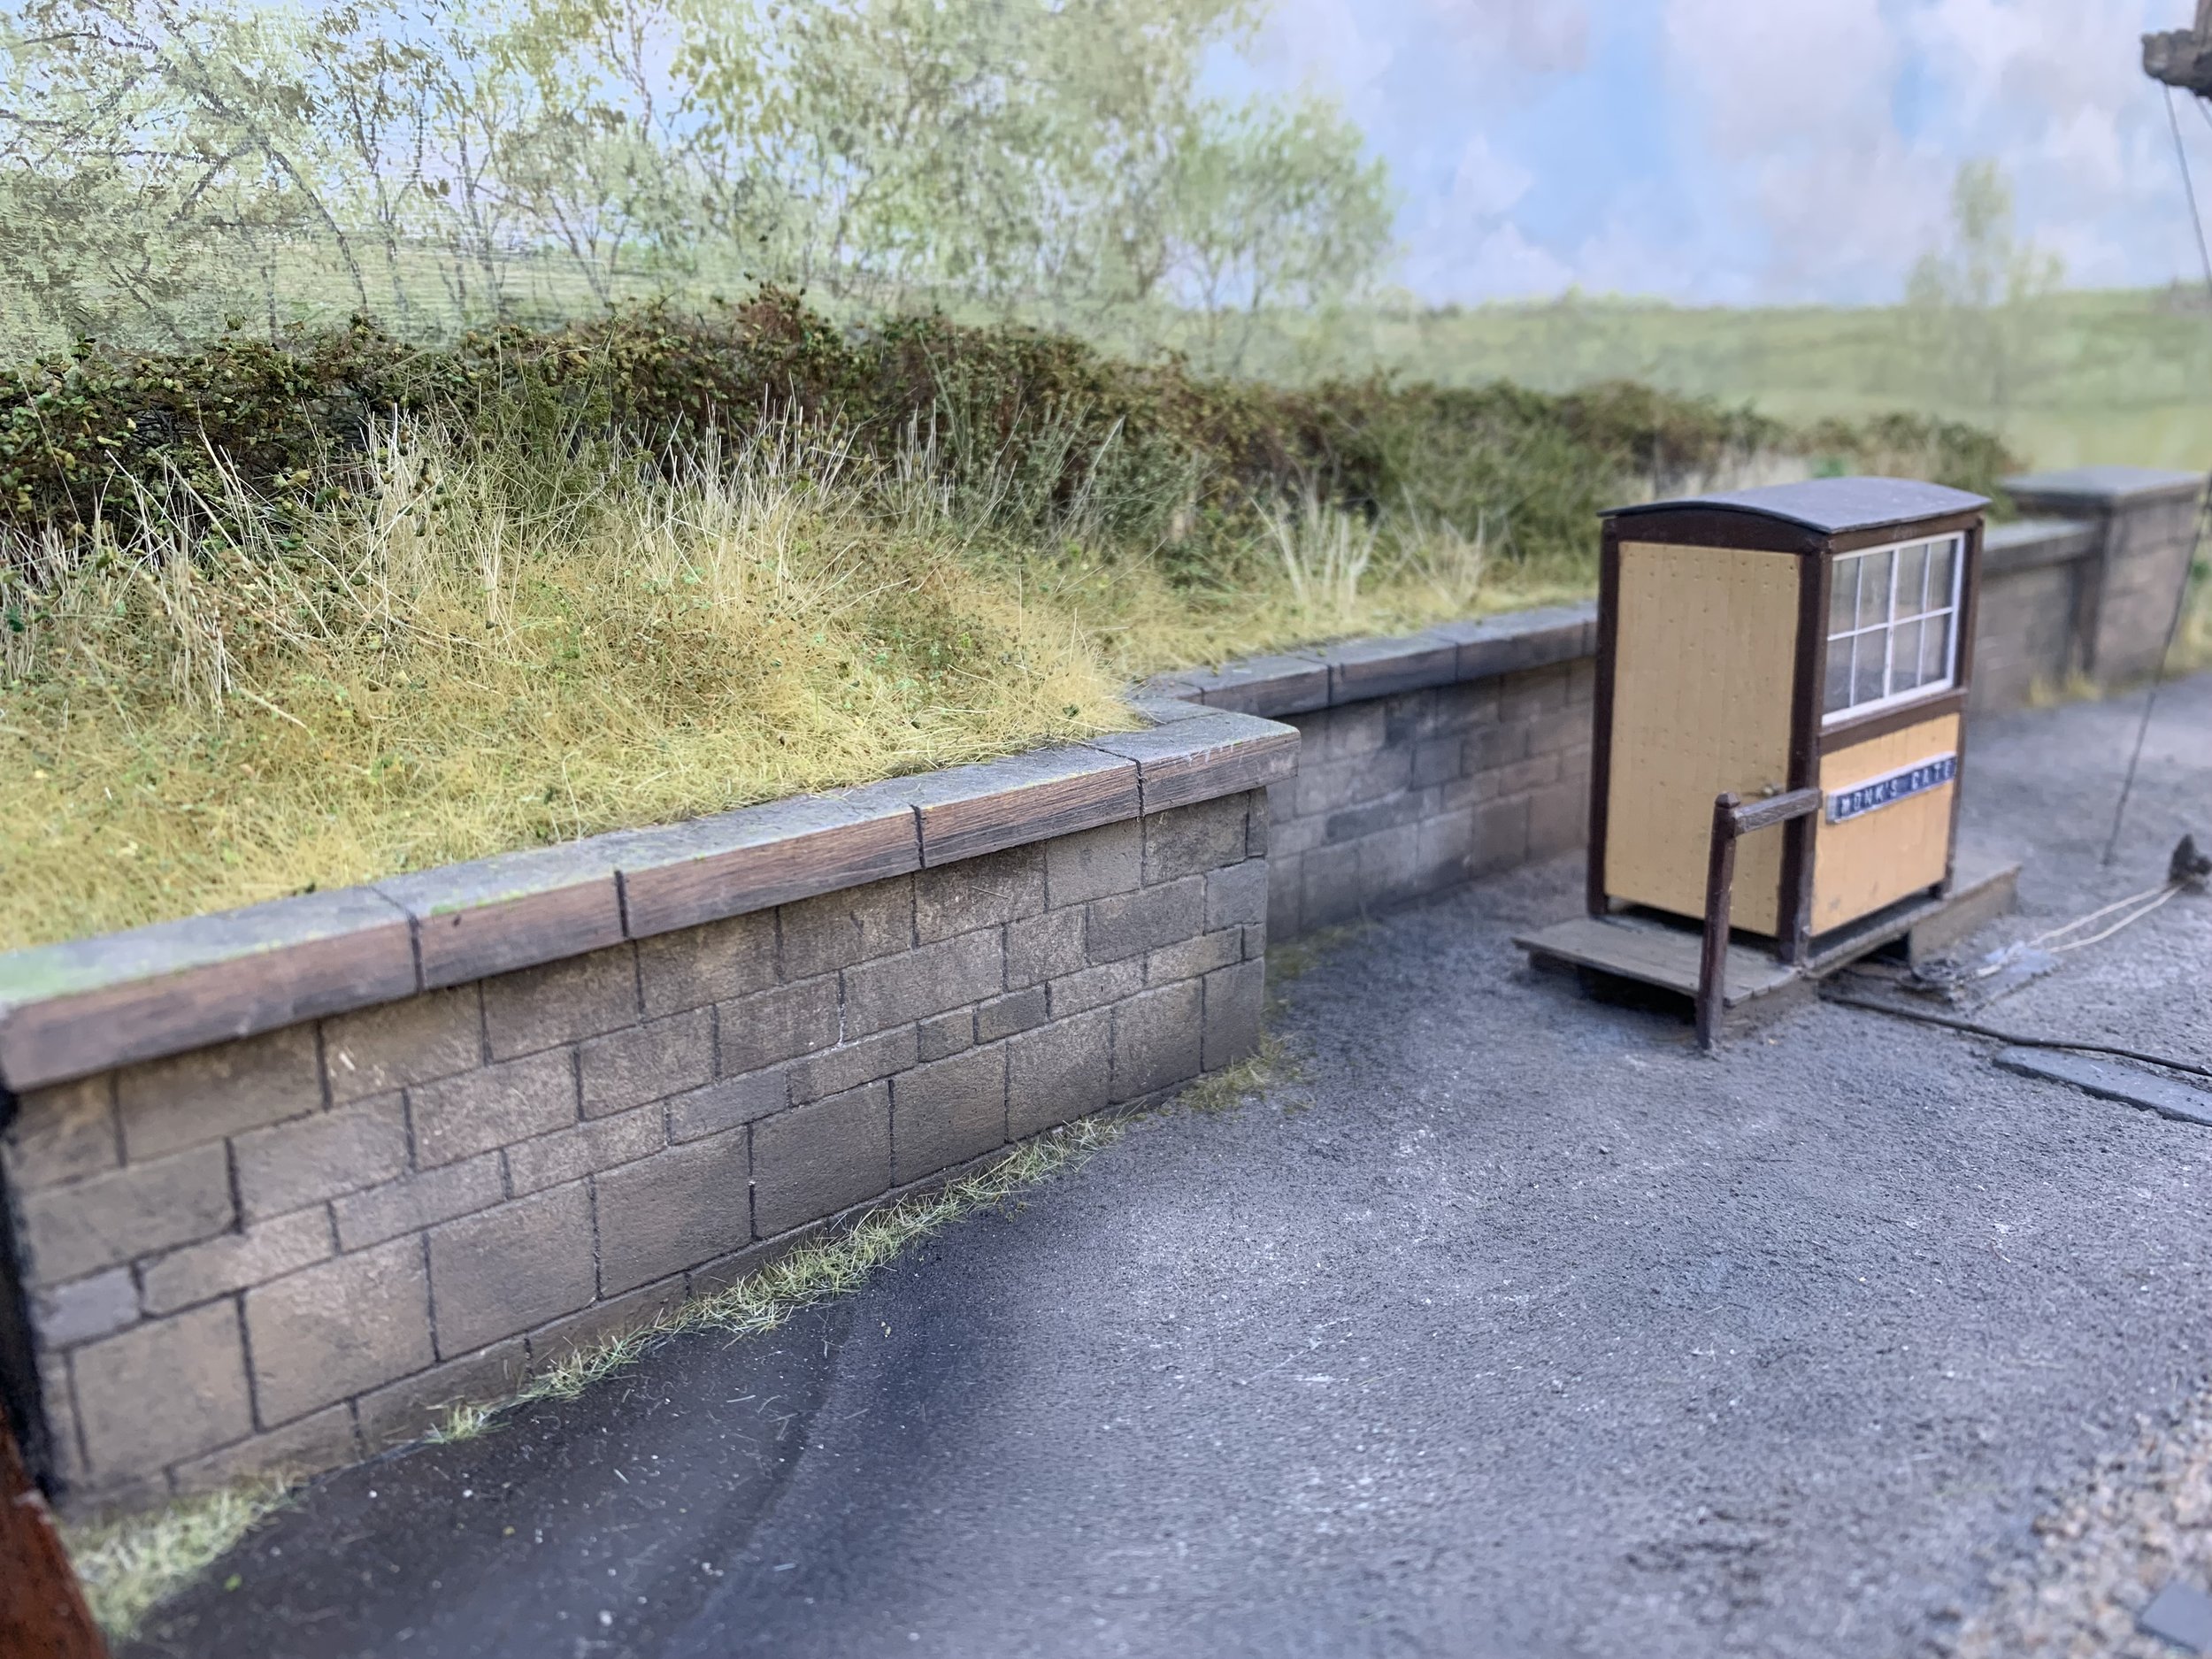
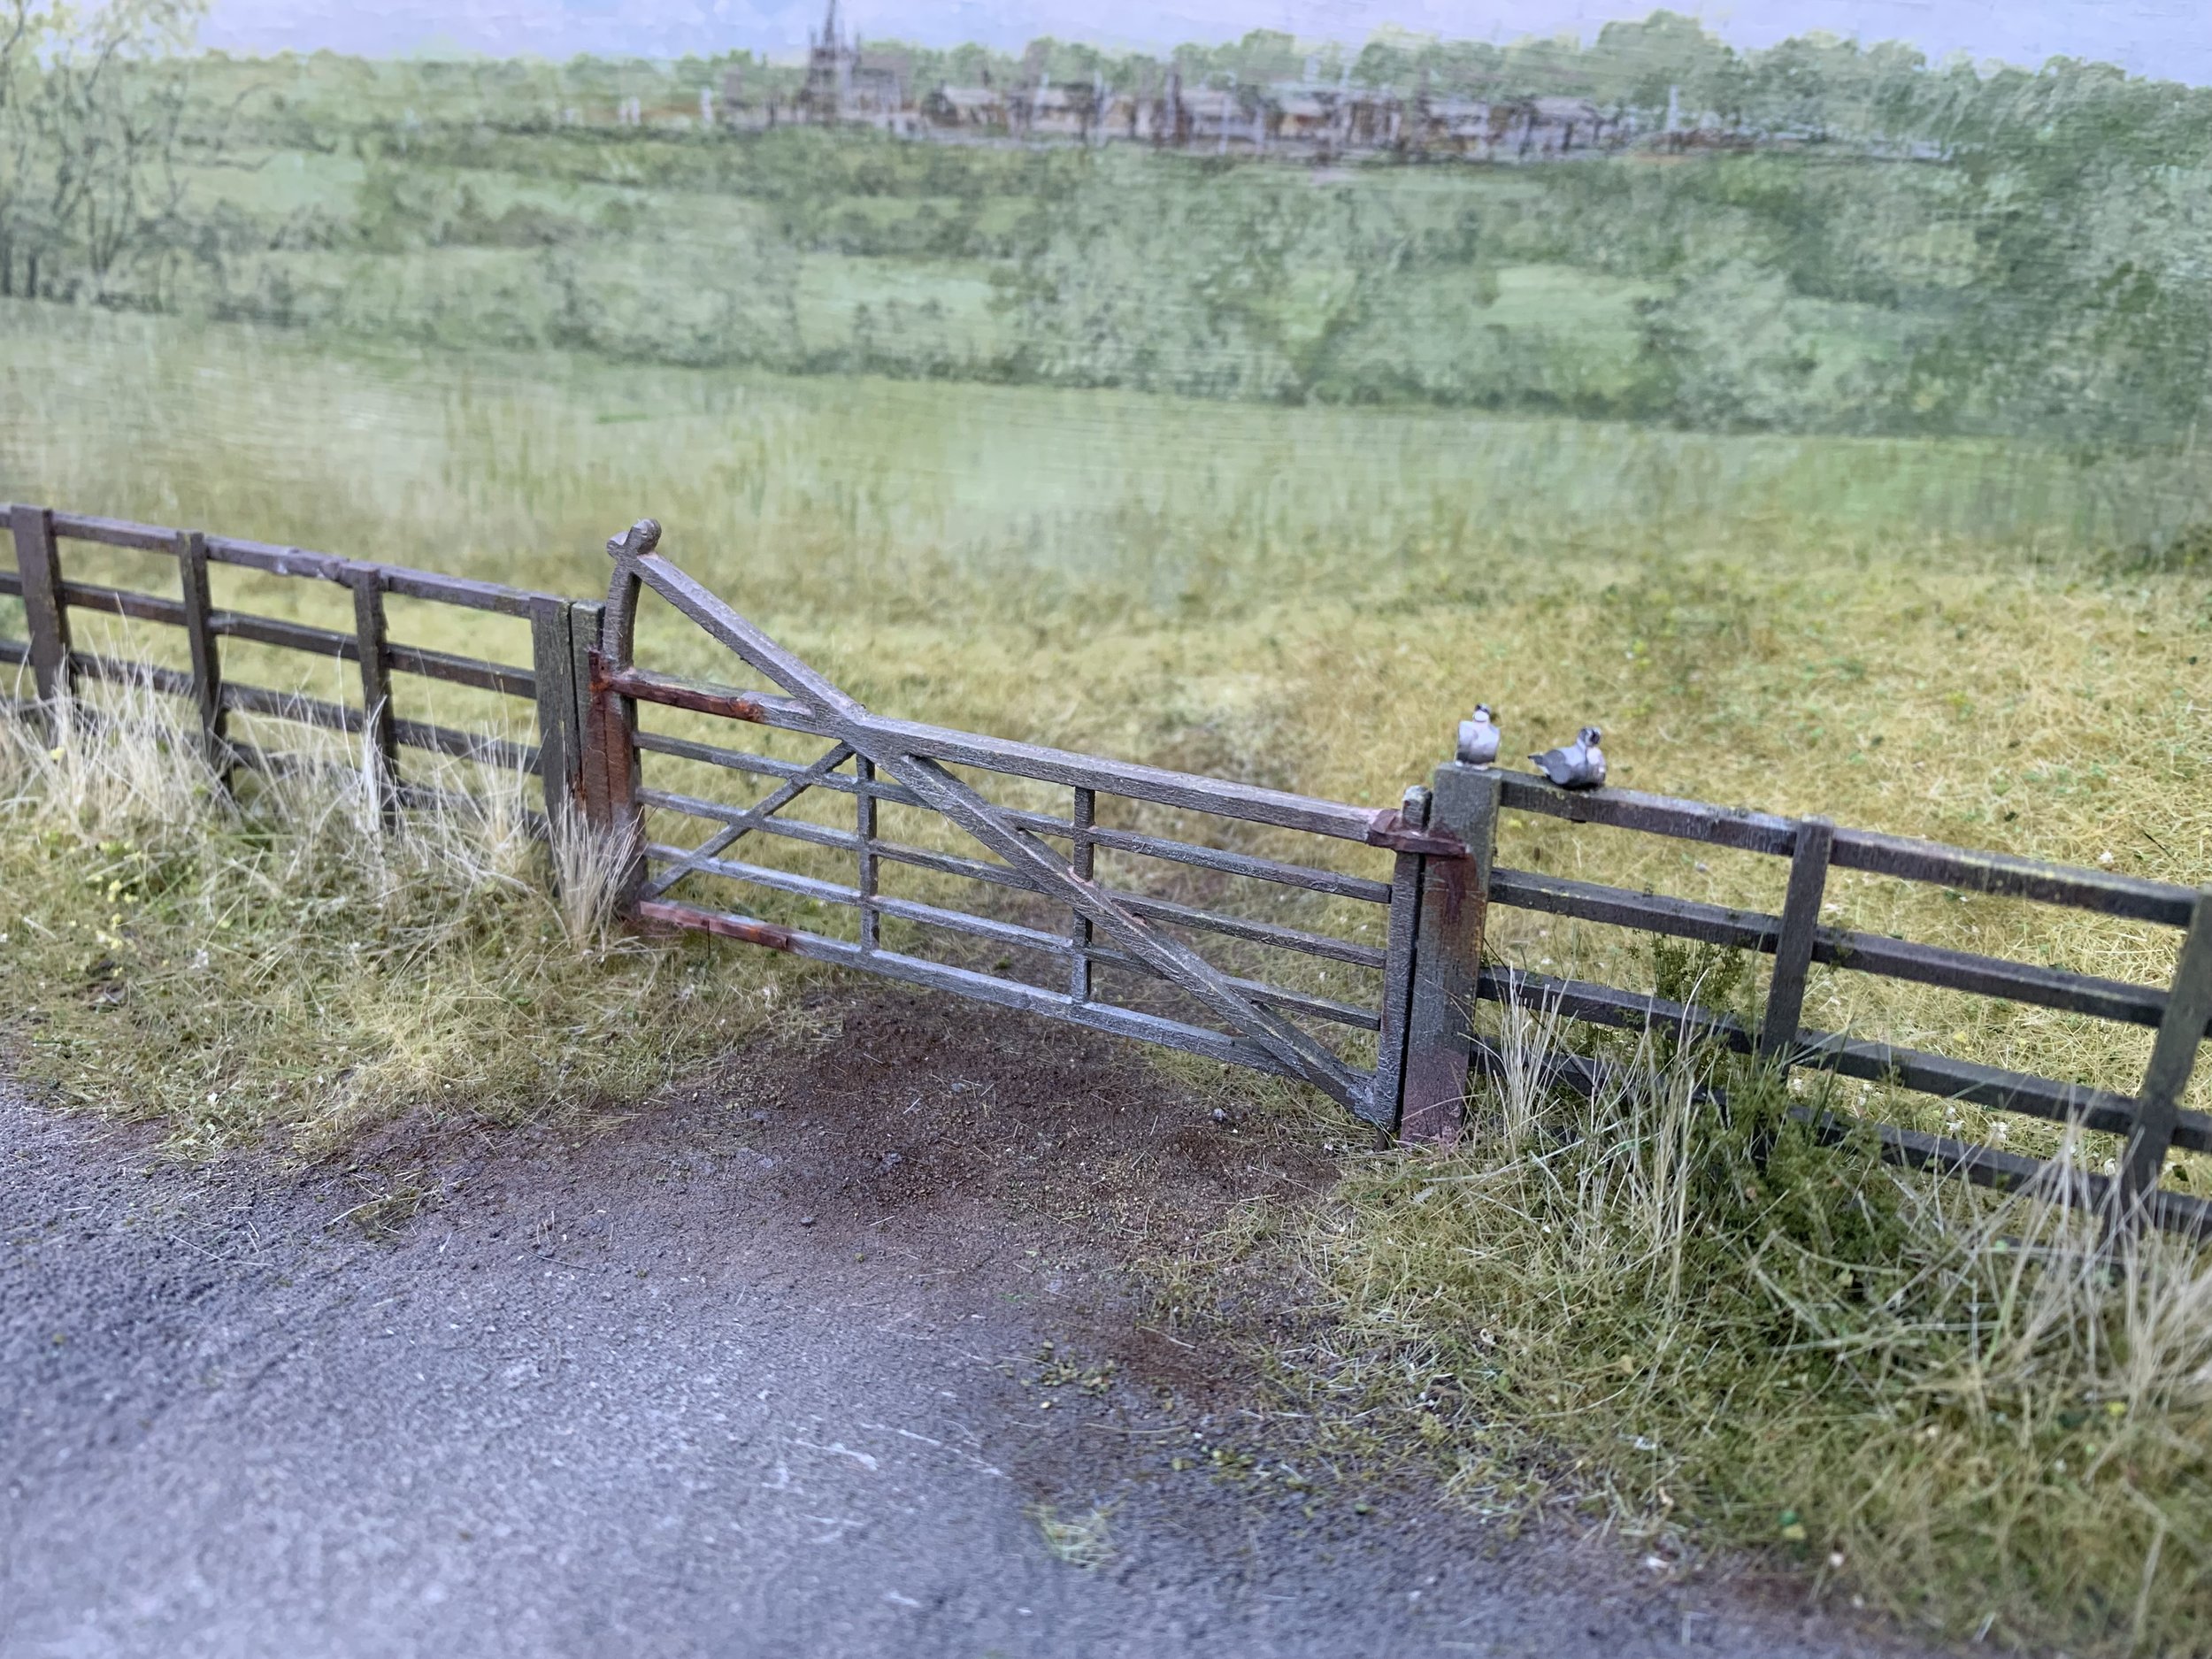
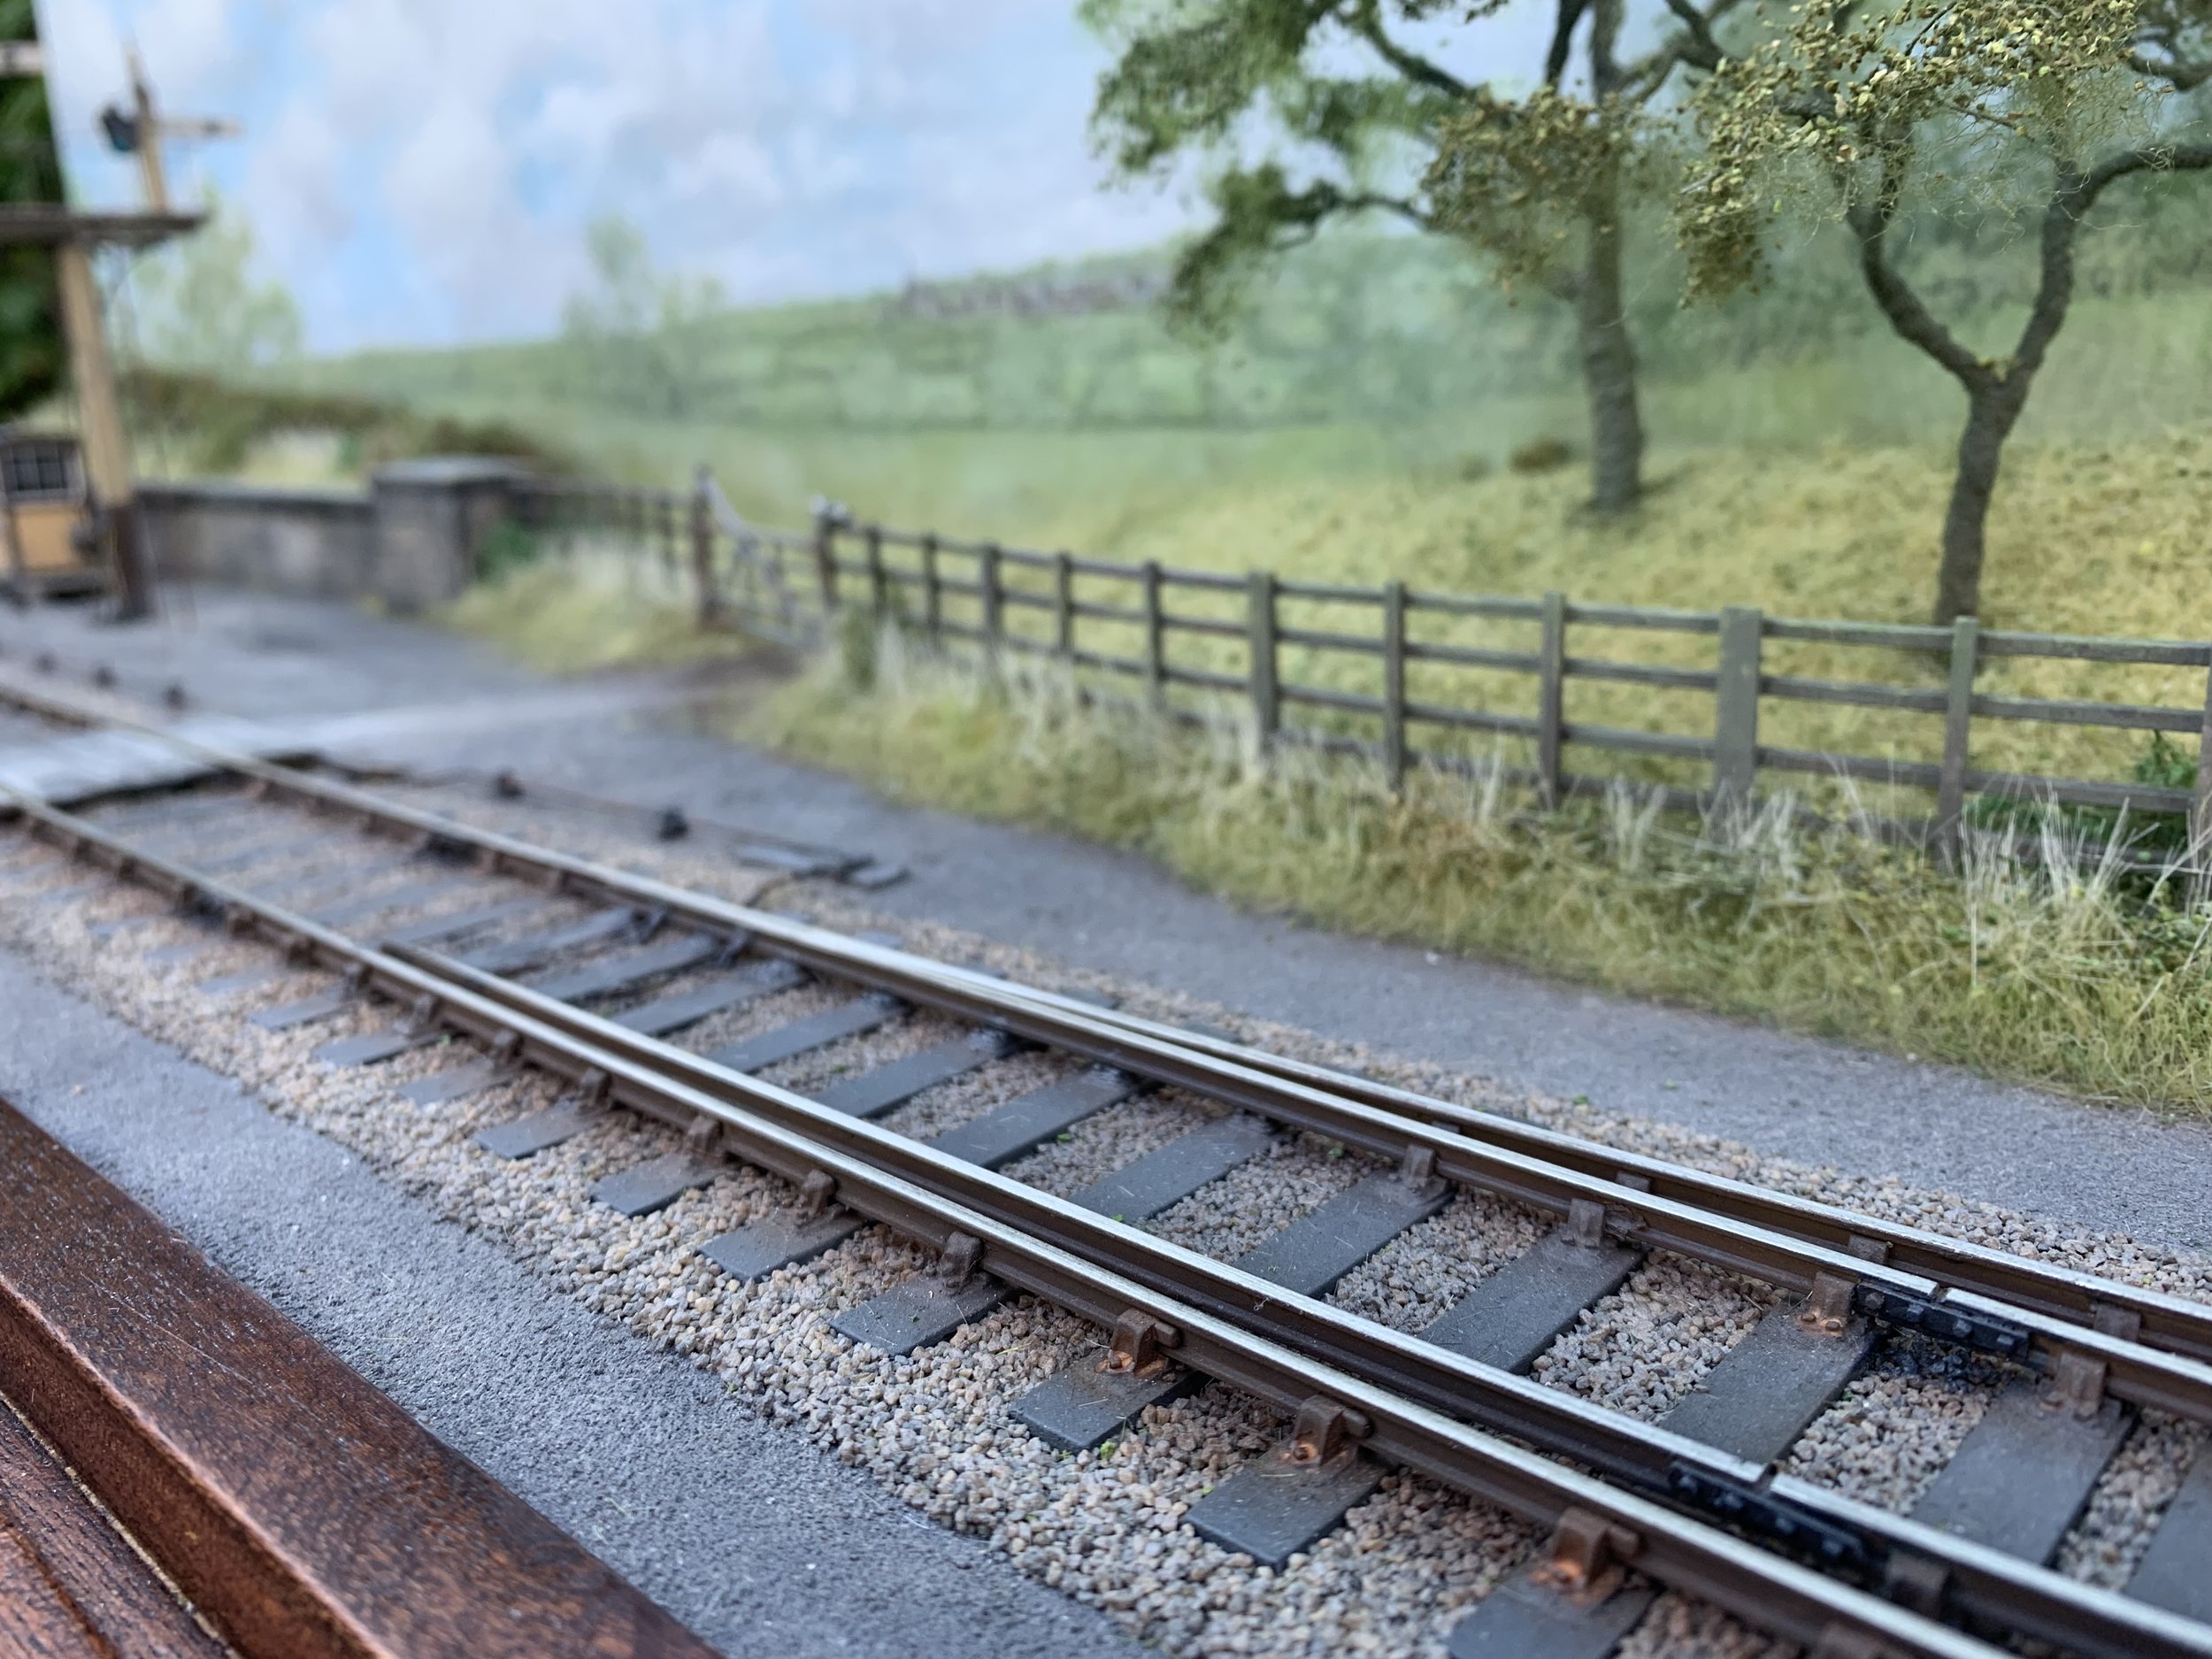
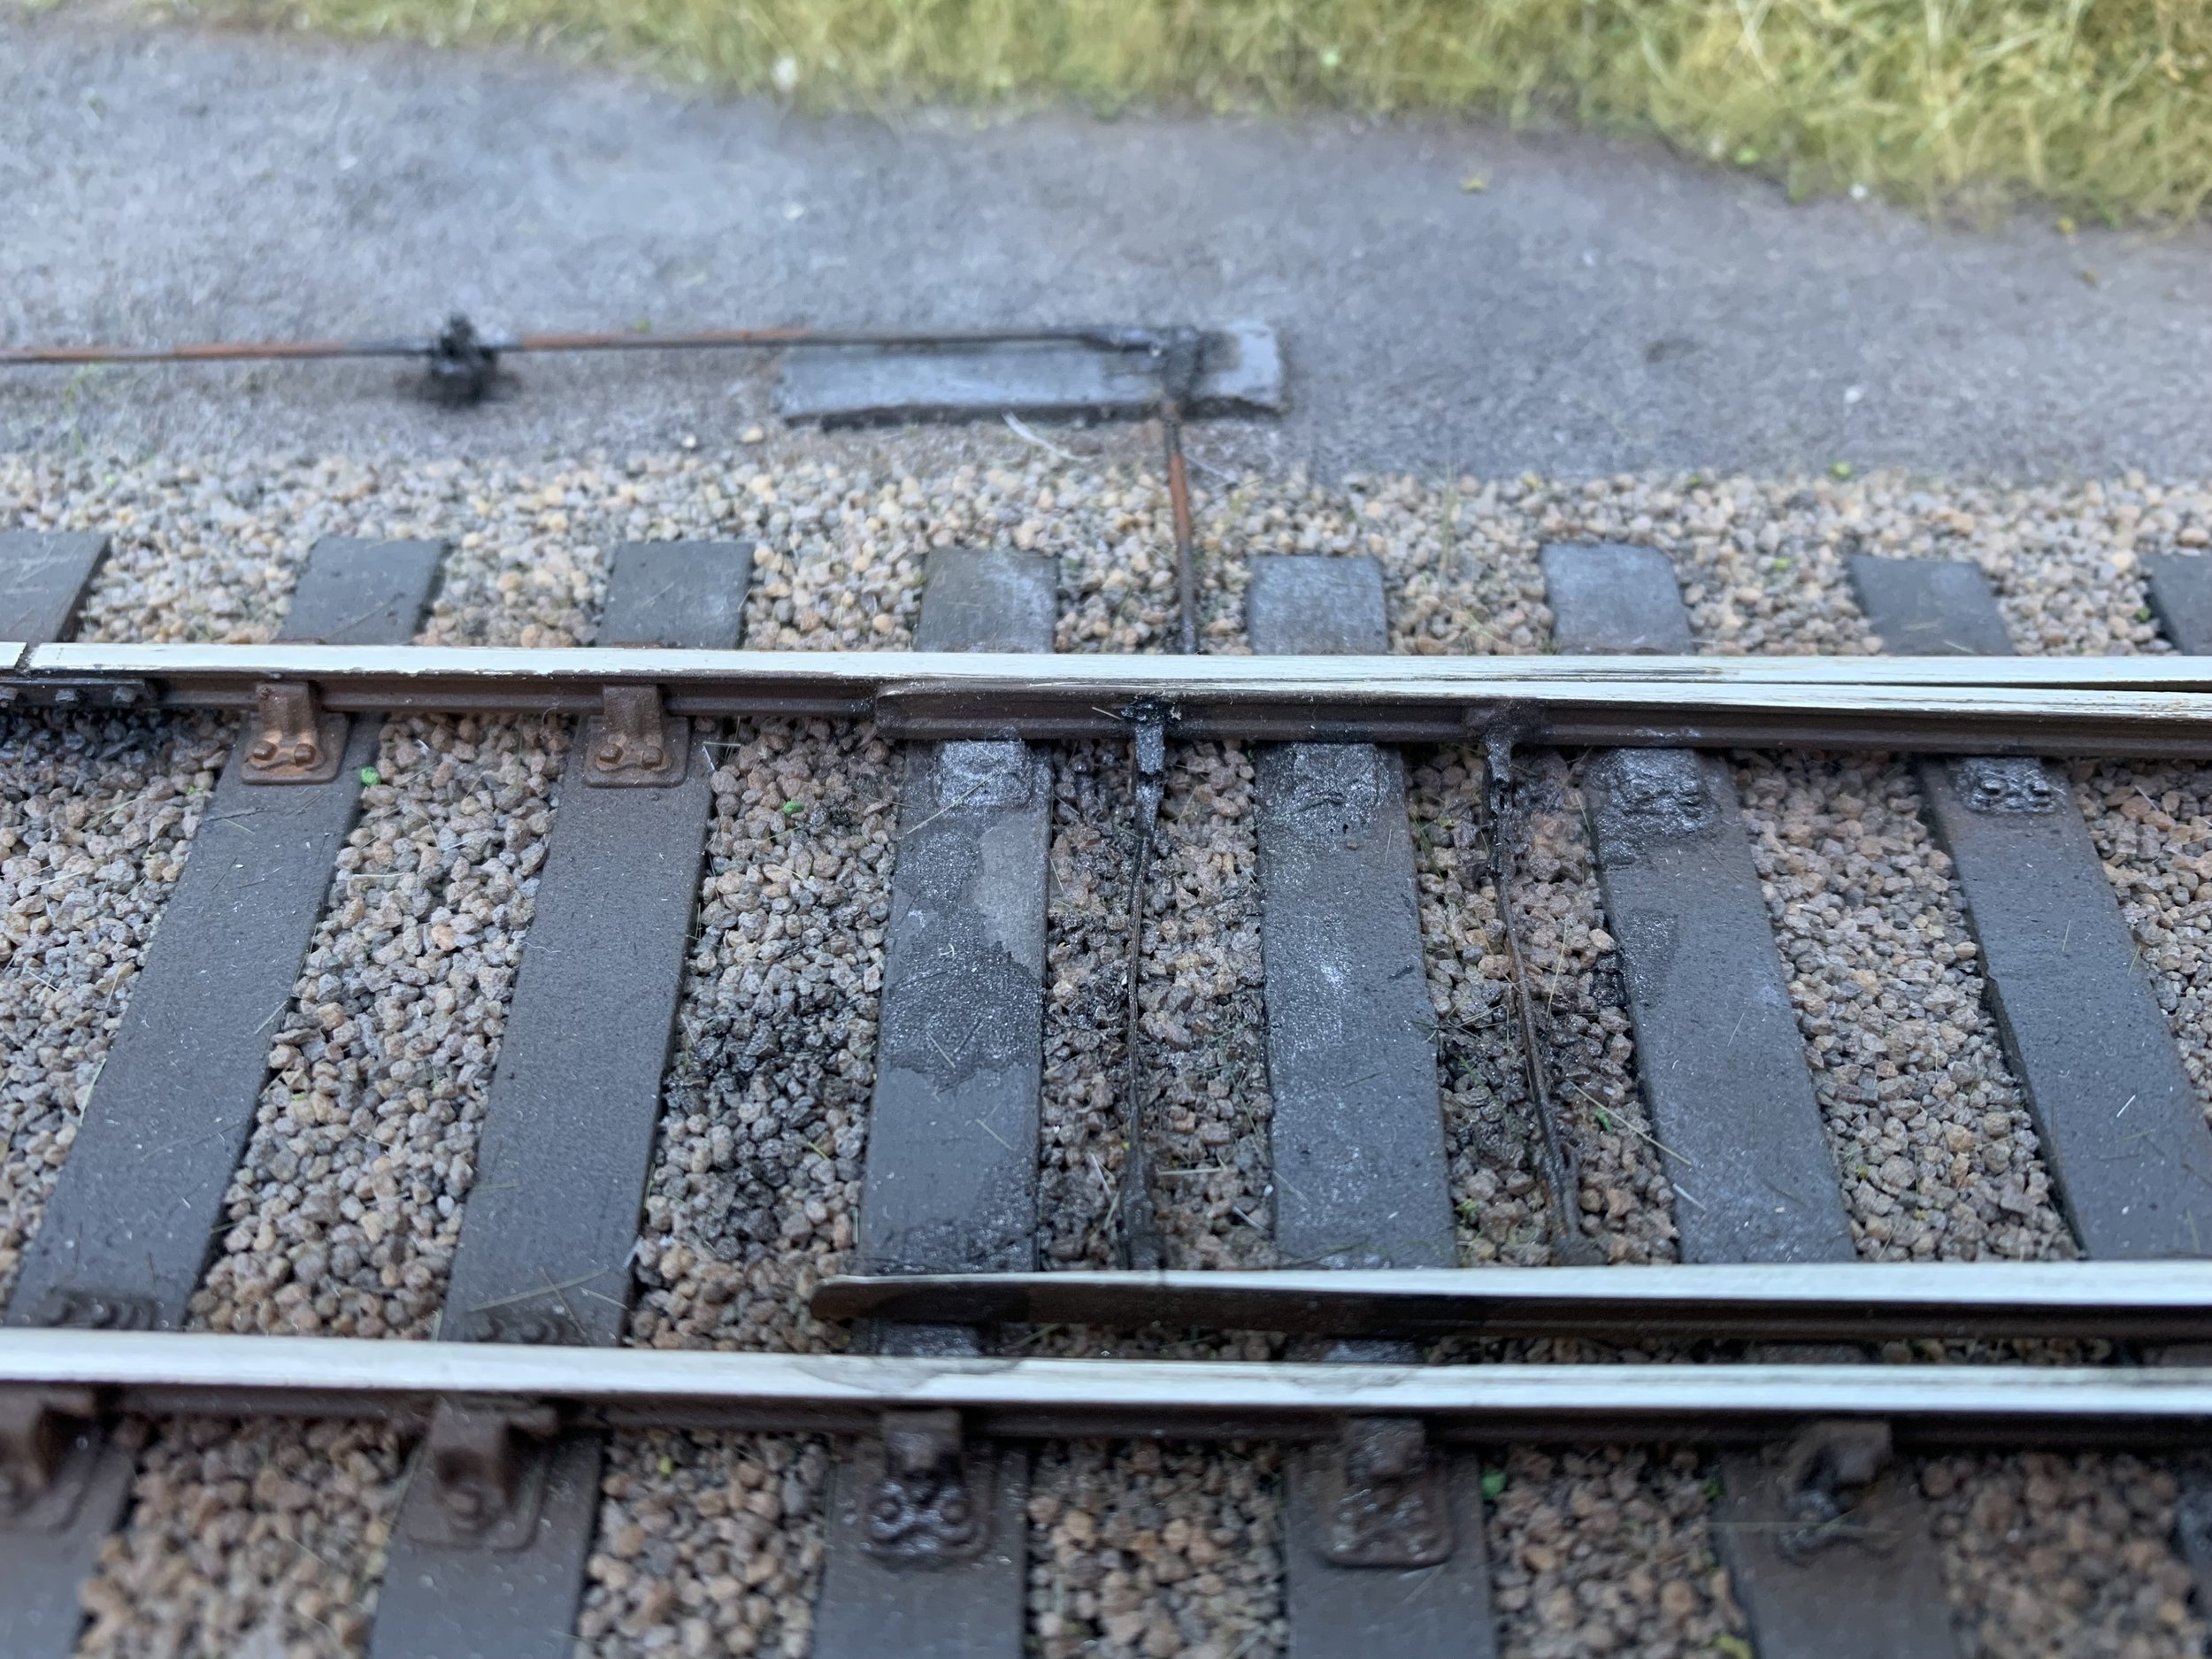
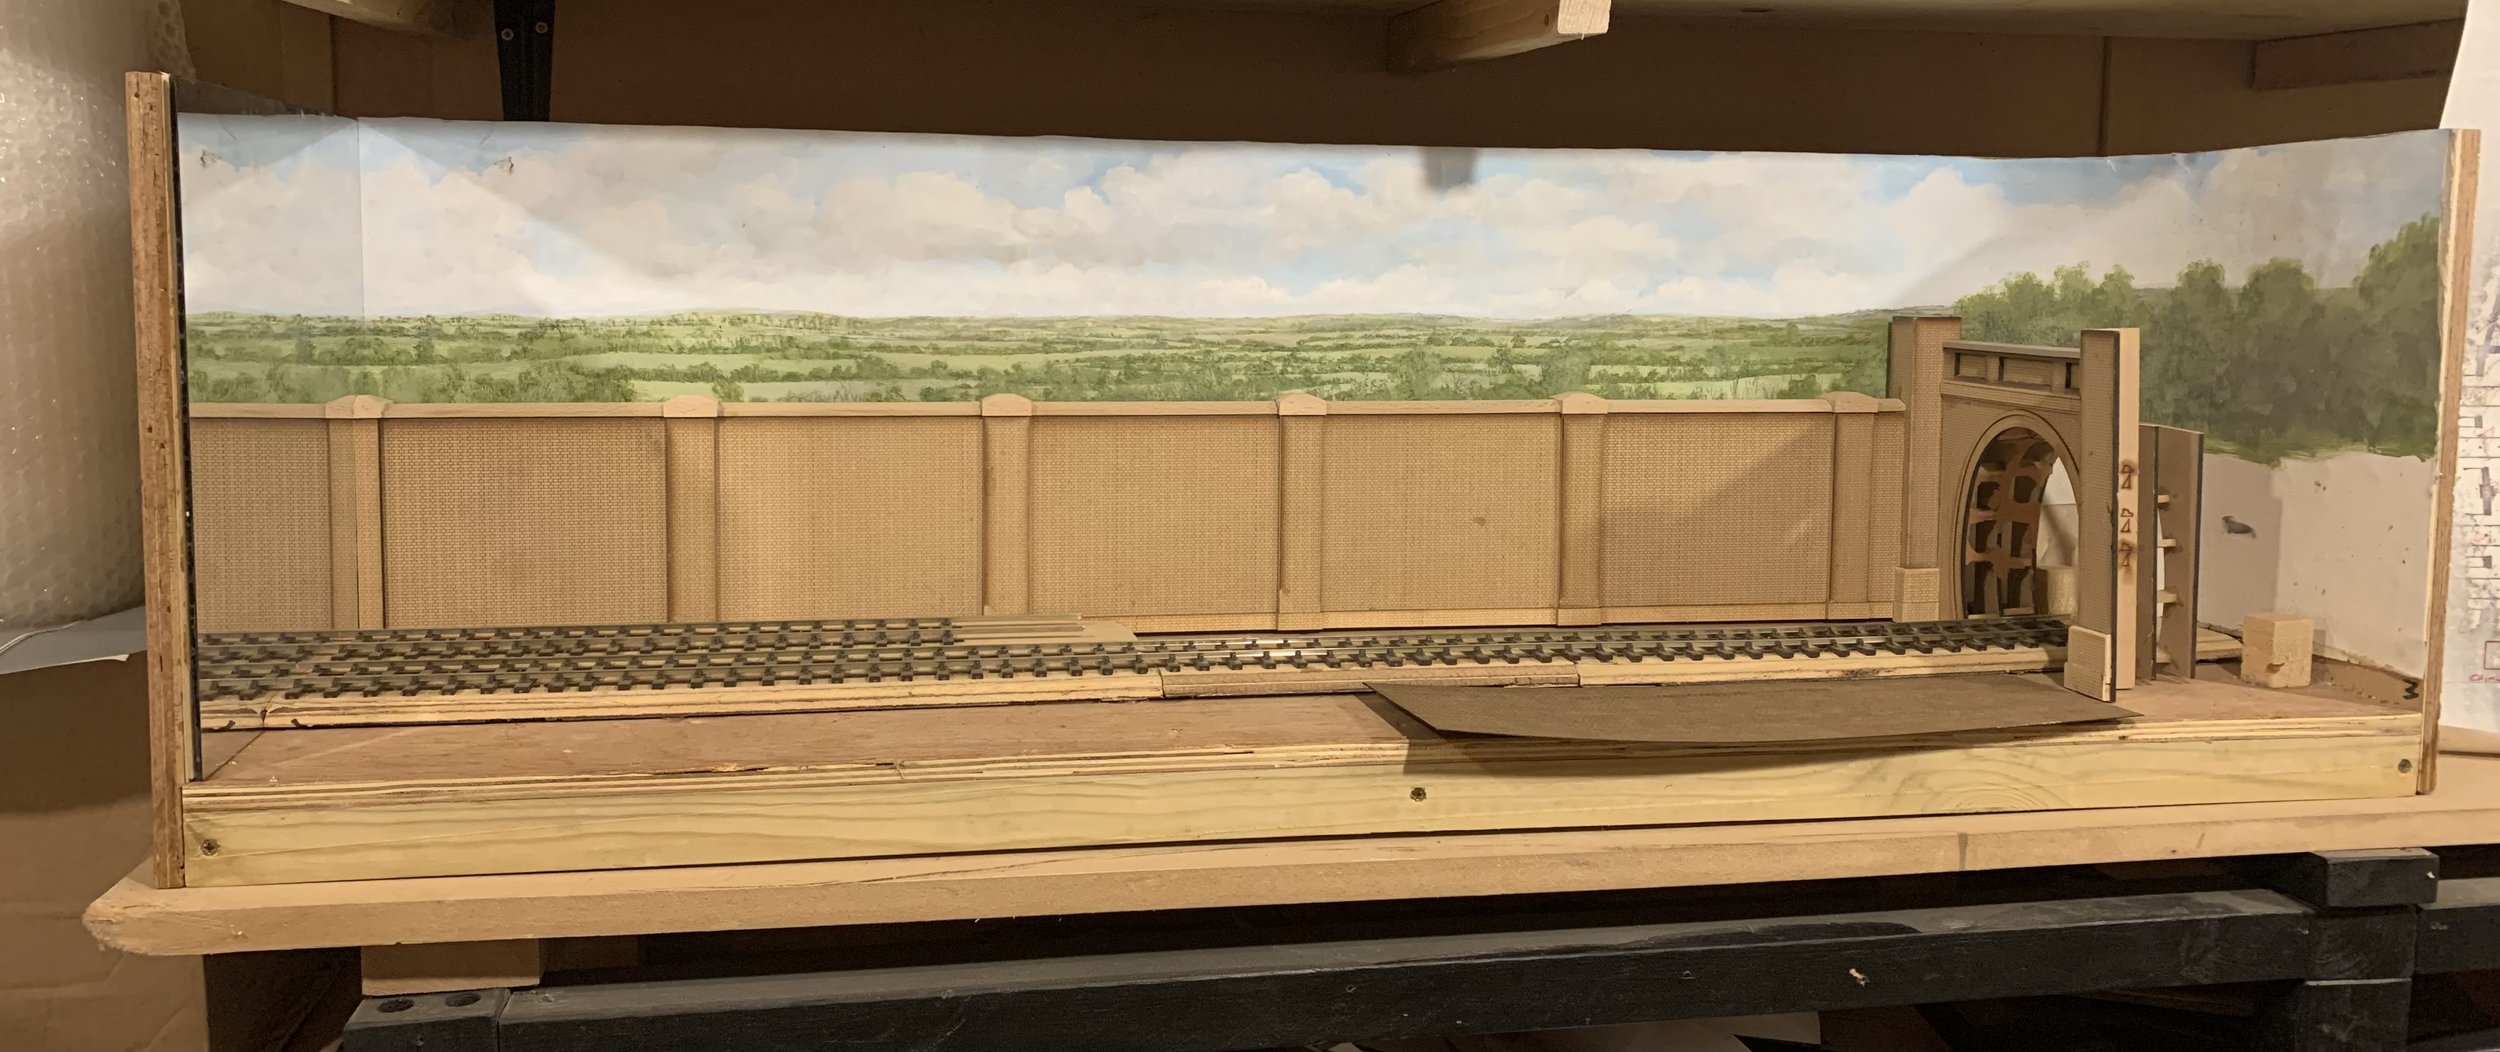
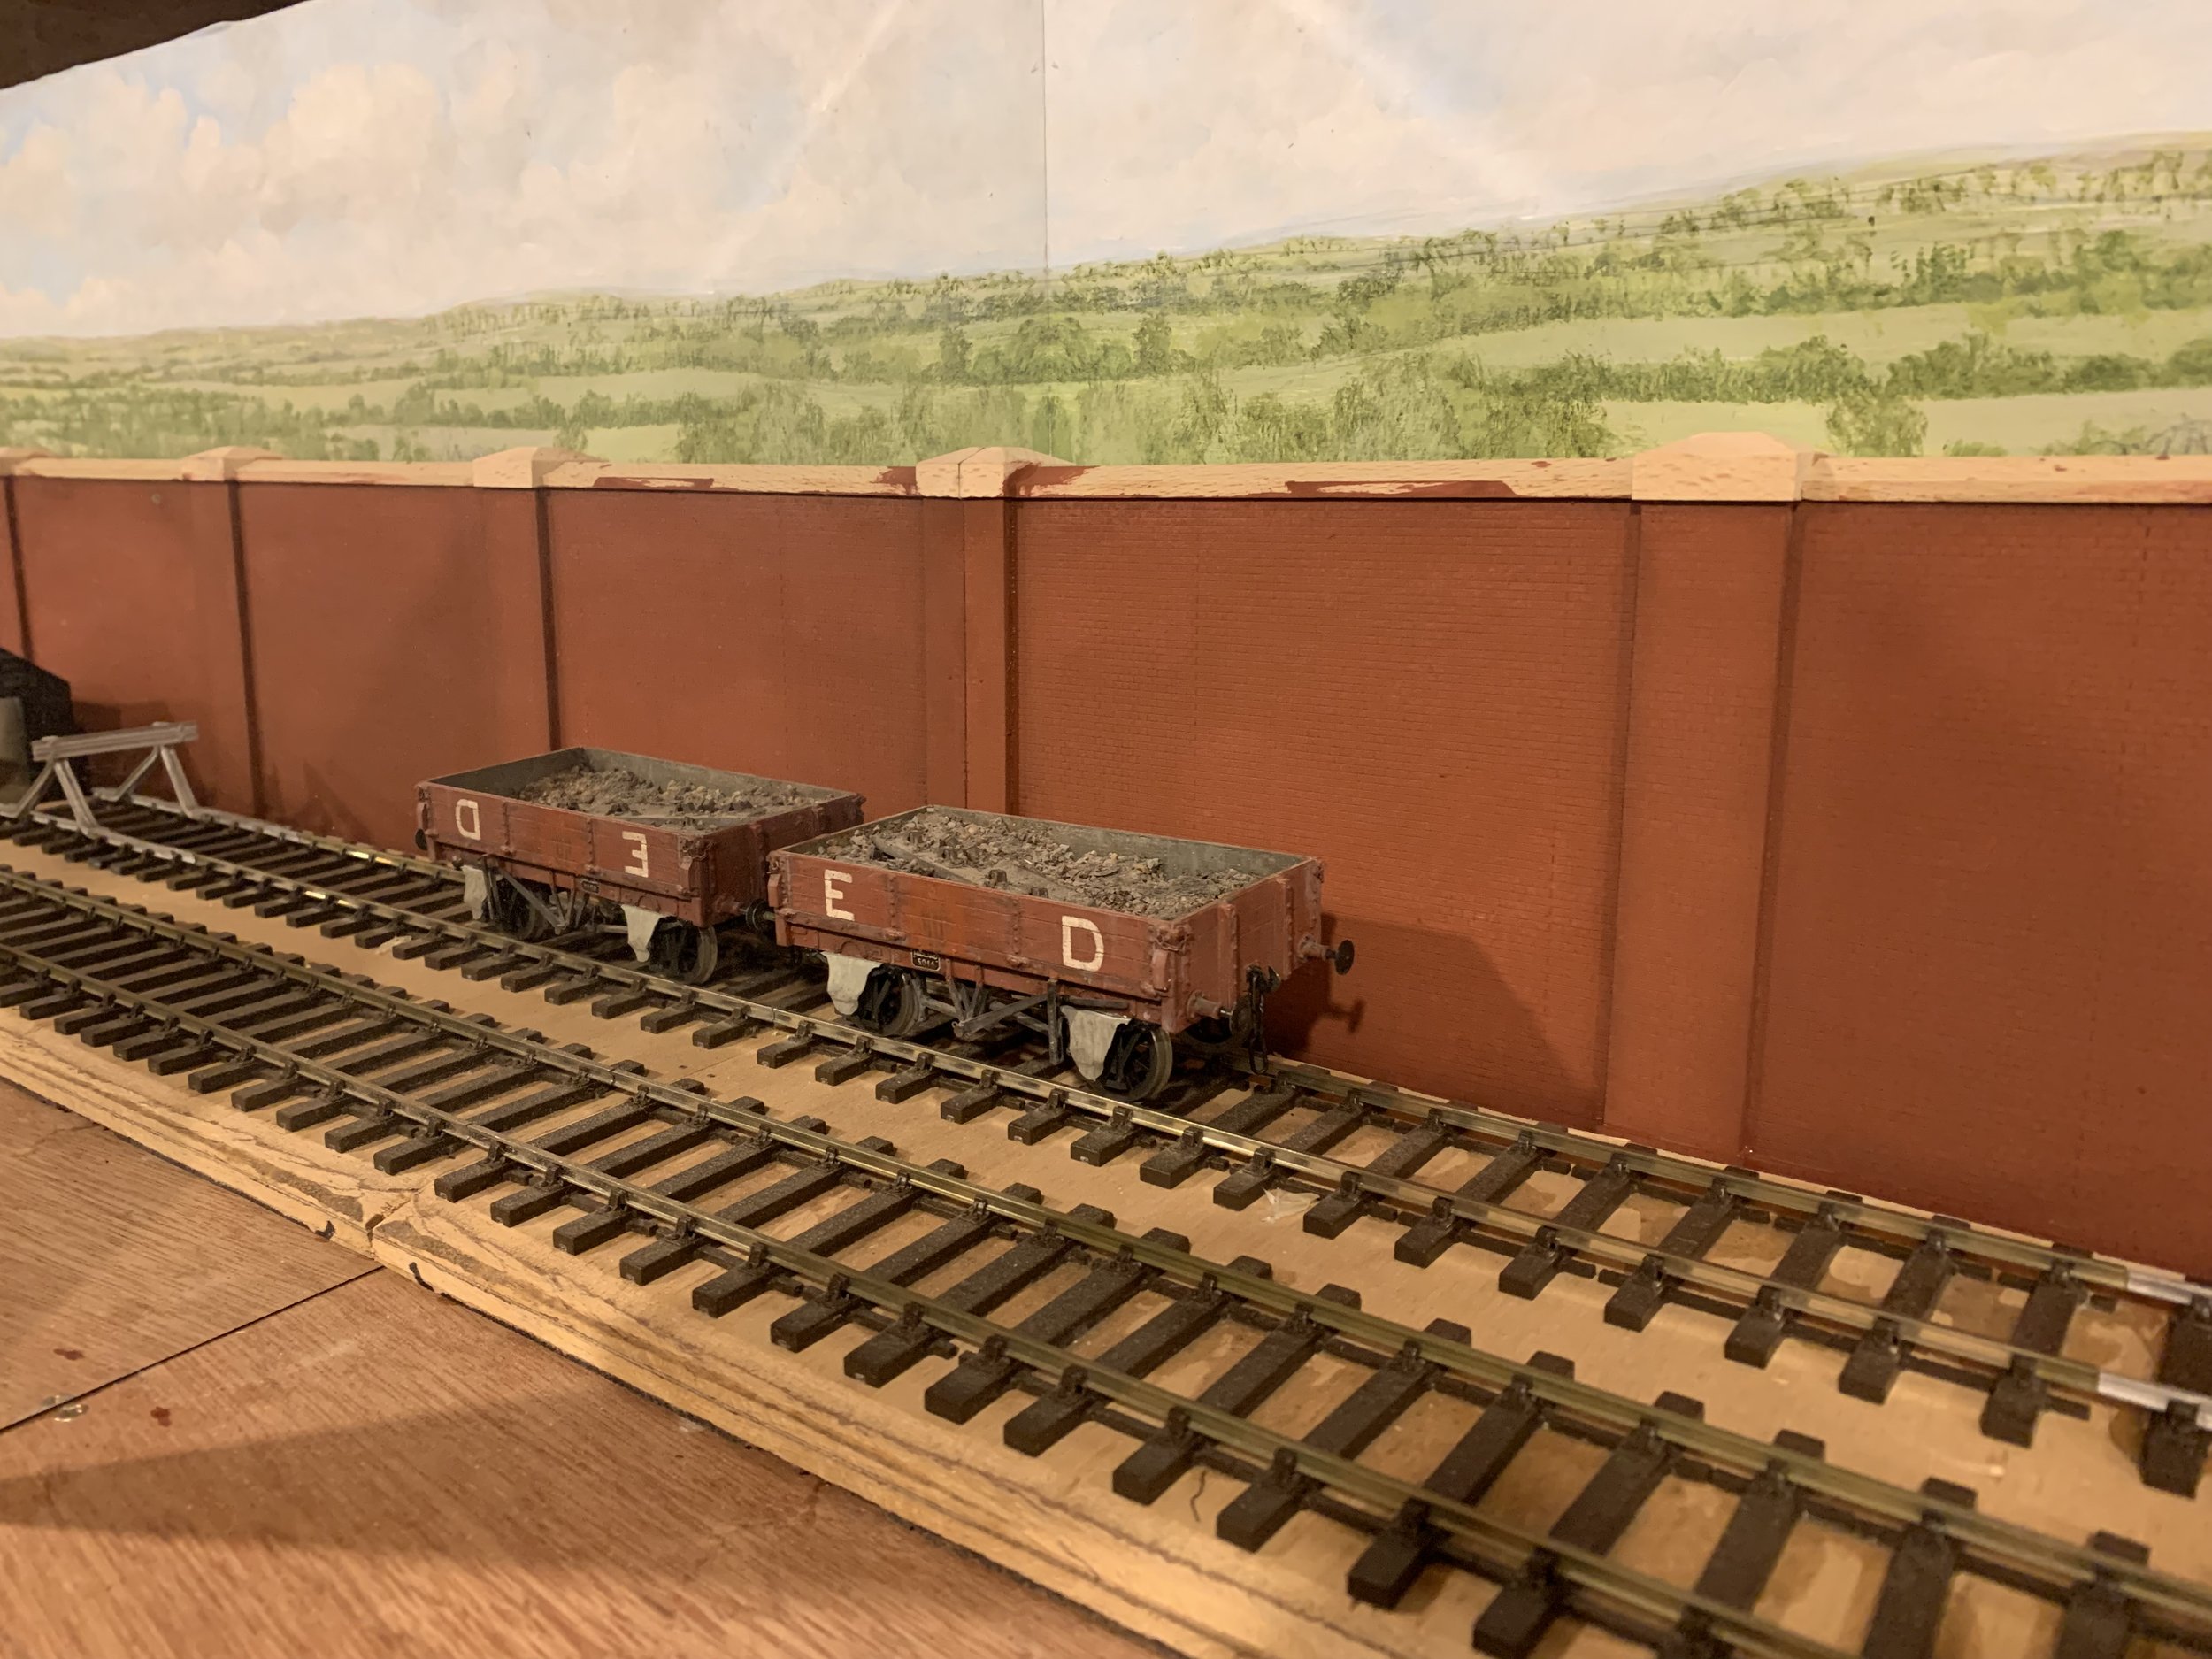
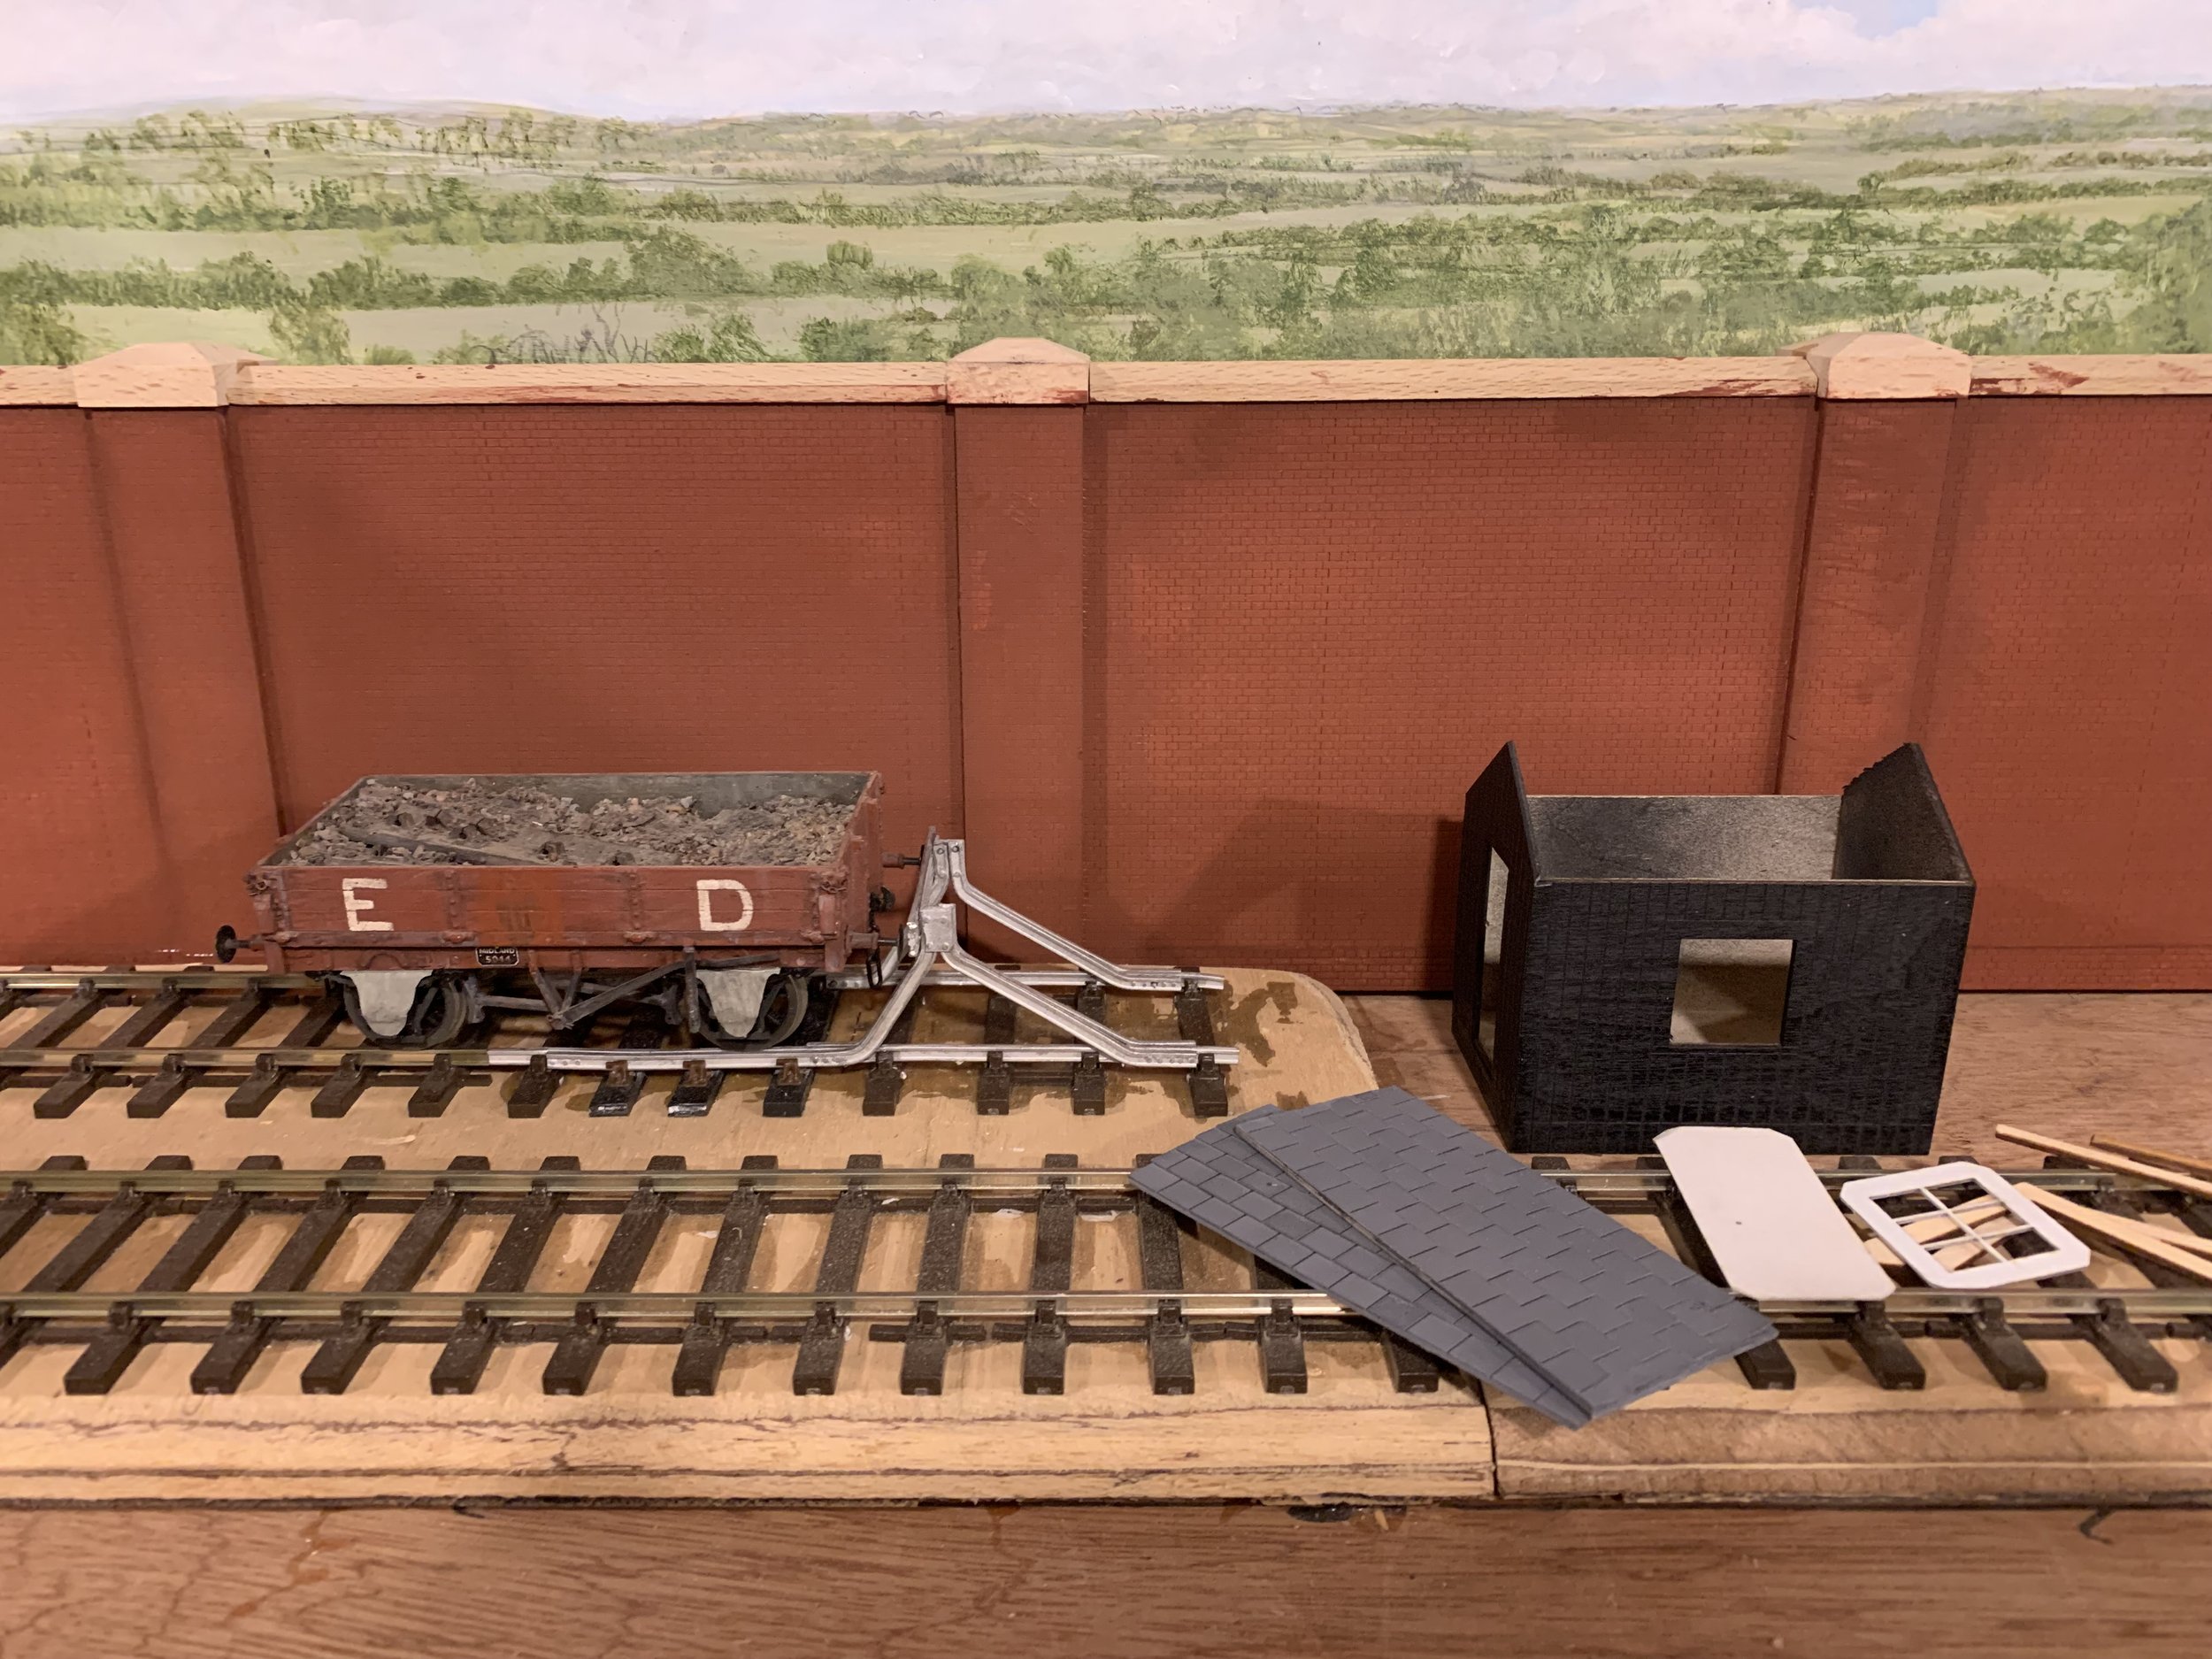
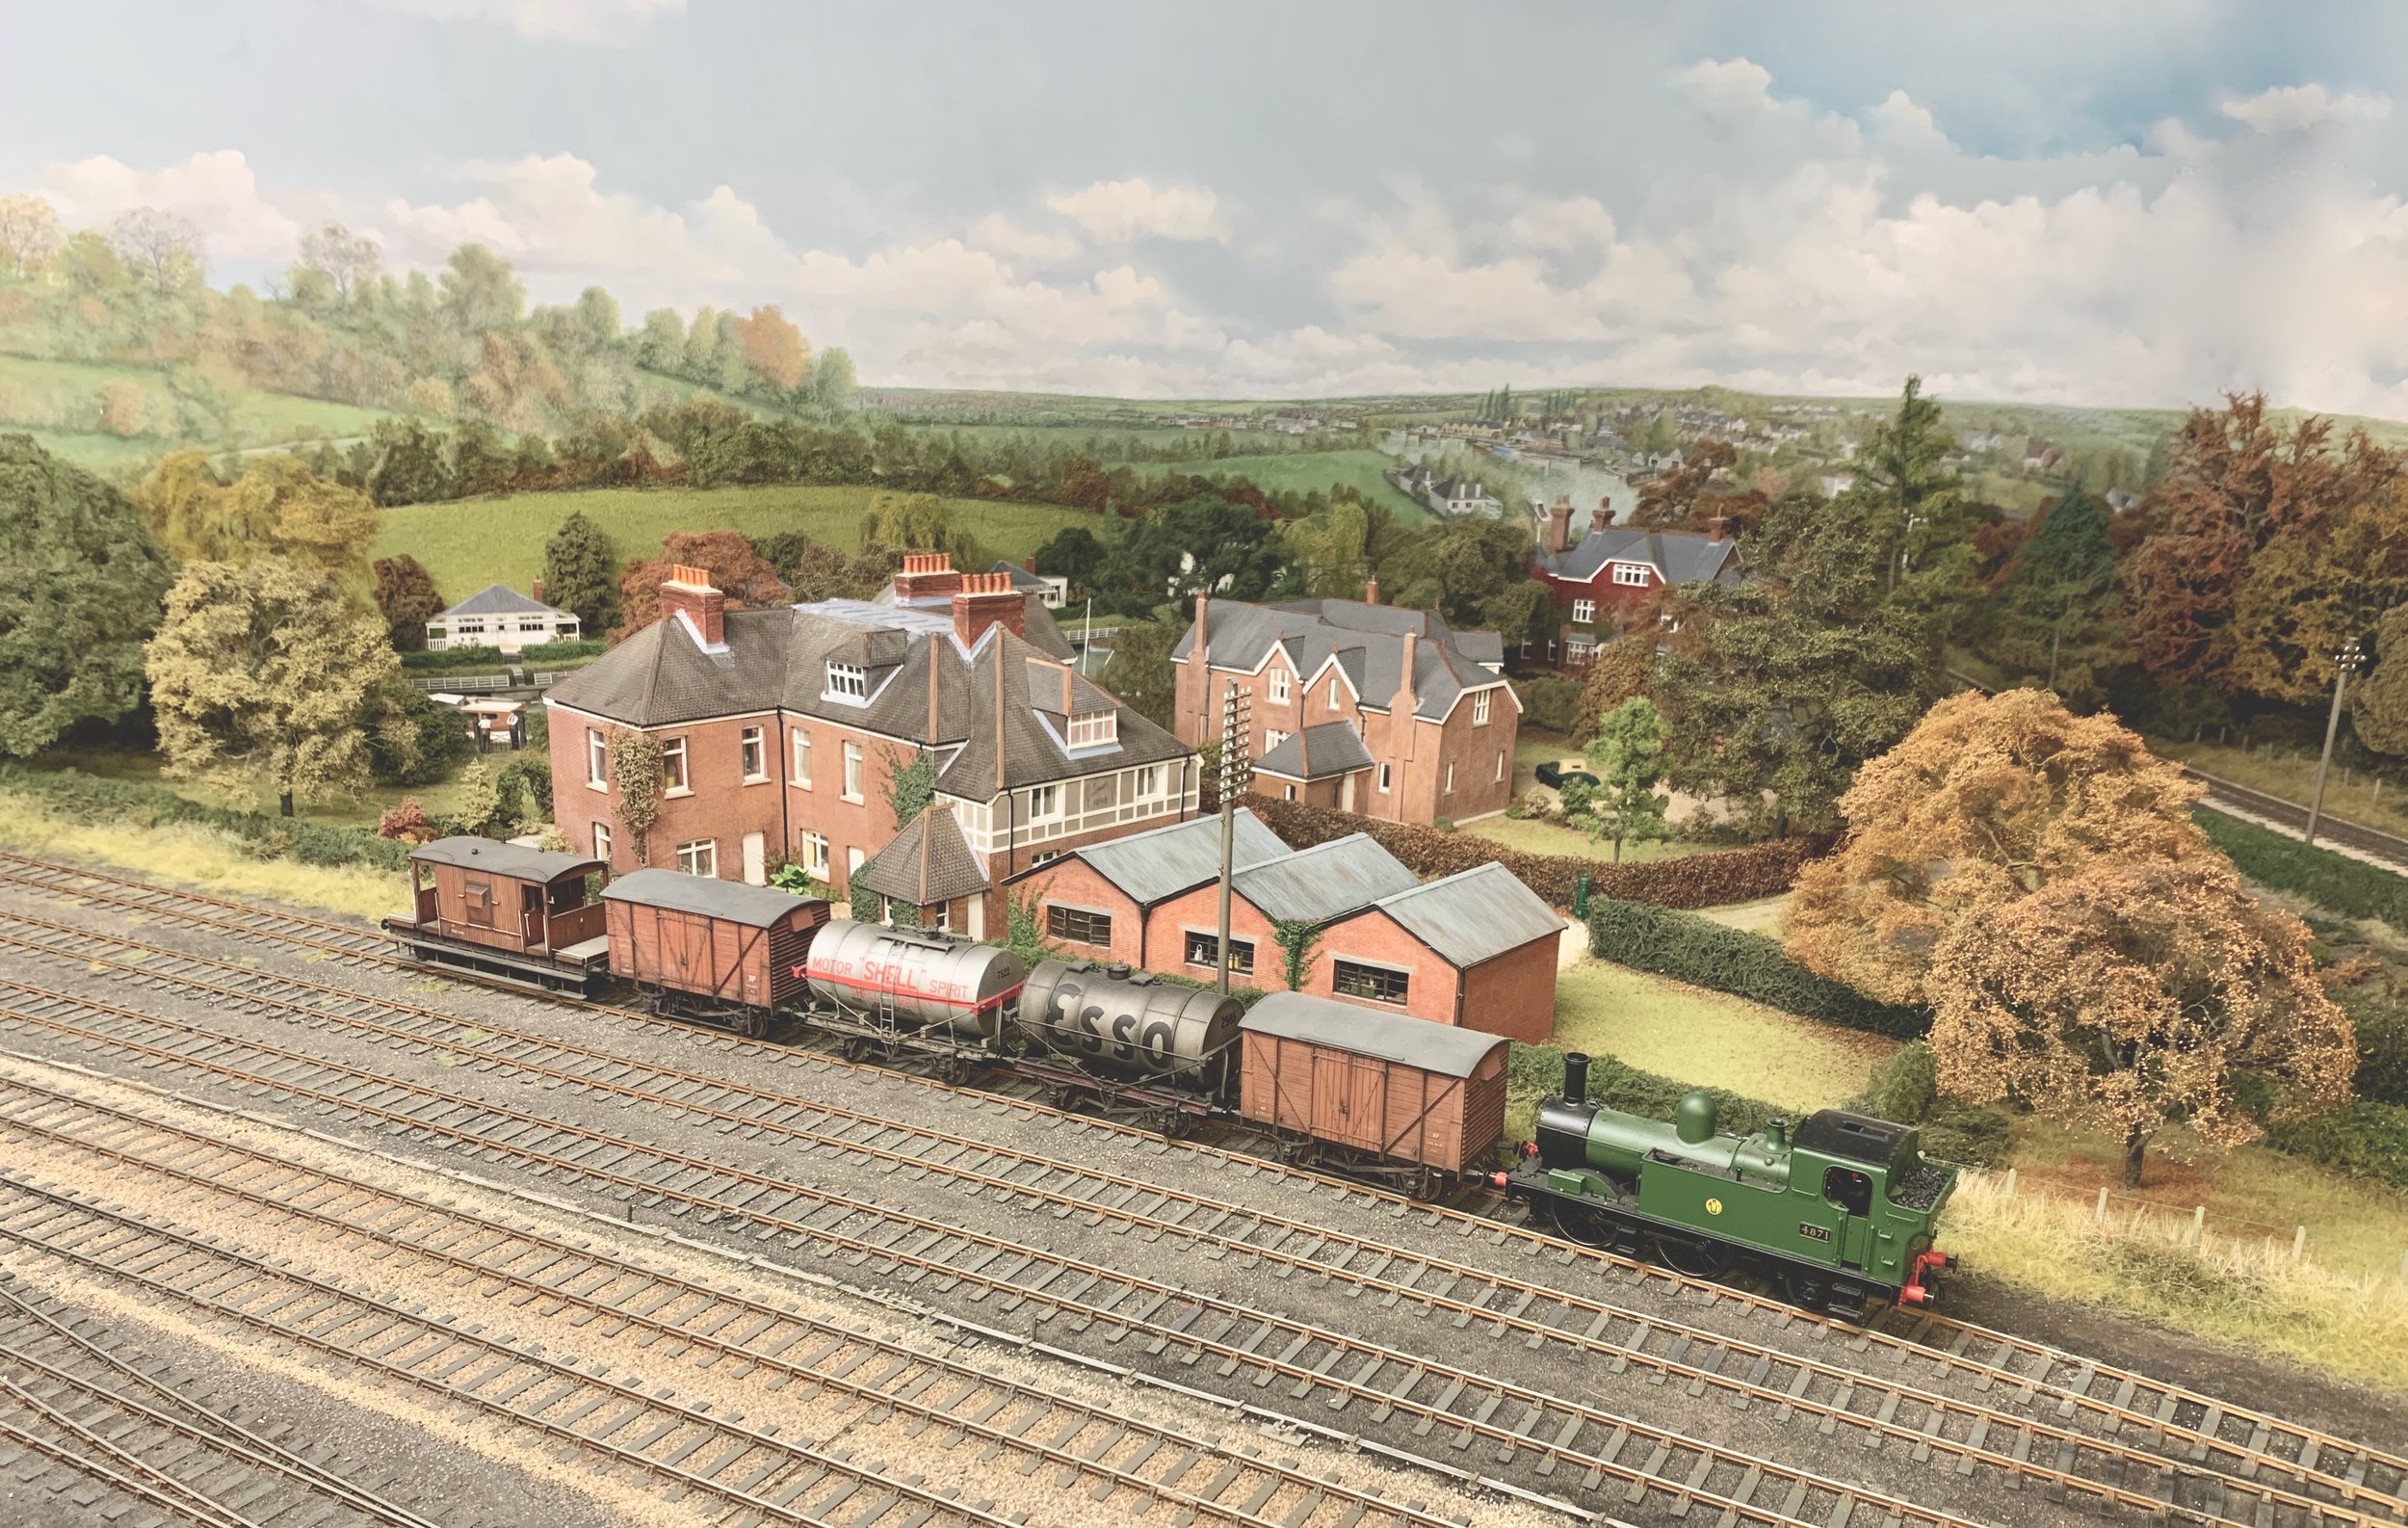
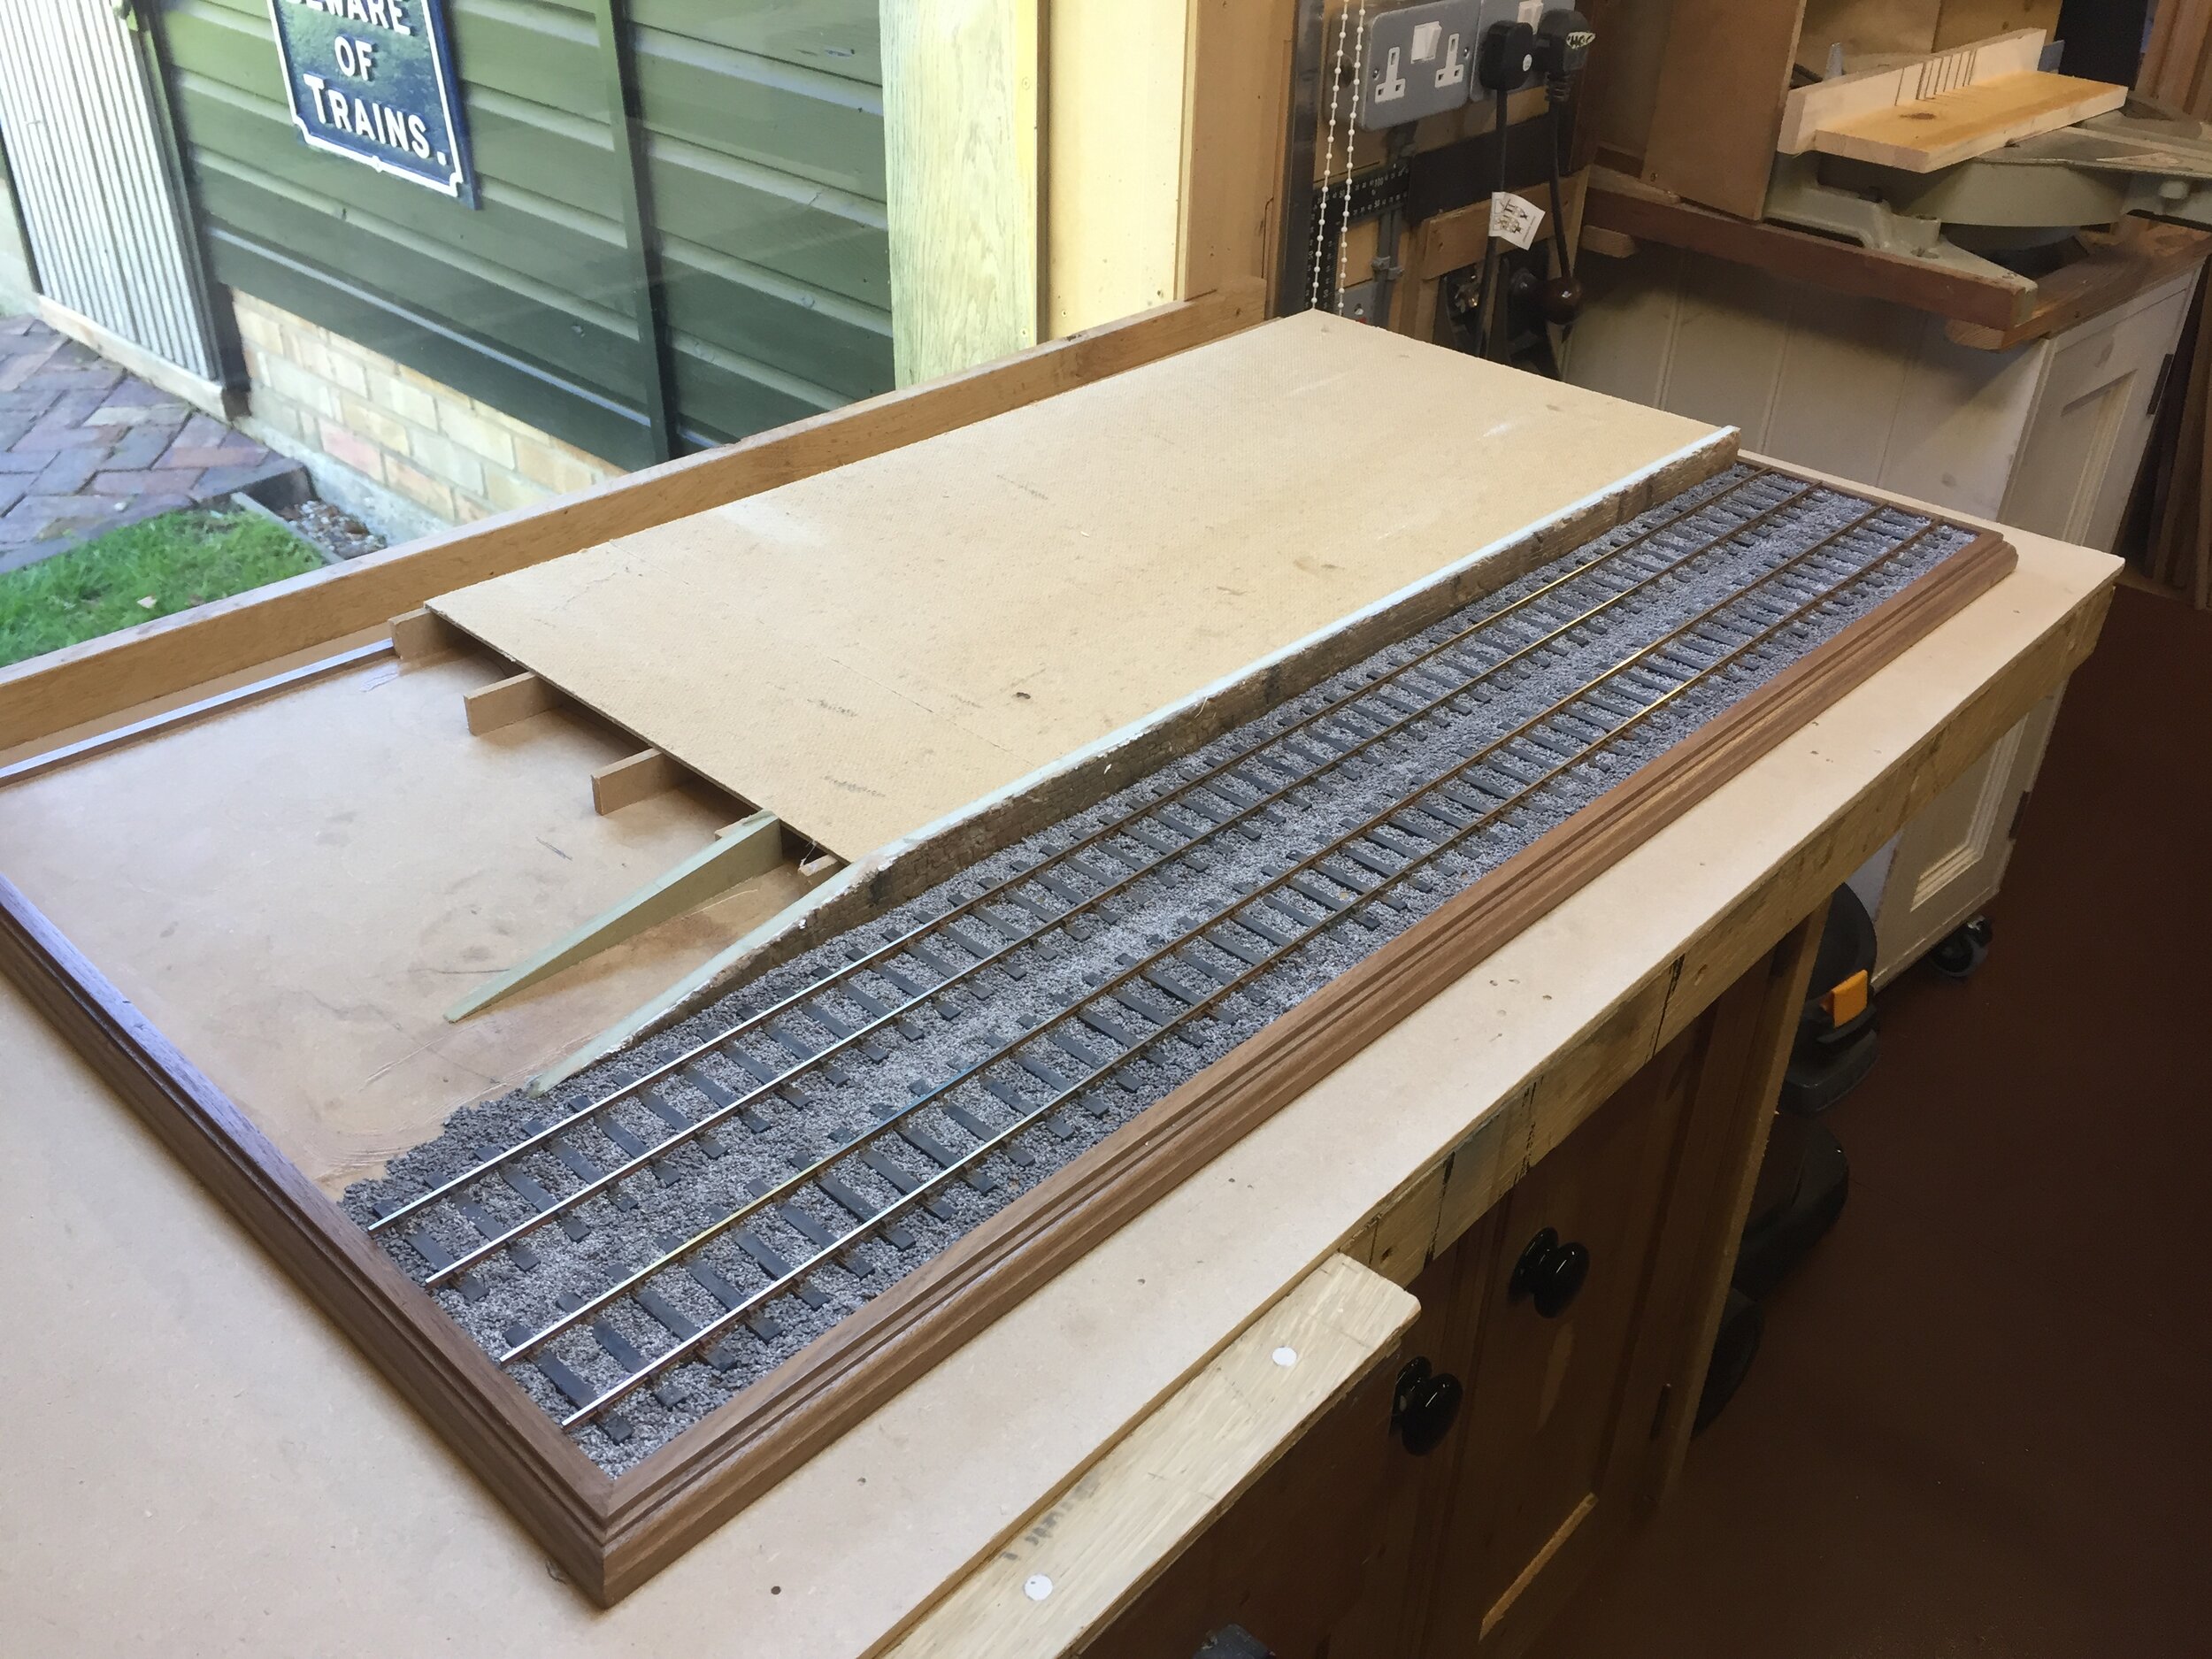
The baseboard itself is a piece of 18mm MDF about 900mm x 500mm, edged with a moulding that I machined from some walnut timber I had lying around. The layout of the diorama is simply a section of double track, the platform edge, the building itself and the platform ramp at the eastern end. It is designed to be viewed from all four sides and eventually it would benefit from a glass or Perspex encasement to keep it dust free and prevent prodding by inquisitive fingers. There are no clear photos of the correct period of the exact arrangement of the platform ‘furniture’ here, just one tantalising shot looking down the platform, and thus all the features are considerably foreshortened in this view. But I’ve made some reasonable assumptions in positioning the ramp itself, the retaining wall behind it, fences, gates, lamppost and running-in board. At the time of writing, all that remains to add are some wall-mounted lamps but my supplier has temporarily shut down it seems due to Coronavirus limitations.

The final additions of these details are, of course, the most fun part – seeing the scene come together. I believe it to be as accurate as I could make it, and it will be quite an emotional day to see the real thing built and open to the public! I hope that won’t be too long. I certainly wish Howard and his team every best wish in bringing the Vale of Berkeley Railway back to steam and thank them for the help they have been in providing prototype and historical information, drawings and photos. I rather feel, even though I live a couple of hundred miles away, I’ll be making fairly frequent visits in the years to come!

Howard Parker, Chair of VoBR adds, “I felt a bit cheeky asking such a wonderful modeller as Richard is to devote his precious time make this model – and to do it as a donation to the effort towards, as he says, recreating the 12” to 1’ version but I would like to thank him publicly for doing so. This exquisite model really brings Berkeley to life and will be a great inspiration for us to keep moving forward until the day when the rebuilt station reappears.

There are many hurdles for us to overcome before we get there but the Friends of Berkeley Station is an active group, working in the local community to give Berkeley back its station, and thereby, its connection to the national rail network. Our ambition is to see the station rebuilt to exactly the same external appearance as Richard’s model since it represents Berkeley in its heyday and, as always, this can only be realised by dint of volunteer effort and financial donations. So please join us if you would like, one day, to sit on a bench on the platform at Berkeley with a pint in your hand, watching the trains come and go. Please help us to realise that dream, all details can be found on our website www.valeofberkeleyrailway.co.uk or in the ‘Friends of Berkeley Station’ Facebook group.” 

GWR Parcels & Receiving Office

This Parcels & Receiving Office was built as part of a larger diorama and is nestled in between a Hotel on one side and a high brick wall on the other. All of these structures are low-relief and only about 25mm deep. The prototype for this office existed at one time around Paddington but the GWR, along with all major pre-Grouping railway companies had Receiving Offices in all major towns and cities up and down the country. As they were sited away from an actual station, they quite often took the opportunity to advertise their railway in very elaborate style. Therefore the scope to produce a model which conveyed some of this atmosphere was an enticing prospect

There are several aspects I love about Victorian and Edwardian architecture, and railway architecture in particular. Specifically, generous proportions and their love of well-balanced and well-proportioned detailing, along with a confident use of colour. Their railway architecture and engineering just oozes the sense of prowess and all-conquering confidence that came with knowing they were world-leaders at most things at the time. Buildings such as the subject of this article seem to be condensed versions of all this confidence; using colour and contrast to best advantage plus a number of different building materials and finishes. In researching the model, I had to rely heavily on input from a friend of mine, far more knowledgeable than me about all things Great Western as my forte is the Midland Railway. So there were endless emails back and forth asking about colours of doors, door frames, windows, stone-work, signage, etc etc. The list at the start seemed endless but I think we got there in the end!

The main structure is my favoured 3mm MDF, laser cut to overall sizes, including door and window apertures. It was a bit complicated to get my head around the various positions (relative to one another) of the door frames, columns, corbels and other main ground-floor architectural details. But once I had the main walls physically in front of me then building up the ‘layers’ of the building structure seemed to flow quite nicely. The upper-storey window mouldings are built up using various thicknesses of ply and MDF, laser cut to size and fitted in place. The windows themselves are thick paper and clear acrylic, again laser cut. The ‘woodwork’ being sprayed white before assembly and final positioning in their recesses. The railings were left over from another project and were my first attempt as producing artwork for a commercial etcher to etc for me. It just so happened that they are a perfect fit for this project too.

The ground floor details are again made using laser-cut parts of thick paper, mountboard and ply, built up around the main 3mm MDF wall as a foundation layer. All details are scratch built, apart from the corbels and columns which are proprietary white-metal castings.

Painting of the model uses Halfords primer. The main wall painted in enamels in two Portland Stone-looking shades to represent the rendered wall surfaces, finished off with a subtle dark grey wash (mostly wiped off) to tone it all down. Woodwork on the doors and door frames uses GWR Stone 1 and 3 from Precision Paints. The marbling on the columns causes some comment and is produced by first painting the columns with a brick-red brown enamel. The veining is done using a very sharp white water-colour pencil, with a photo of real marbling to hand to copy, and detailed with a little grey and brown pencil. Lastly a thinned coat of oil-based satin varnish with a drop of Precision Paints ‘Weathered Wood’ was lightly brushed over and allowed to dry. We weren’t too sure about the prototype usage of gold paint to pick out details at the base and tops of the columns but it was impossible to resist not doing so. I think it looks right anyway!

The sign-written glazing was produced by first drawing the lettering and blue background in AutoCAD and then printing onto ordinary paper. This was given a couple of coats of cellulose lacquer and allowed to dry. Then, one last generous coat of lacquer was sprayed onto the paper surface and while wet, laid an oversize piece of acrylic glazing onto the paper. If the lacquer is generous enough then capillary action takes over and the glazing sticks to the paper with no bubbles. Leave alone until well and truly dry as any disturbance could smudge the printer ink. Once dry, trim to size and fit.

The large Receiving Office and Great Western sign boards were again first drawn in AutoCAD and then the lettering cut into the surface of 3mm MDF with a very light scored line. The boards were then primed and painted with a rich red-brown. The lettering itself was picked out with gold paint and a very fine brush, using the scored lines as guides. The paint tends to not go over the lines, although some touching-in was necessary. The same dirty thinned varnish was lastly lightly brushed over the surface.

The finished model was ‘planted’ against the side wall of the diorama. The road is cobbled and is a sheet of mountboard with individual scribed cobbles. Once the building was stuck down onto this surface, the paths were cut and painted and then stuck up to the edge of the building, so that it doesn’t have any unsightly gaps around the base. The finished effect is rather pleasing. Whilst the layout of the diorama doesn’t allow a face-on uninterrupted view of the Office, tantalising glimpses are possible looking down the road and through arches. I quite like this; because the viewer’s gaze is caught by something round a corner or partly obscured by foreground detail, it invites closer inspection.

Baseboards Galore!

As I have a well-equipped wood-working workshop, I can offer bespoke made-to-measure baseboards. These are usually high quality birch ply throughout, with a 9mm top and beams made from two pieces of 6mm sandwiched together with 18mm mdf spacers. Holes are drilled between boards for cable runs and locating pattern-maker’s dowels ensure accurate alignment. Semi-permanent fixings are with nuts and bolts. Support legs can also be constructed, as well as scenic back-boards, painted fascias with lettering and control panels. If you would like to discuss your project then please get in touch using the contacts page.

LNWR Engine Shed

This is part of a much larger project to 7mm scale/O Guage. Use was made of Jack Nelson’s LNWR Portrayed book as well as LNWR Engine Sheds. It is entirely scratch built with laser cut mdf brickwork, bespoke etched brass internal brackets and laser cut windows and doors.

English Heritage Martello Tower

This commission is on behalf of the custodians of the Martello Tower in Dymchurch, on the Kent Coast. There were a total of 74 towers built between 1805 and 1812 along the south and east coasts to ward off invasion by Napoleon. This tower - number 24 - is a remarkably intact example and is being restored to its condition when it was occupied by the military in 1806.

The model is being built to a scale of 1:18, and will be displayed within the tower as part of an exhibition depicting life in the tower at that period. It will be mounted on a board with scenic groundwork and a protective acrylic display cover. The tower, in common with most martellos, is egg-shaped in plan with circular central living and storage floors. Access to the tower was only by a ladder onto the first floor. The top open floor houses the 18-pounder cannon which could traverse through 360 degrees. The thickest portion of the walls faced the sea as this was, of course, where an invasion was likely to appear. In fact, no invasion ever took place and the cannon was only ever fired in practice.

As if the egg-shaped plan is not difficult enough, the walls taper in order to deflect enemy cannon fire and the model is shown cut away so that the full internal detail can be modelled and seen. Construction is proceeding with ply ribs spaced around and covered internally and externally with 2mm flexible ply. Internal partitions are laser-cut ply and mdf, built up in layers to represent the wooden panelled walls. The vaulted ceilings on the first floor and ground floor gunpowder store are made with mdf ribs, covered with paper mache, and polyfiller. At the time of writing I have still to cover this in DAS modeling clay which will be scribed to represent lime-washed brickwork. The cannon itself is a maple turning, with the gun carriage from Iroko. Further updates will be added as the build progresses.

Reading Corporation Tram

This commission was undertaken as part of the Jackson’s Corner diorama and is built to a scale of 1:32. No commercial kit exists so it is entirely scratchbuilt mostly from etched brass. I drew the etching artwork on Autocad and sent it off to 4D Modelshop for them to etch. Their service and quality is excellent. The two spiral staircases presented the most head-scratching! Custom decals were also ordered from Custom Model Decals.

LNWR Coal Hole

This model (to 7mm/ft) is part of a large layout build and complements the LNWR Engine Shed. Its construction is mostly laser-cut MDF. The tank is a solid core of MDF around which the tank details were added in plastikard. The wooden planking on the top is maple. Sometimes there is no substitute to represent real wood than real wood. Full internal detail is modelled. If you would like one, or similar do contact me.

And here’s a photo of the coal hole positioned temporarily on the customer’s layout. A very similar photo exists of the coal hole at Buxton with a loco on the wagon ramp alongside the small shed. Prototype inspiration!

IMG_0256.jpg
GWR Drays

I was asked to make a GWR dray to Gauge One for part of the Jackson’s Corner display. By coincidence I was also asked to make a similar one to O Gauge. As no kits exist for either scale, I decided to make them from scratch myself. Heavy use was made of thr laser and most parts are either mdf or ply of various thicknesses. The drays are also painted by me. Signwriting was done using Autocad and printing to the correct colours

First foray into Gauge One

I have long held a desire to make large scale display railway models. I have been inspired on numerous occasions by such models displayed in museums, especially the Science Museum and the National Railway Museum. So I thought I’d take the plunge. I have started with something simple, a Midland Railway double bolster wagon, complete with a load of steel pipes. The basis of the model is sections of maple machined by me to the correct sizes to represent the buffer beams, solebars, plank sides and bolsters. The floor is a piece of ply with laser engraved planks. The wheels, axleboxed, w-irons, buffers and couplings came from Slater’s. The bolt details are from the excellent range by Historex. A bit of trial and error was needed to get the right sizes but they are extremely effective. I also have Phil Pearce of Intentio to thank for the laser engraved number plate, builder’s plate (with legible build date!) and ticket holder. My laser doesn’t quite have the definition to make these unfortunately. The load of steel pipes are curtain poles from Ikea that I happened to have lying around!

I have plans for a second wagon build so watch this space.

If you would like to commission me to build you your favourite wagin to this marvelous scale then contact me to discuss. This model is made to true 1:32, or 9.5mm/ft, as that is the scale the Slater’s parts are produced to.