Berkeley Station Building
Back in August 2018, I was surfing the internet researching something connected to the Midland Railway when I accidentally came across a website detailing work being undertaken on a newly formed preservation enterprise called the Vale of Berkeley Railway. I was intrigued to discover a stretch of the Midland that was unknown to me and one which had an interesting history to it. Here was a project at its very beginning and I was very drawn to the clear enthusiasm of the team involved in realising the dream of steam once again running on the railway. I made contact with Howard Parker, its Chairman, to introduce my services as a professional model-maker and see if there was any way I could help. As it happened, my wife and I were on holiday in Malvern and it only took a bit of arm-twisting with her to arrange a visit to meet Howard on site.
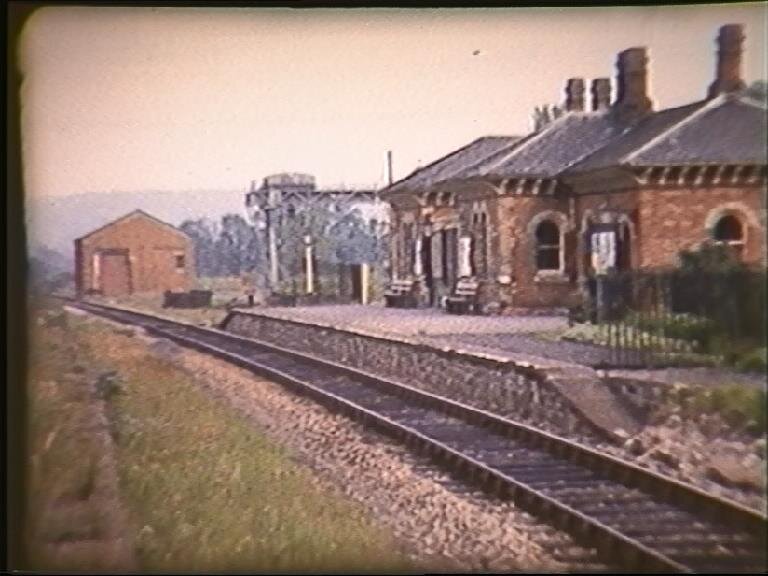
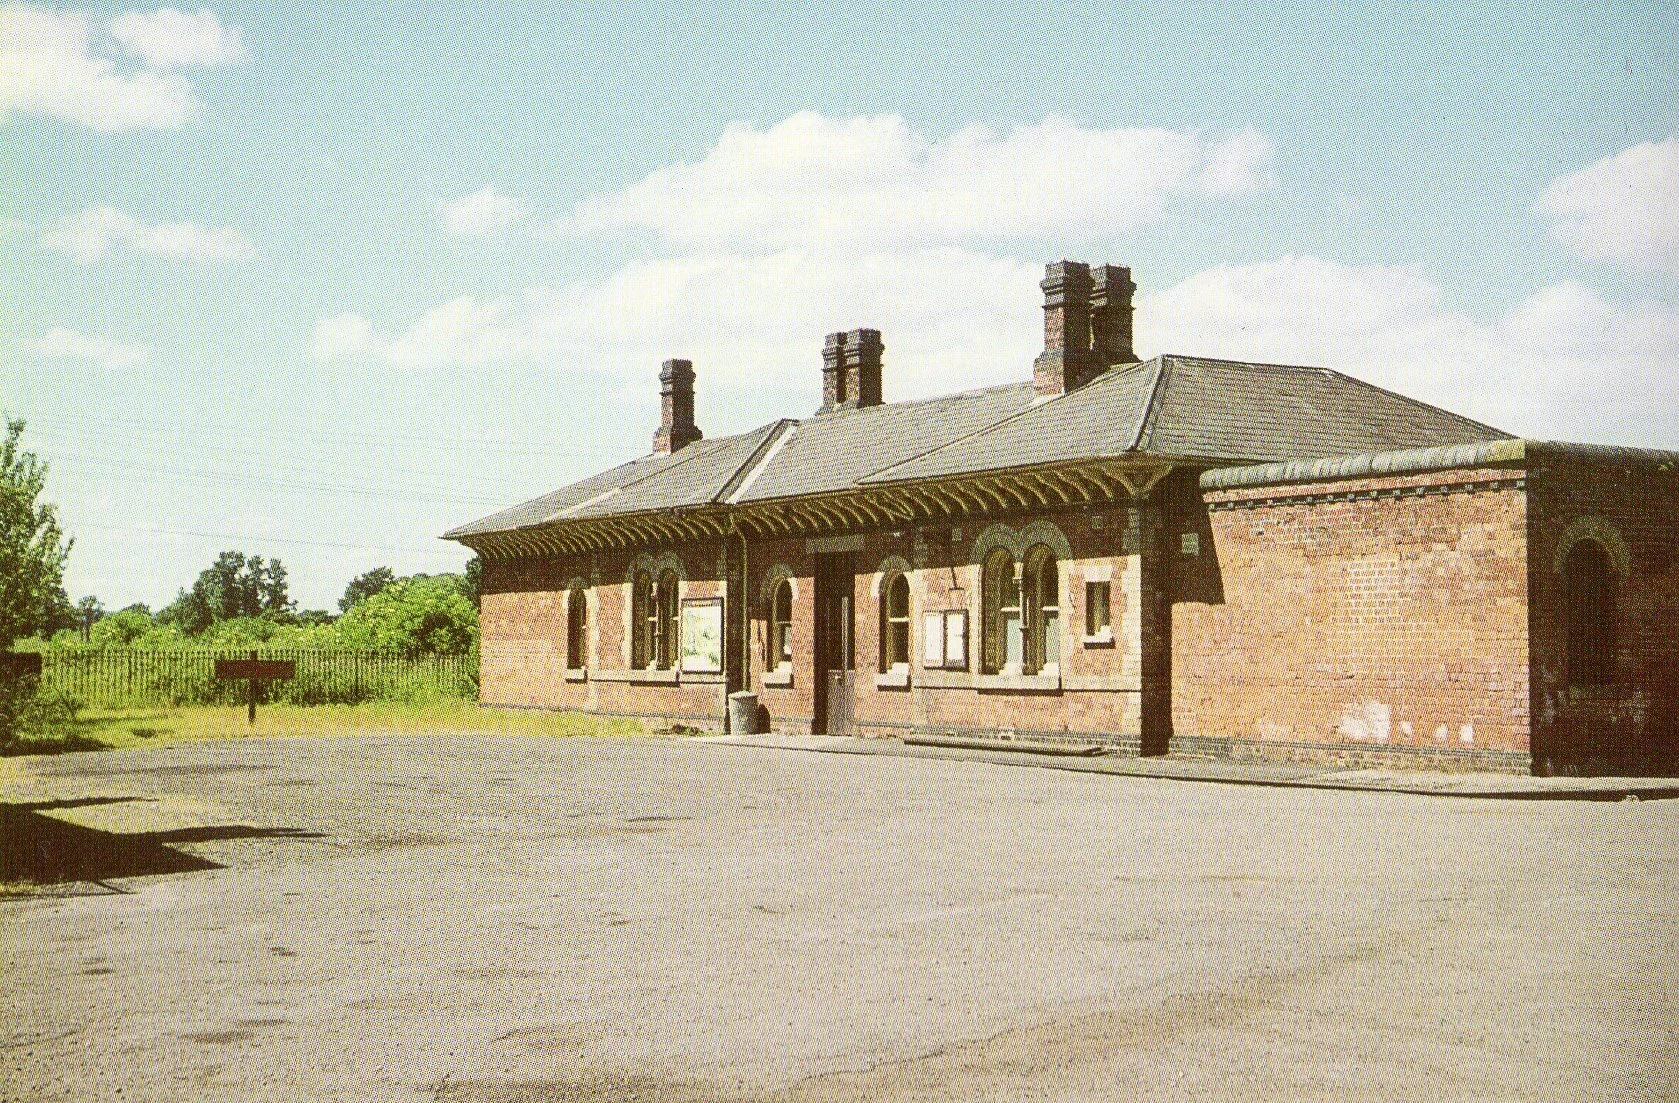
We met at the loco works at Sharpness, walked along the sidings at Oldminster and then took a short drive to Berkeley Station. As Howard talked with obvious enthusiasm, I could feel myself coming under the spell of his vision. All that remains now of Berkeley Station building are the footings, scatterings of red bricks and some tantalising yellow window arch bricks, engineering blue bricks and sections of stone mullions hiding in the long grass. Howard’s plan is to re-build this important and once beautiful structure as one of the main stations on the railway and thus forms a vital link in overall restoration plans. I therefore agreed to build a 7mm model of the station building as it would have looked in its heyday. The purpose of the model first and foremost being to provide a strong visual representation of how the station looked; and to inspire donors to contribute to its re-building.
Berkeley Station lay on a stretch of line that ran from a junction off the Gloucester to Bristol Midland main line at Berkeley Road Station, through to Sharpness Docks. From there, the line ran onward over the Severn Bridge to the Forest of Dean. The branch was originally built by the Midland Railway in 1875 as the Severn & Wye & Severn Bridge Railway, which subsequently ran into financial difficulties and in 1894 became jointly owned with the Great Western Railway to form the Severn & Wye Joint Railway. It was originally laid as double track but later reduced to single. It closed to passenger services in 1964 and the station building gradually fell into disrepair being finally demolished sometime in the late 70s or early 80s. The line itself is still there today, along with some sidings in the old goods yard that now only see very occasional freight traffic.
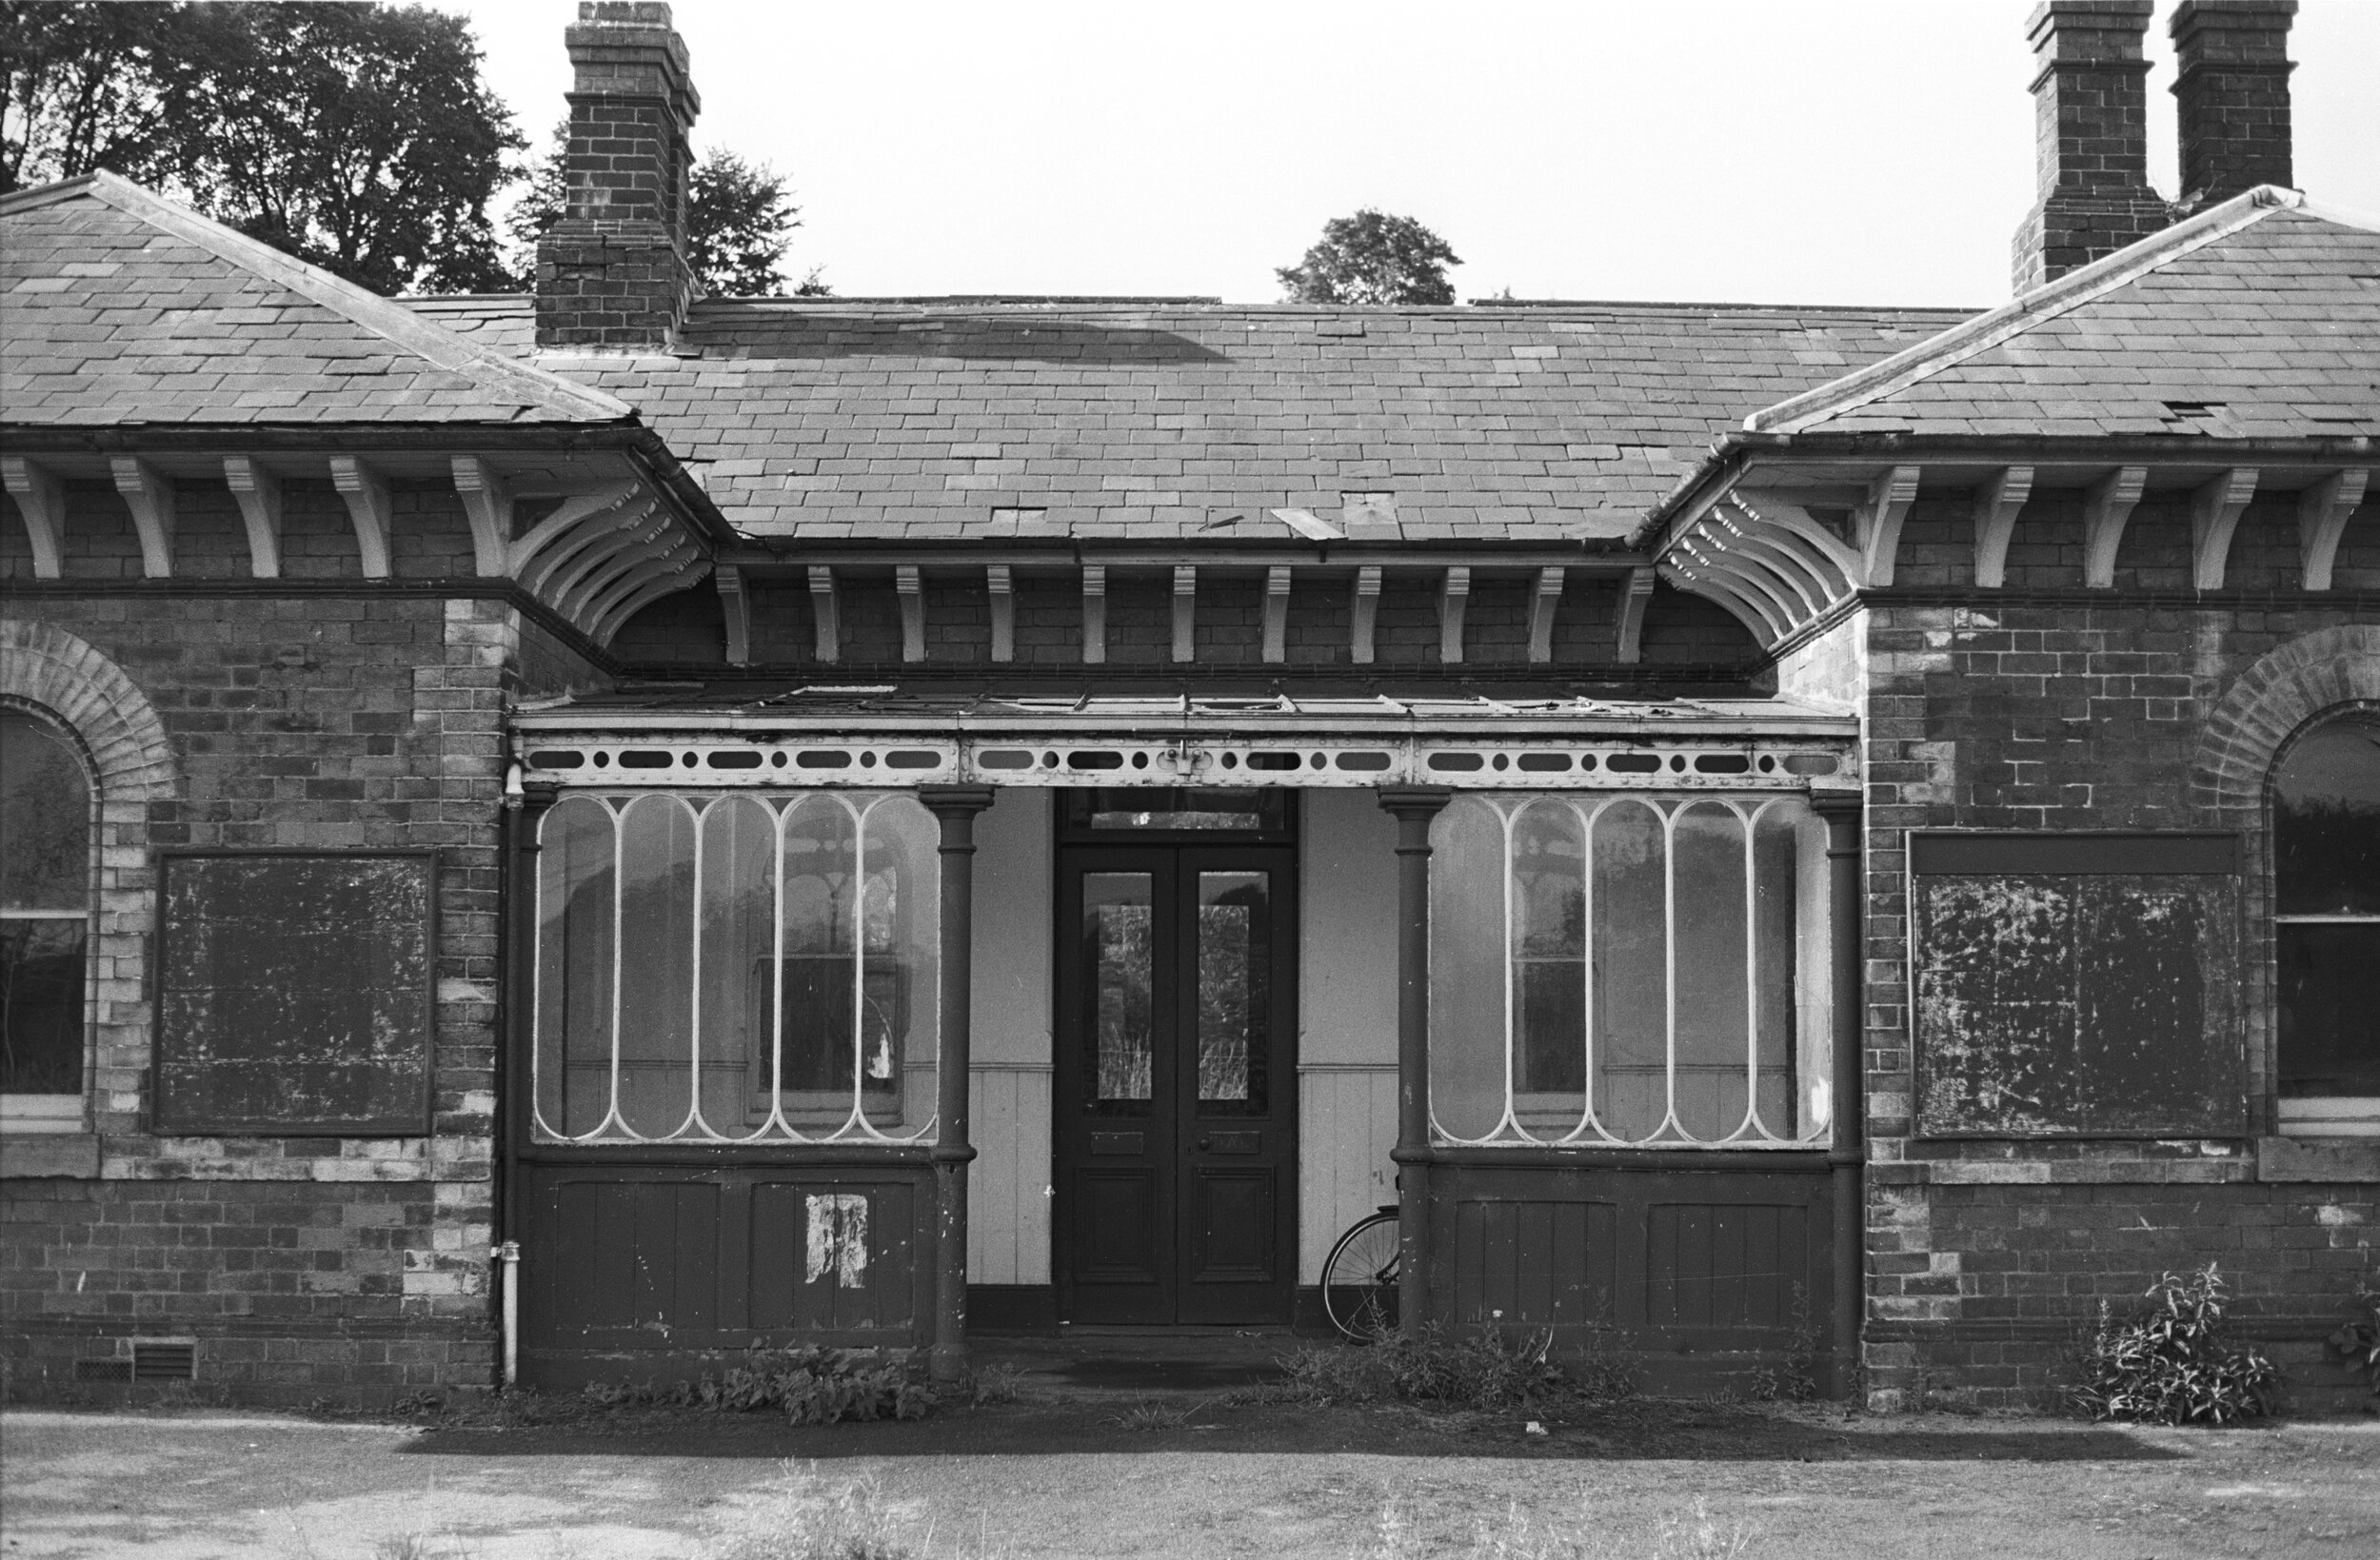
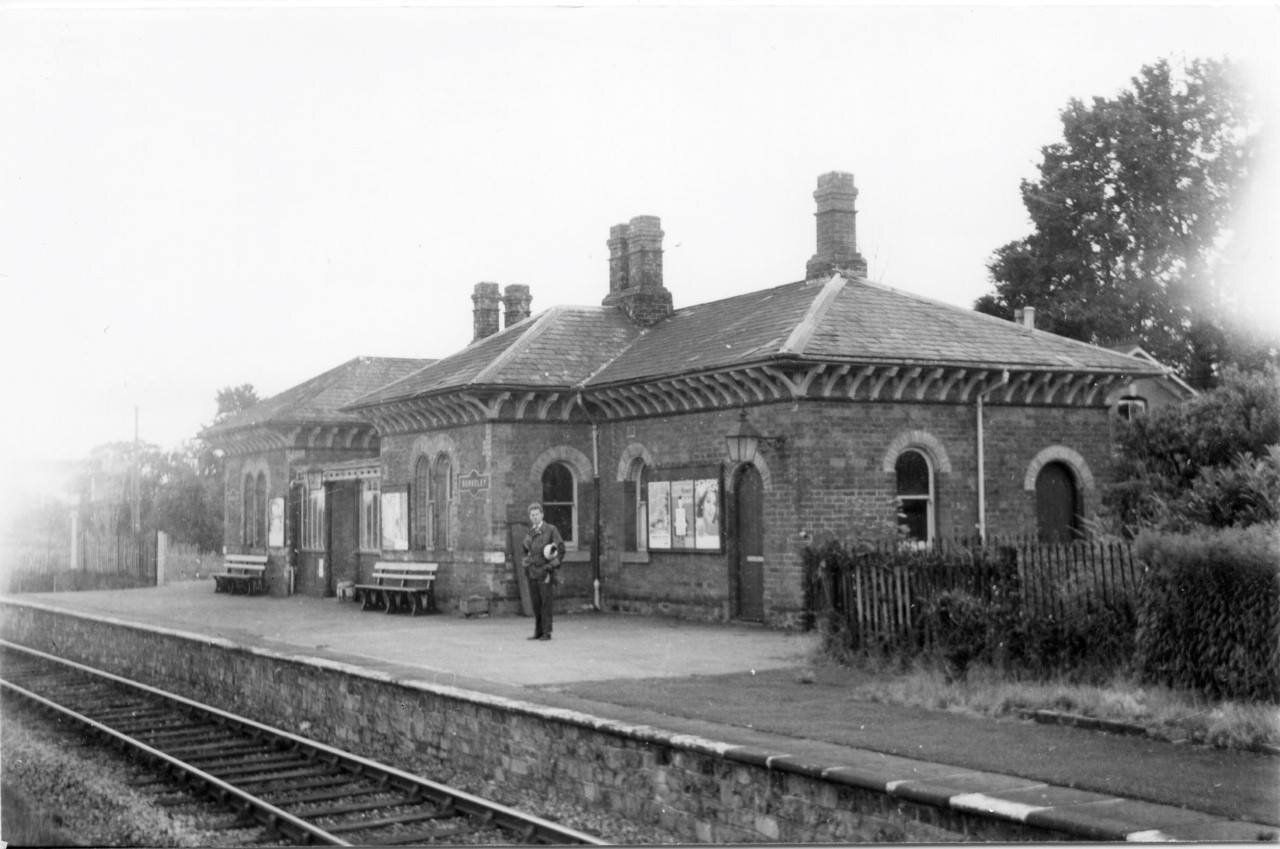
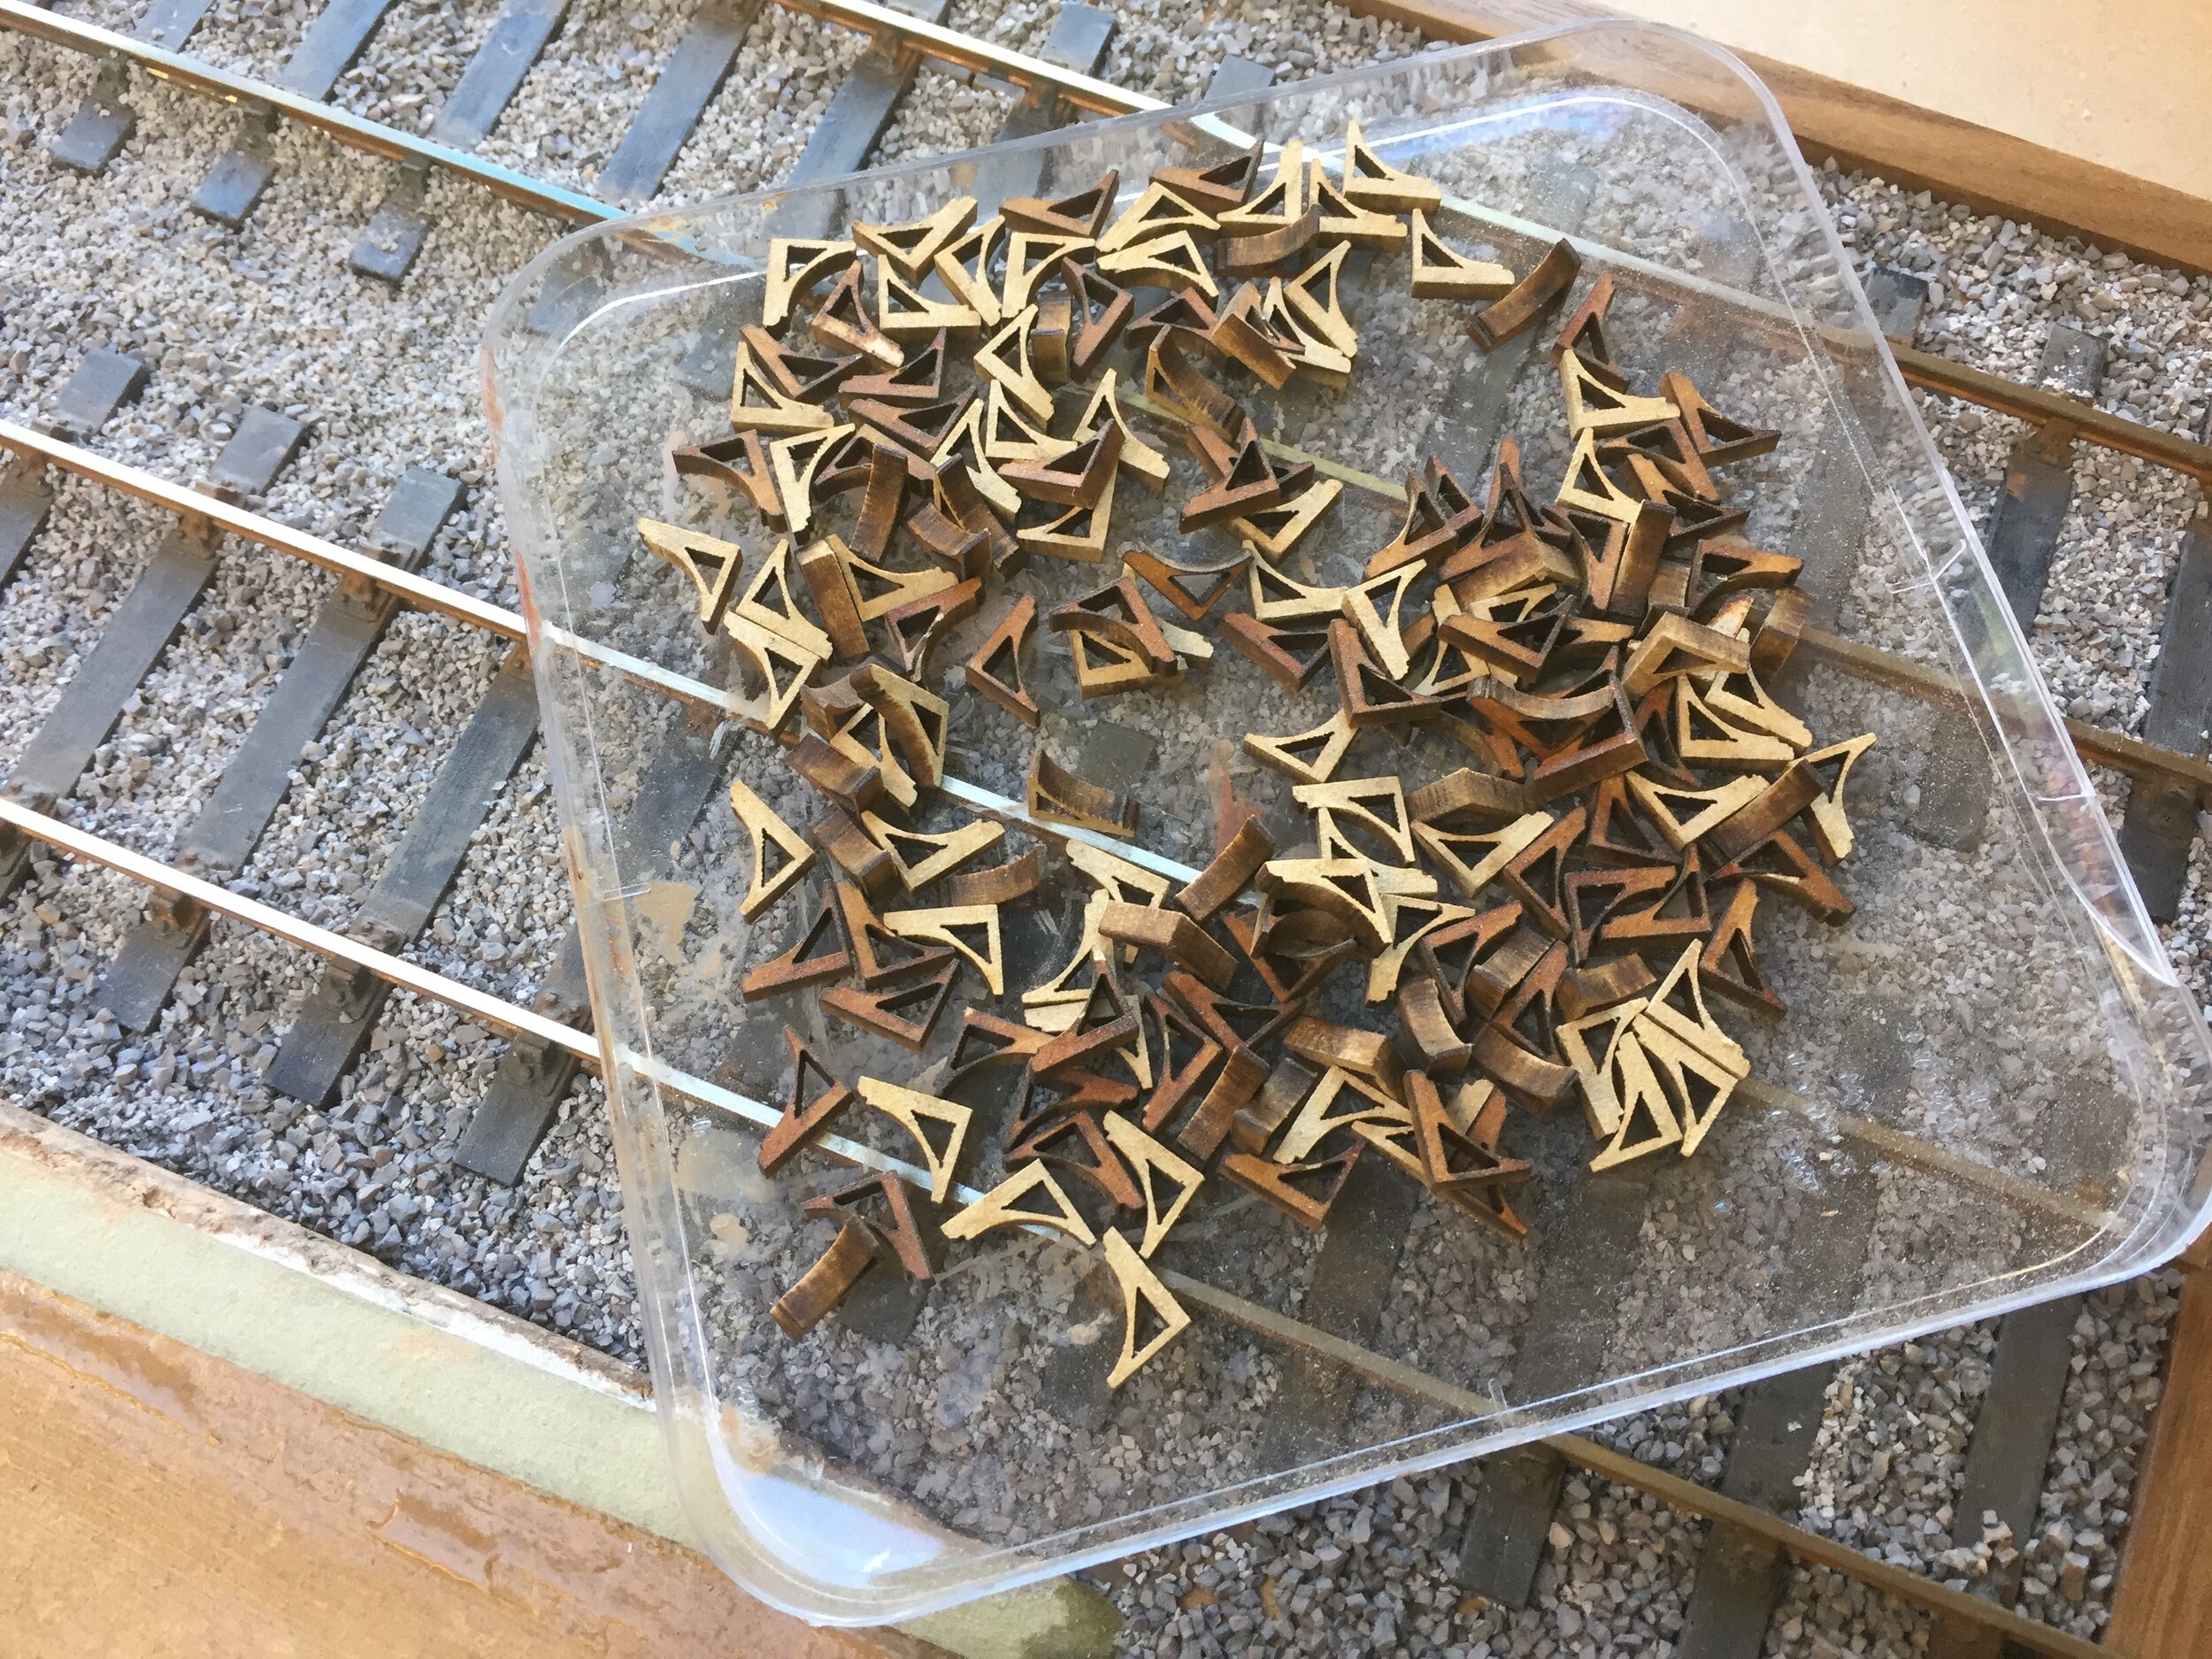
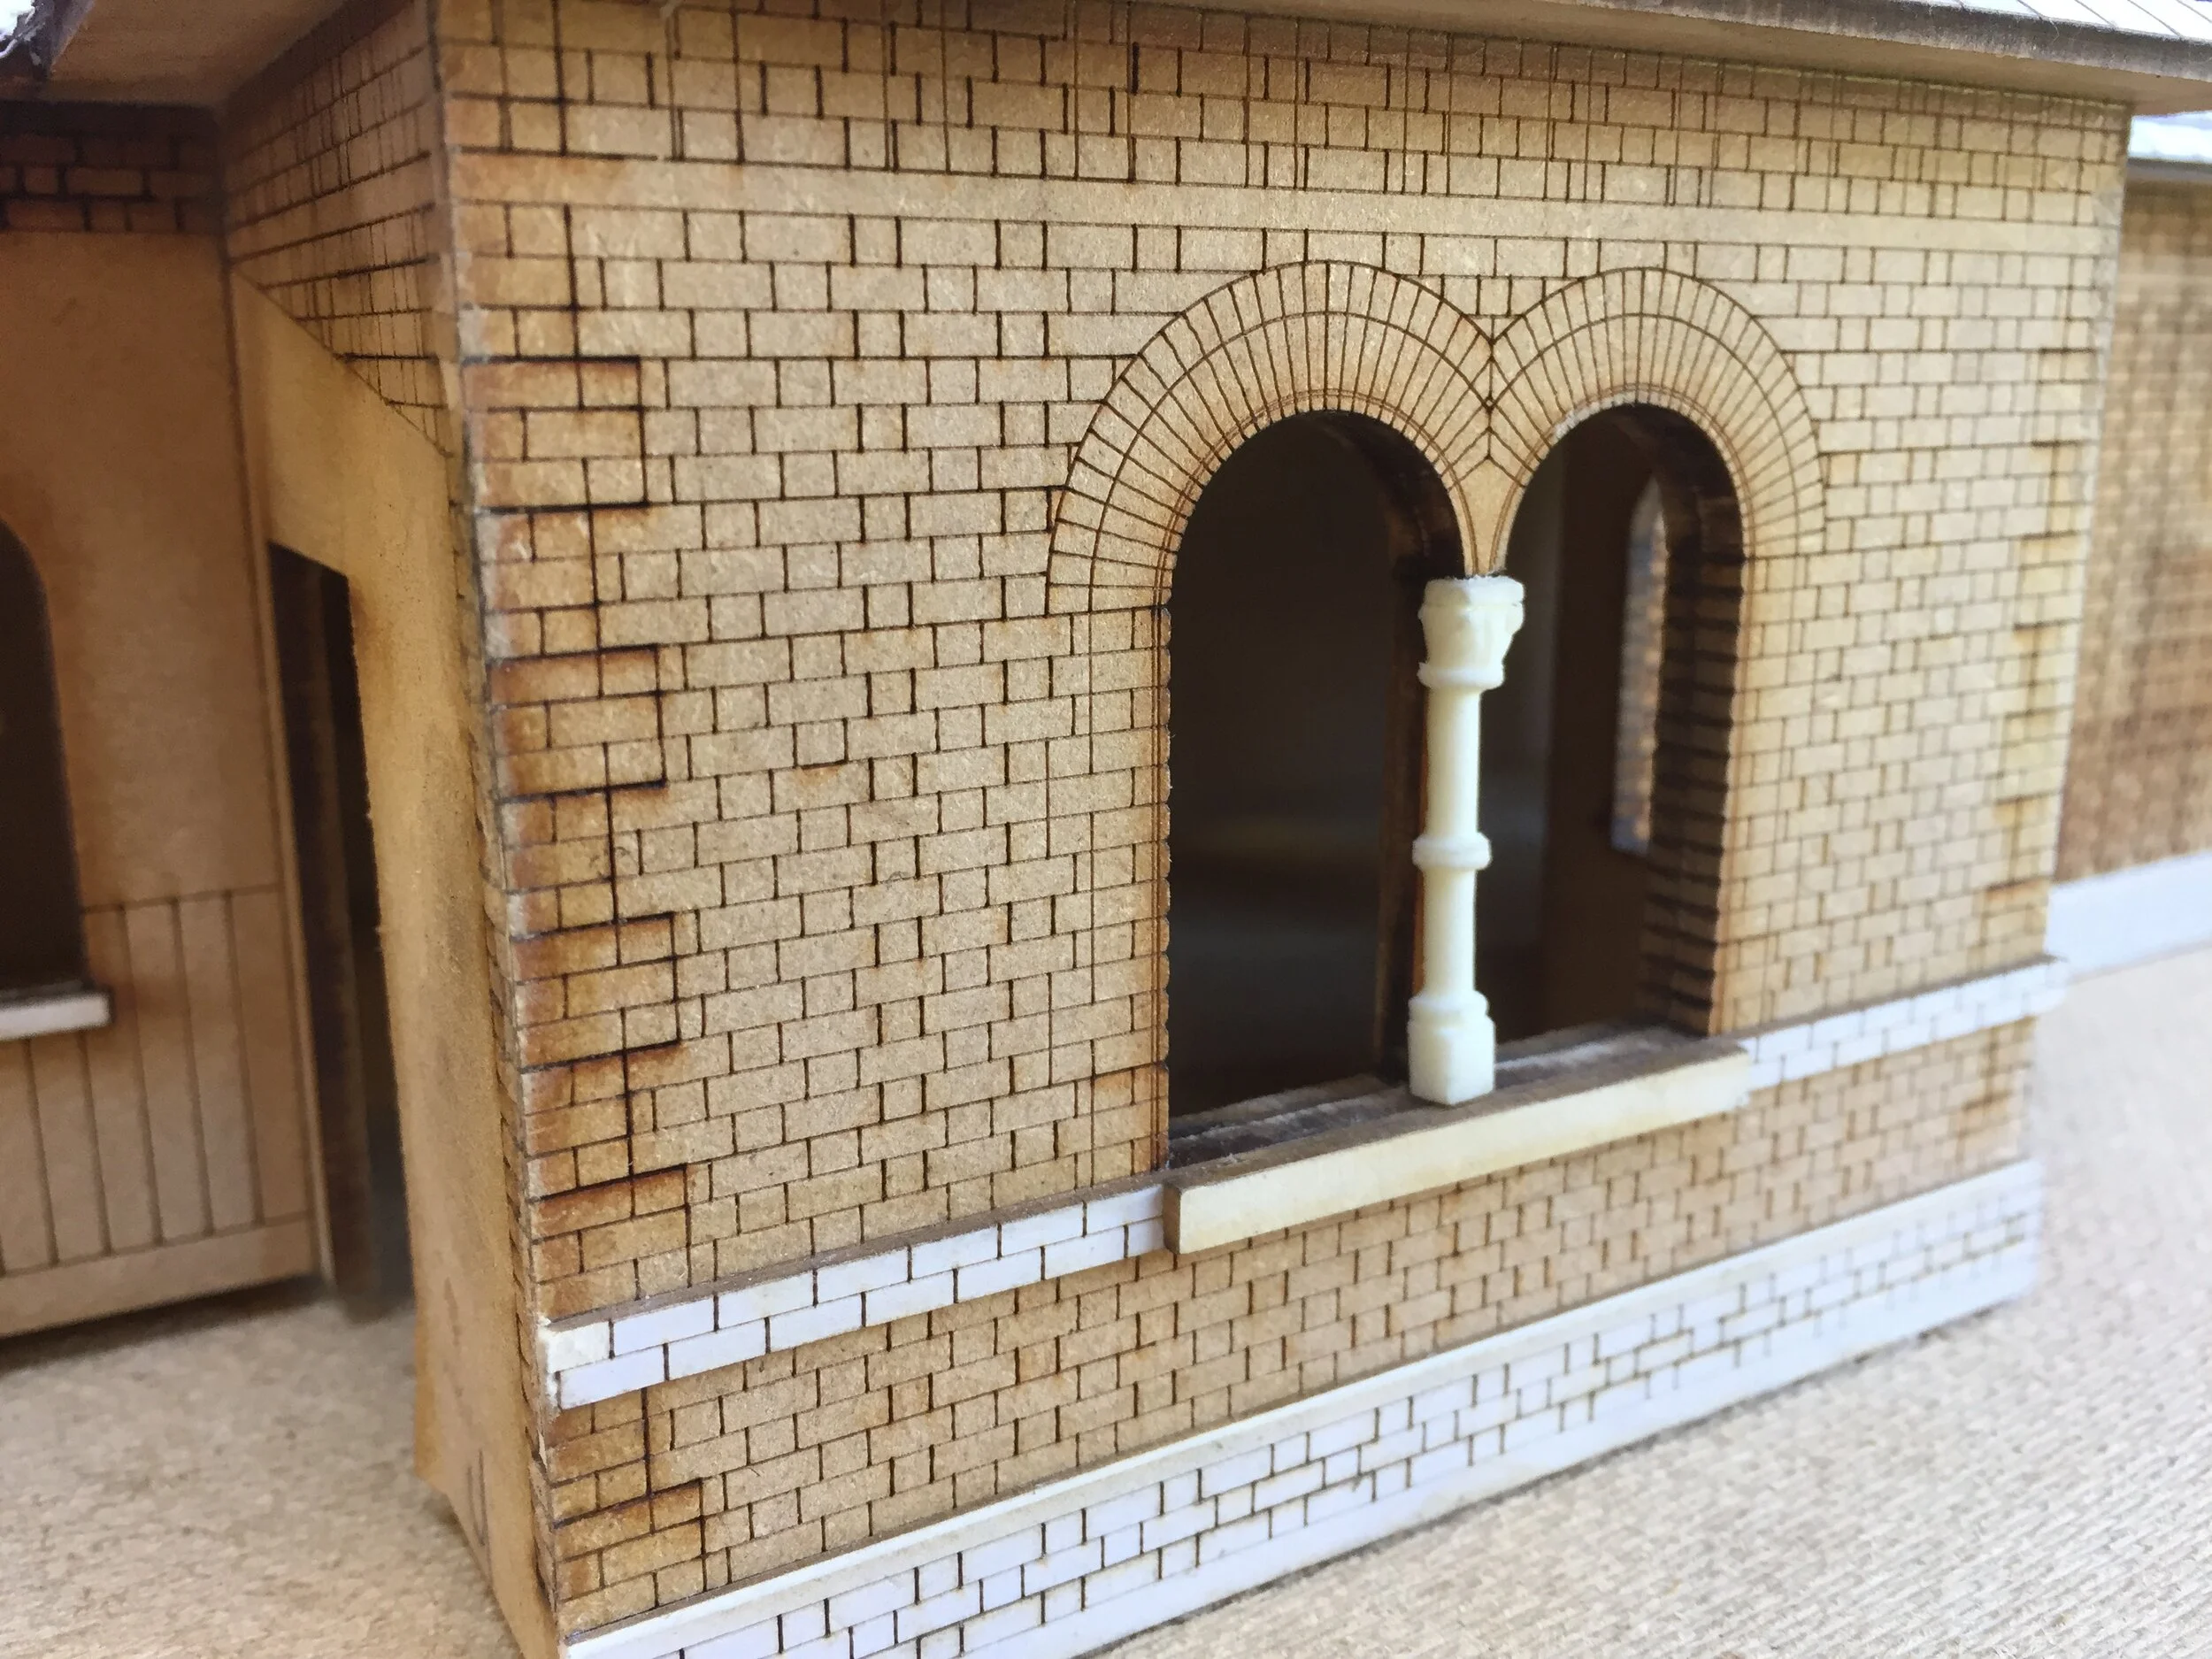
From the site remains, Derek Hore, an expert on Berkeley Station history, was able to provide me with a survey of the remaining footings, along with many photos of the building prior to demolition. From these I was able to produce my own AutoCAD drawings of all the elevations. These were then used to laser cut the walls and roof sections out of 3mm MDF. The brickwork and arches were engraved into the walls and doors and window openings cut out in one go. I also engraved short vertical lines at the tops of the walls to guide me when it came to sticking on over 100 soffit board brackets – just hoping these lines wouldn’t get covered over when I came to paint the brickwork! The brackets themselves are also laser cut from 3mm MDF, the idea being that they would be painted before gluing onto the model. To do this I stuck them down in long rows to a scrap strip of MDF and sprayed them with primer followed by Halfords Rover Sandalwood Beige which sounds a hideous colour for a car, but is a very close match to the colour swatch of ‘Denby Pottery Cream’ in ‘Midland Style’ by George Dow.
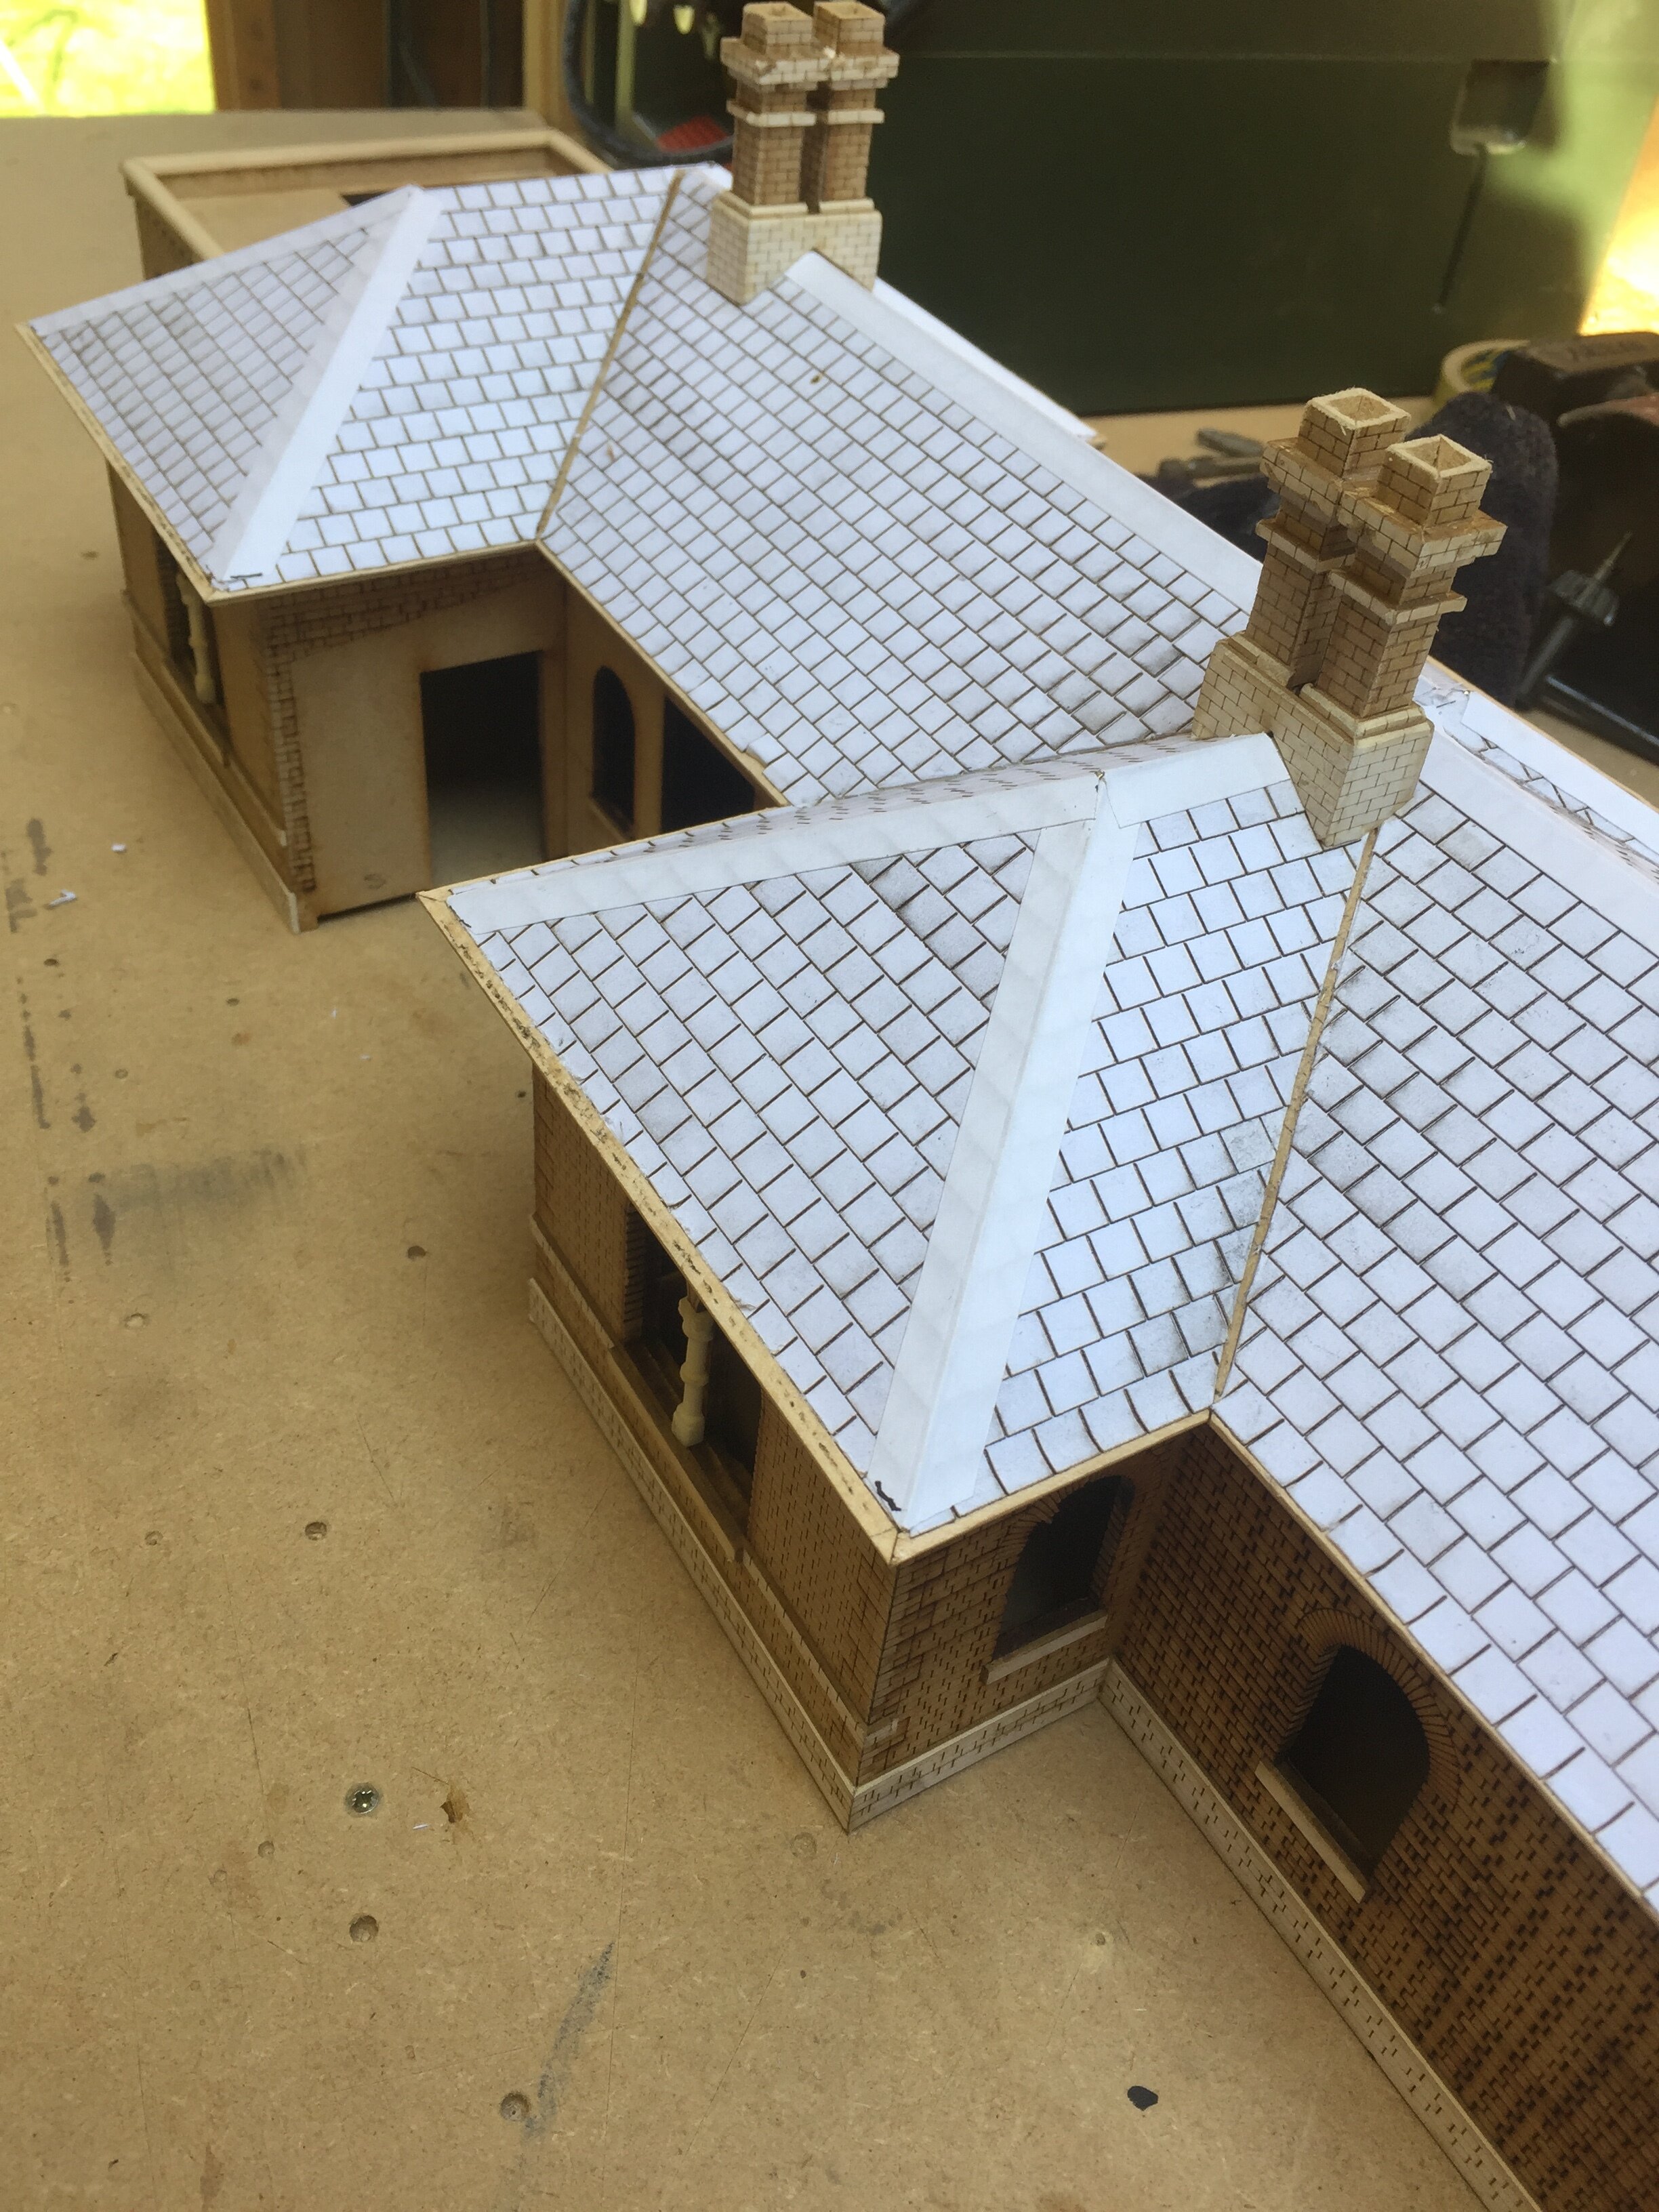
I decided to make the building itself in two halves; the lower half being the walls up to, but not including, the soffit boards. The top half being the soffit boards, roof and chimneys, only being brought together once the soffit boards were sprayed in the same Halfords Beige.
The roof itself comprises no less than five hipped ends and a central portion joining them all, so producing the angles of the ridges and valleys was a challenge but made considerably easier by being able to draw and laser cut the parts very accurately. I also scribed guide-lines on the faces of the roof parts to make sticking and aligning the slates easier later on. The slates themselves were represented by strips of self-adhesive paper with laser cuts made at slate-width intervals and then stuck down. Lead-work on the ridges is again self-adhesive paper cut to 7mm wide strips but with lengths of brass wire stuck centrally down the back of the strips before being stuck down and folded over the roof ridges. This brass wire gives a representation of the ‘broom handle’ timber moulding that is fitted underneath real lead. Apparently the original ridges were covered with an elaborate style of extra-long ridge tile but this information unfortunately came to light a bit too late for my build. Paper was also used to add the flashing around the chimney stacks. I will be interested to see how these roof details work out when the real thing is built, as some junctions of chimney/ridge/valley/flashing are quite complicated! The roof was first sprayed with Halfords grey primer and then detail-painted using acrylics, with the flashing and ridges being picked out in very light grey, complete with lead staining running down the slates. A roof of this age and general excellent state of repair would be very unlikely to have any broken, slipped or missing slates so I’ve resisted the common urge to show any.
Painting of the brickwork, which is laid to the correct Flemish bond, was carried out also using acrylics. The trick I find is to mix the paint one or two shades ‘brighter’ than the intended final look; the final operation being to wash over a very, very thin wash of off-white mortar colour which settles in the mortar courses and softens the colouring as well. Using acrylics in this way is also doubly tricky as they tend to dry darker than when you first apply them. However, the advantage is they dry quickly and depth of colour with successive coats and shade variations can be achieved within one sitting. The yellow bricks around the window reveals and external corners were quite fiddly to paint neatly, added to this, the initial colour of buff yellow looked quite startling until I gave it a wash of grey enamel which dulled them down to exactly the right shade.
Windows are made up of layers of laser-cut paper and 0.75mm clear acrylic, with the paper being sprayed Beige before assembling onto the acrylic. There are two separate pieces of acrylic in each sash separated by a layer of paper which gives the appearance of the top sash being set forward of the bottom one, just like a real window. Doors are also layers of paper and mountboard, also laser cut for accuracy. I find paper and mountboard incredibly versatile as mediums for architectural detailing; coupled with the ability to draw and cut accurately means intricate window and door designs, thin glazing bars and raised panels are relatively simple to create.
The porch on the platform side was left pretty much until last as it caused me the most headaches to think how I might make it. As often happens though, the actual execution is not as complicated as I made it out to be in my head. Once I started to draw it, it became clear how I would make it from various layers (again of paper and mountboard) sprayed either Crimson Lake or Denby Pottery Cream (aka Halfords Beige!) before being assembled over 0.75mm clear acrylic glazing. One oversight on my part was not finishing the inside backs of the lower red panels as I thought they wouldn’t be visible on the finished model. As it turns out they are, if you peer over the roof from the forecourt side! So I cut a couple of pieces of card and sprayed them red and stuck them inside to cover the unfinished surfaces.
Once the walls were united with the roof, I stuck on the soffit board brackets one by one. A tedious task but one which gives rewarding satisfaction to see the building suddenly become instantly ‘Midland’ before my eyes. No-one knows the arrangement of the sky-light over the Gents; or indeed if it had any sort of covering at all, and may have been open to the elements, as no photos exist. So I made this up, but based on snippets of detail I managed to spot in images of other preserved Midland station buildings of a similar type. Of course, if a photo does come to light (pardon the pun!) of the original then it could be altered accordingly.
Once the building was finished externally, the innards were roughly divided up with internal partitions and all painted black. The partitions are only there to prevent clear sight-lines through the building from one side to another. And painting it all black means that there are no internal unsightly reflections. Once done, the building was stuck down to the baseboard.
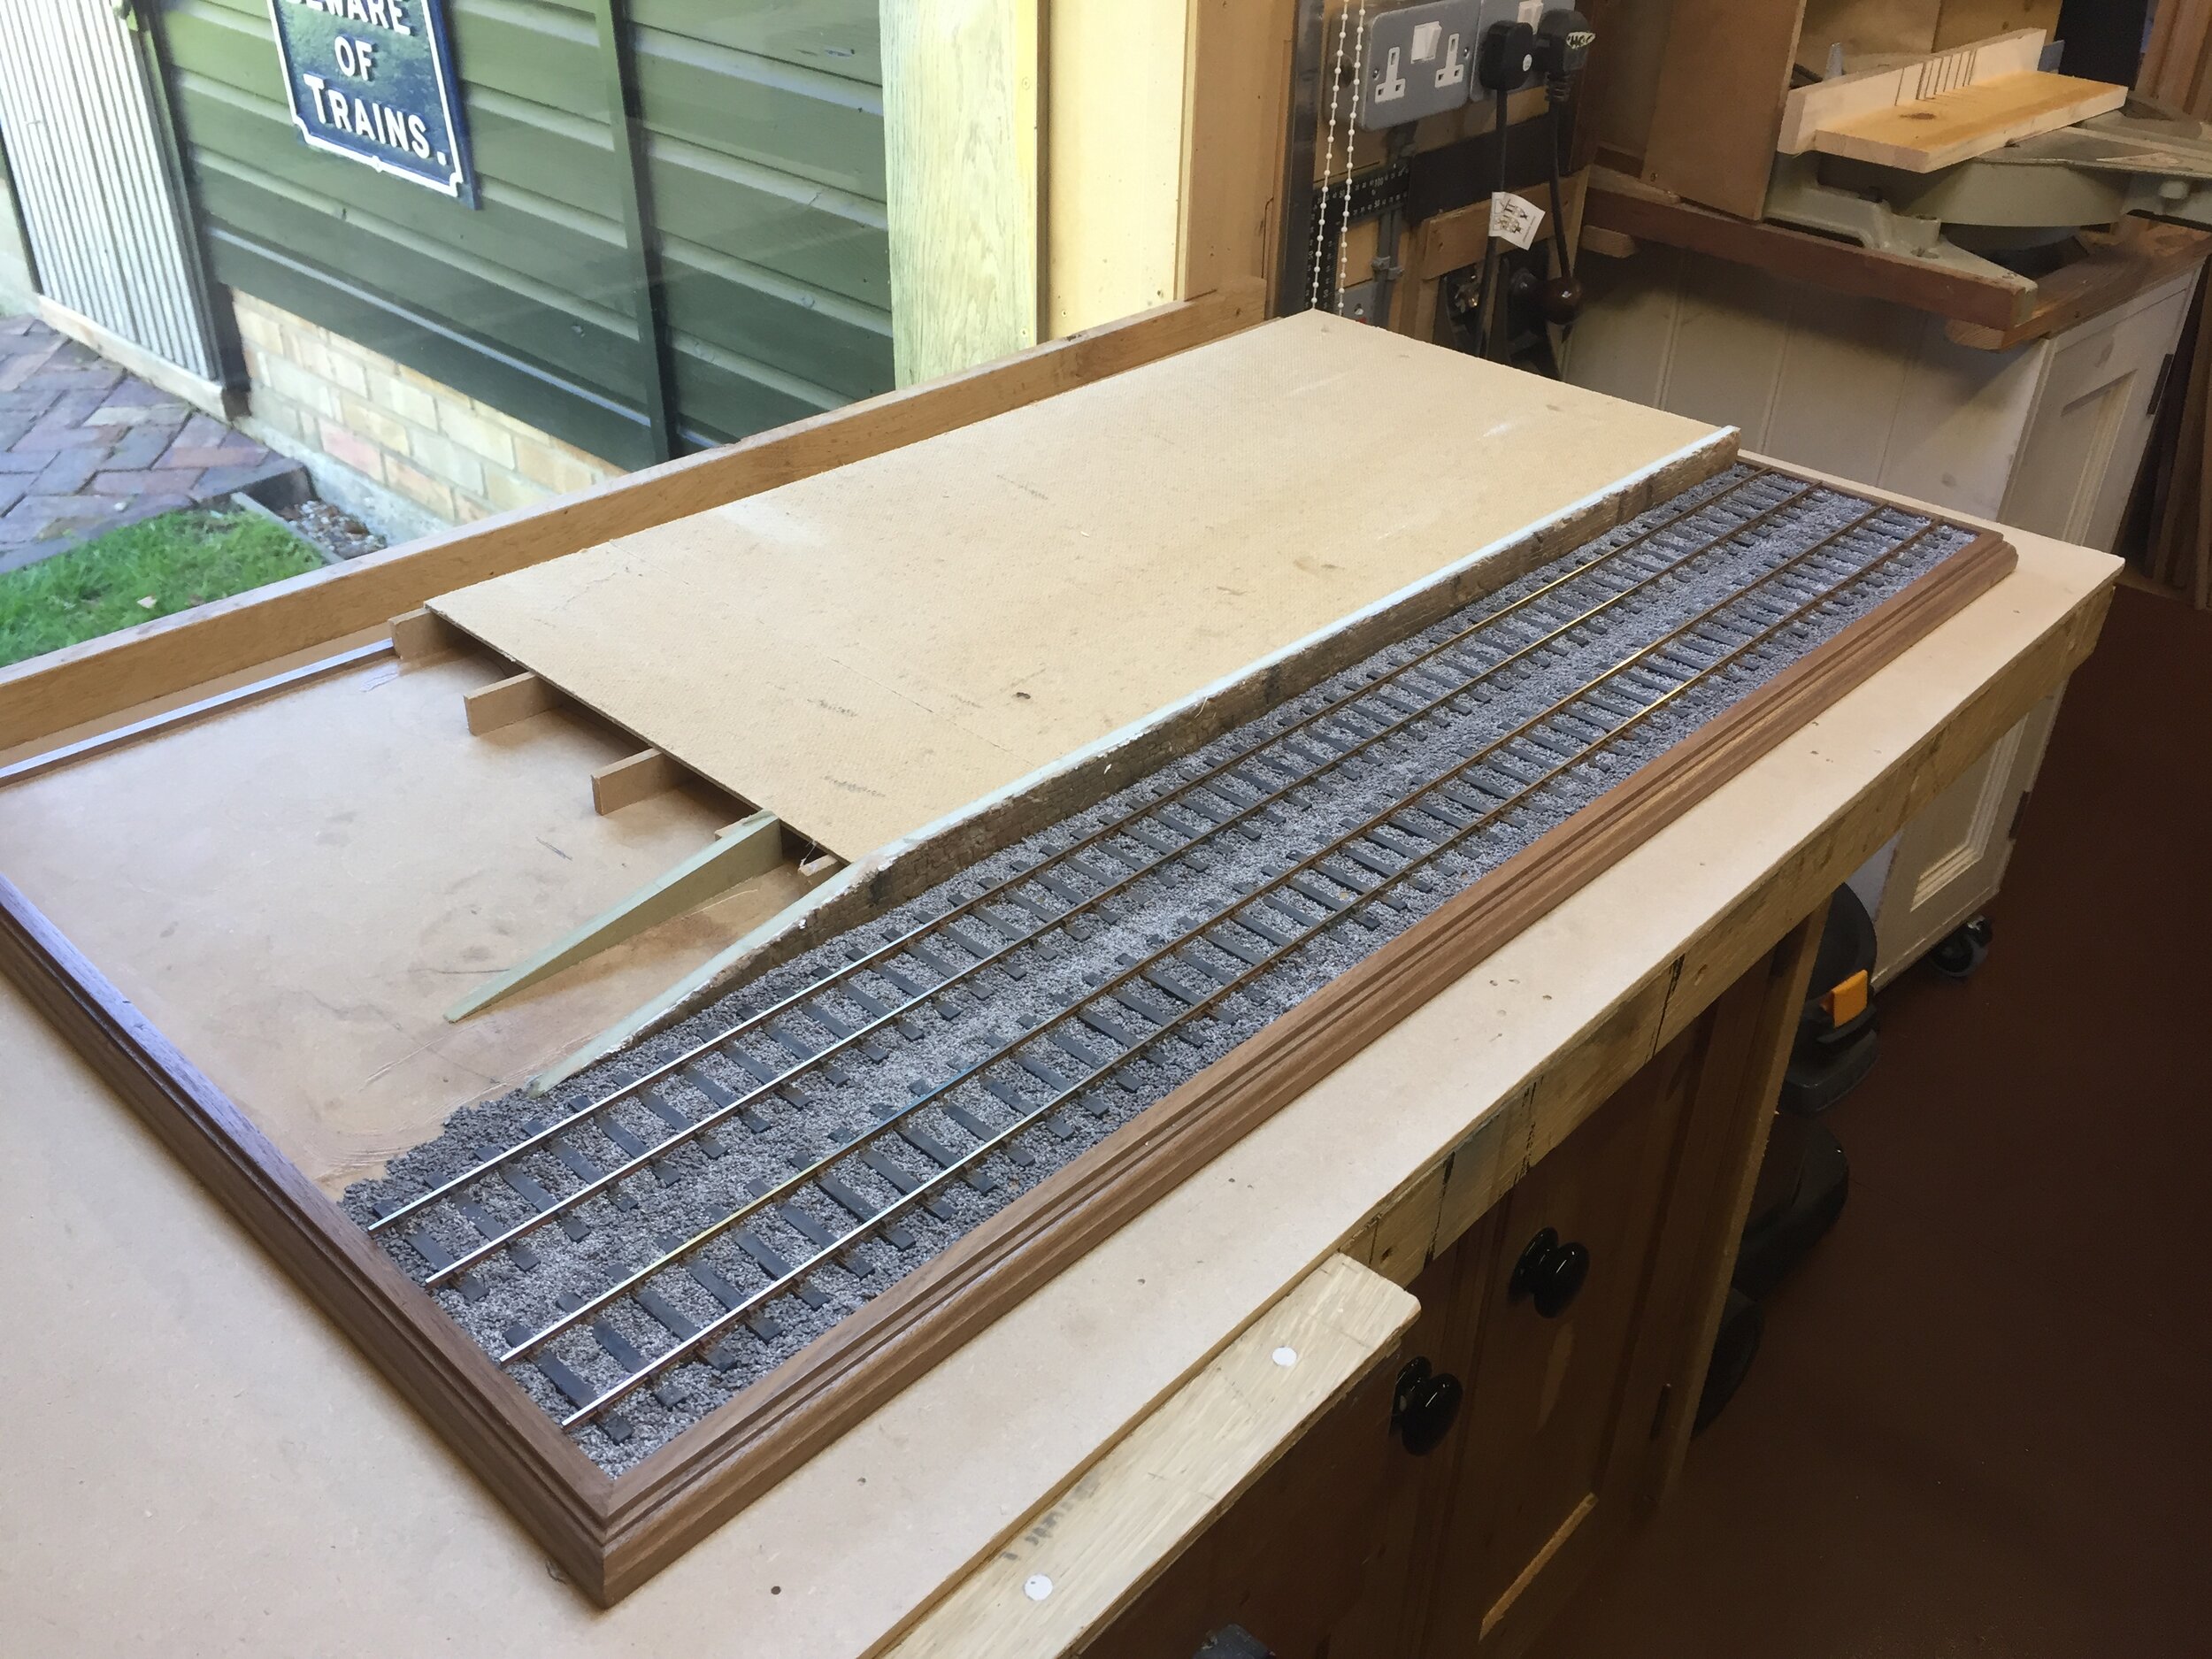
The baseboard itself is a piece of 18mm MDF about 900mm x 500mm, edged with a moulding that I machined from some walnut timber I had lying around. The layout of the diorama is simply a section of double track, the platform edge, the building itself and the platform ramp at the eastern end. It is designed to be viewed from all four sides and eventually it would benefit from a glass or Perspex encasement to keep it dust free and prevent prodding by inquisitive fingers. There are no clear photos of the correct period of the exact arrangement of the platform ‘furniture’ here, just one tantalising shot looking down the platform, and thus all the features are considerably foreshortened in this view. But I’ve made some reasonable assumptions in positioning the ramp itself, the retaining wall behind it, fences, gates, lamppost and running-in board. At the time of writing, all that remains to add are some wall-mounted lamps but my supplier has temporarily shut down it seems due to Coronavirus limitations.
The final additions of these details are, of course, the most fun part – seeing the scene come together. I believe it to be as accurate as I could make it, and it will be quite an emotional day to see the real thing built and open to the public! I hope that won’t be too long. I certainly wish Howard and his team every best wish in bringing the Vale of Berkeley Railway back to steam and thank them for the help they have been in providing prototype and historical information, drawings and photos. I rather feel, even though I live a couple of hundred miles away, I’ll be making fairly frequent visits in the years to come!
Howard Parker, Chair of VoBR adds, “I felt a bit cheeky asking such a wonderful modeller as Richard is to devote his precious time make this model – and to do it as a donation to the effort towards, as he says, recreating the 12” to 1’ version but I would like to thank him publicly for doing so. This exquisite model really brings Berkeley to life and will be a great inspiration for us to keep moving forward until the day when the rebuilt station reappears.
There are many hurdles for us to overcome before we get there but the Friends of Berkeley Station is an active group, working in the local community to give Berkeley back its station, and thereby, its connection to the national rail network. Our ambition is to see the station rebuilt to exactly the same external appearance as Richard’s model since it represents Berkeley in its heyday and, as always, this can only be realised by dint of volunteer effort and financial donations. So please join us if you would like, one day, to sit on a bench on the platform at Berkeley with a pint in your hand, watching the trains come and go. Please help us to realise that dream, all details can be found on our website www.valeofberkeleyrailway.co.uk or in the ‘Friends of Berkeley Station’ Facebook group.”
